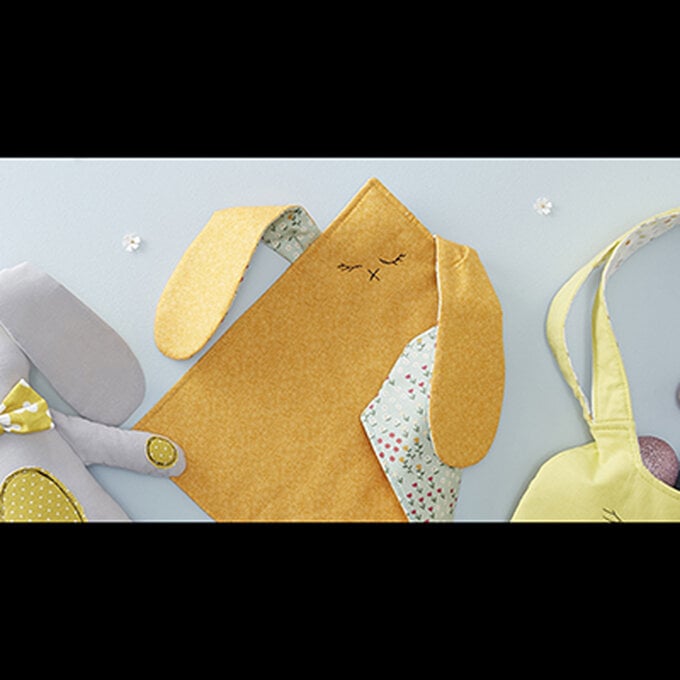
How to Sew a Simple Animal Cushion
Make an adorable animal cushion using fun printed cotton fabrics. These cuddly animals are great for gift giving or jazzing up a child's bedroom - a perfect project for beginners, using simple appliqué and hand sewing techniques to create a professional finish. No special sewing skills required and it's super fast!
Why not make the whole set, or a different animal for each sibling!? Fat quarters are great for playing with pattern and creating a uniform set of homewares.
Project and instructions by sewing expert Sophia Palmer from Sew Jessalli.
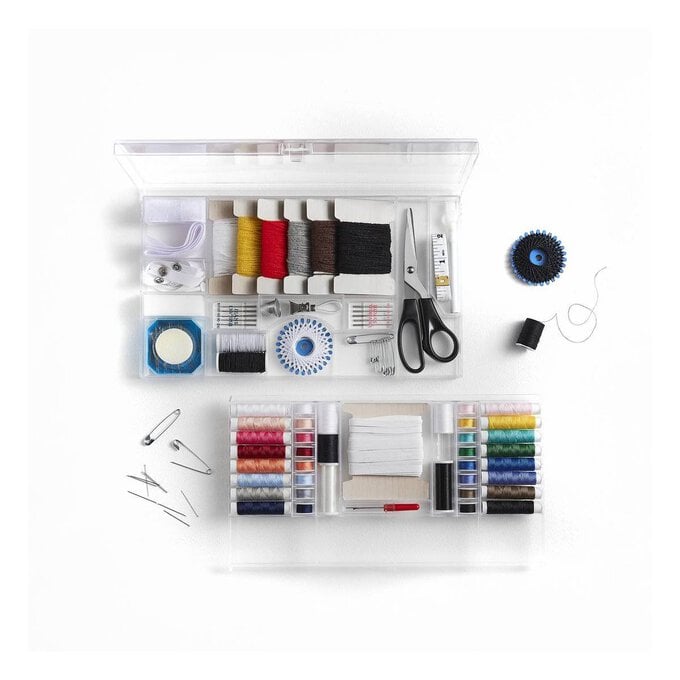
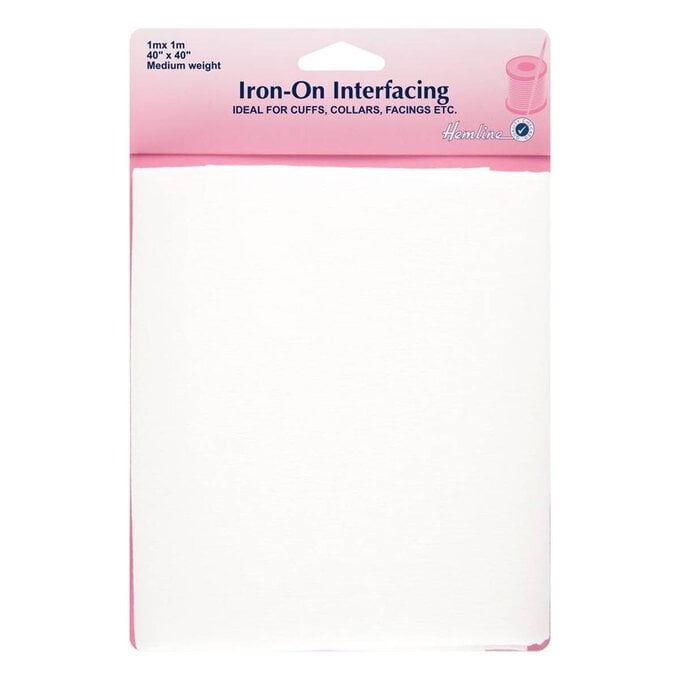
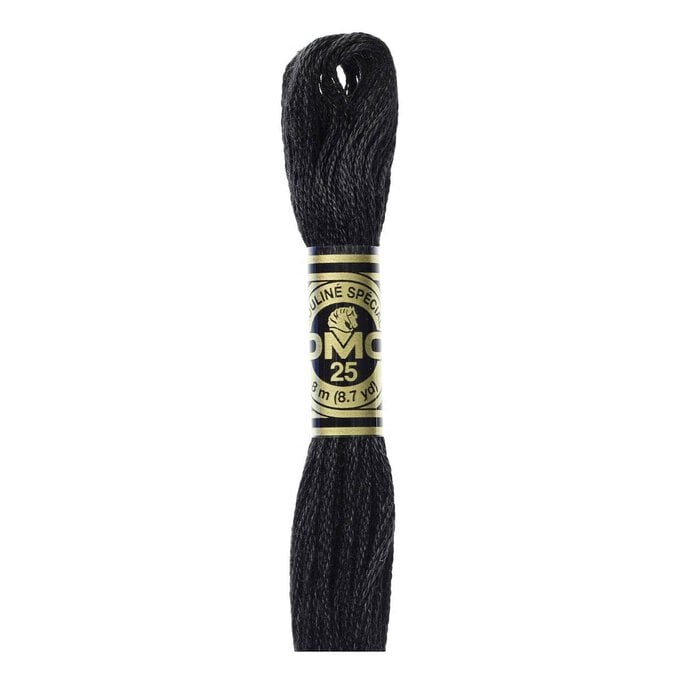
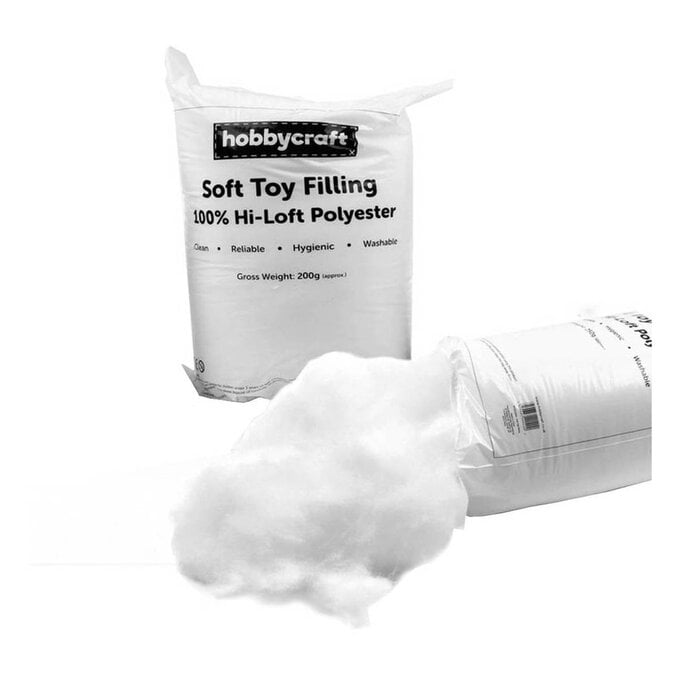
You will need

Subtotal
Is $ 51.00
Subtotal
Is $ 28.00
Subtotal
Is $ 4.49 , was $ 7.49
Subtotal
Is $ 6.49
Subtotal
Is $ 2.49
Subtotal
Is $ 6.49
How to make
Please note: All sewn edges include a 10mm seam allowance, unless otherwise stated.
Trace 2 x body tops(a) and 2 x bottom(b) templates onto iron on interfacing and cut them out loosely.
Iron the top(a) interfacing pieces onto the back of your plain fabric. And iron your bottom(b) pieces onto the back of your pattern fabric, consider the direction of the pattern before you iron.

Once fused, cut the pieces out neatly. Place each bottom(b) piece right sides together onto the top(a) pieces, lining up the straight edges and pin.

Sew both together. Press seams open. You now have a front and a back.

Next trace 4 x ear(c) shapes onto iron on interfacing. Cut out loosely and iron onto the back of your plain fabric and cut out neatly.

Then trace the inner ear(d) into your Iron on adhesive. Cut out loosely, then iron onto the back of another patterned fabric. Once fused, cut out neatly and peel off the backing paper.

Place the inner ears(d) on top of two of the ear(c) pieces and iron permanently in place. Use your machine to zig zag these on the very edge of the patterned fabric.

Place the ear fronts on the plain ear backs right sides together and pin. Sew around the edge with a narrow 5mm seam allowance, leaving the bottom open.

Clip into the curves. Turn the right way around and press.

Lightly stuff. Then pin in place, right sides together along the top of one of you body pieces. Sew in place very close to the edge, we will hide this stitching.

Trace 2 cheek shapes(e) and 1 nose shape(f) onto your iron on adhesive. Cut out loosely, then iron onto the back of 2 different patterned fabrics. Once fused, cut out neatly and peel off the backing paper.

Place these shapes on the main body and arrange how you like. Iron permanently in place. Use a small zig zag stitch to appliqué in place.

Next either draw the eyes and mouth on with a water soluble pen, or trace onto paper or embroidery backing. Use embroidery thread to back stitch the details in place.

Press the whole front body. Then place on the back body, right sides together. Make sure the ears are tucked down, inside the two body pieces.

Pin together, and sew all around the edge, leaving a 6cm gap in one of the straight sides. Clip into the curves.

Turn the right way around through the gap. Press and stuff. Use a slip stitch and matching thread to sew up the gap by hand.

Related Products