6 Easy Christmas Card Making Ideas
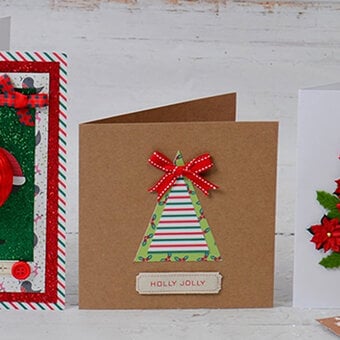
Discover six quick and easy Christmas card designs using embellishments from our festive papercraft range. Ideal for beginner papercrafters, this guide will show you how to make six lovely cards for six different loved ones.
If you love one particular design, you could even recreate the same one as many times needed for your entire family!
These Christmas card designs are so stunning that your recipients will be proud to display them on their mantelpieces!
Project and instructions by Sarah Jackman Read
Please see individual steps for a list of all items needed for each card.
You will need
Subtotal
Is $ 5.49
Subtotal
Is $ 1.49
6 Easy Christmas Card Making Ideas
You Will Need
* White A6 Cards and Envelopes
* Holly Jolly Christmas Paper Pad
* Building Toppers
* Wooden Banners
* Snowflake Embellishments
* 3D Foam Pads
* Your Choice of Paper Adhesive
* Craft Knife or Scissors
Step 1: Cover the entire front of an A6 card blank with patterned paper.
Step 2: Fix a panel measuring 11.5x7.3cm to the centre with 3D foam pads.
Step 3: Add the Santa shop sticker using more foam pads, followed by the wooden sentiment strip underneath it.
Step 4: Add two silver snowflake embellishments to finish.


You Will Need
* White A6 Cards and Envelopes
* A Floral Christmas Paper Pad
* Tree Toppers
* Silver Stars Stickers
* Wooden Sentiment Strip
* Scrap Cardstock
* 3D Foam Pads
* Your Choice of Paper Adhesive
* Craft Knife or Scissors
Step 1: Cut three patterned paper panels measuring 10.5x3.2cm, fix each one to a strip of cardstock to give some stability then attach them to the card front using 3D foam pads ensuring to leave a small gap between each one.
Step 2: Fix the green tree topper directly on to the fixed panels then attach the pink tree using a foam pad to rise slightly above the green tree.
Step 3: Attach the wooden sentiment in place just below the trees.
Step 4: Add a few silver star stickers using 3D foam pads to finish.


You Will Need
* Pale Blue A6 Cards and Envelopes
* Mixed Stickers Santa and Snowman
* Happy Holidays Christmas Paper Pad
* Silver Star Stickers
* Scrap Cardstock
* 3D Foam Pads
* Your Choice of Paper Adhesive
* Craft Knife or Scissors
Step 1: Trim a piece of patterned paper to measure 14x5.8cm then cut a fishtail into the bottom, glue this prepared fishtail panel to a piece of cardstock for added stability then fix to the card front using 3D foam pads.
Step 2: Attach the Santa sticker to the card front using more 3D foam pads. (You can add the sticker to some cardstock first then fussy cut out to give extra strength. if you wish.)
Step 3: Add a few silver star stickers and a Christmas sentiment of your choice.


You Will Need
* Pale Blue A6 Cards and Envelopes
* Snowman Stickers
* A Floral Christmas Paper Pad
* Silver Star Stickers
* Wooden Sentiments
* Snowflake Gems
* Scrap Cardstock
* 3D Foam Pads
* Your Choice of Paper Adhesive
* Craft Knife or Scissors
Step 1: Attach a piece of patterned paper to a scrap of cardstock to add stability, then trim to measure 14.4x7.5cm. Fix to the front of an A6 card blank using 3D foam pads.
Step 2: Make the stickers into toppers by sticking them to cardstock first then fussy cut them out creating a sturdier topper. Fix the snowman to the card front using 3D foam pads.
Step 3: Next add the gnome with 3D foam pads.
Step 4: Add the stars using foam pads, then add the sentiment and snowflake gems to finish.


You Will Need
* White A6 Cards and Envelopes
* Traditional Tartan Christmas Paper Pad
* Sticker Sentiments
* Wooden Embellishments
* Clear Gems
* Scrap Cardstock
* 3D Foam Pads
* Your Choice of Paper Adhesive
* Craft Knife or Scissors
Step 1: Attach a panel of tartan patterned to fit slightly smaller than an A6 card blank.
Step 2: Cut a panel measuring 11.5x7.3cm then fix to the centre using 3D foam pads.
Step 3: Stick the holly jolly sticker to a piece of cardstock then fussy cut out to create a firmer topper, attach to the card front with 3D foam pads.
Step 4: Glue two wooden leaves either end of the topper. Add the gems to finish off the design.


You Will Need
* White A6 Cards and Envelopes
* A Floral Christmas Paper Pad
* Happy Holidays Christmas Paper Pad
* Wooden Embellishments
* Clear Gems
* Wooden Sentiments
* Scrap Cardstock
* 3D Foam Pads
* Your Choice of Paper Adhesive
* Craft Knife or Scissors
Step 1: Cut a panel of patterned paper to measure approximately 7x7cm then glue onto the top half of an A6 card blank.
Step 2: Glue a piece of patterned paper to some cardstock to give it stability. Trim the panel to measure 12.7x8.4cm then cut a circle shape into the top half (this can be done using a die cutting machine, scissors or a craft knife) attach to the card front using 3D foam pads.
Step 3: Fix the wooden embellishment in place, followed by the sentiment strip.
Step 4: Finish off by sticking on some clear gems.


