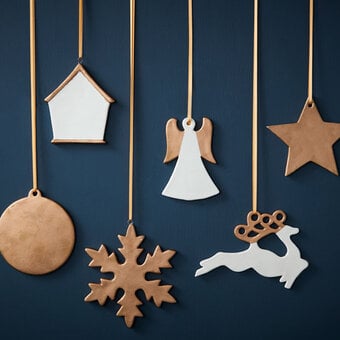
How to Make Novelty Christmas Tree Decorations
Add a touch of holiday magic to your Christmas tree with these novelty decorations created using air dry clay and paint.
Follow our step-by-step instructions to craft a charming Christmas cake ornament and an adorable little frog decoration that will bring festive joy to your tree.
You will need

Subtotal
Is $ 7.49
Subtotal
Is $ 2.49
Subtotal
Is $ 5.49
Subtotal
Is $ 6.49
You Will Need
* Air dry clay
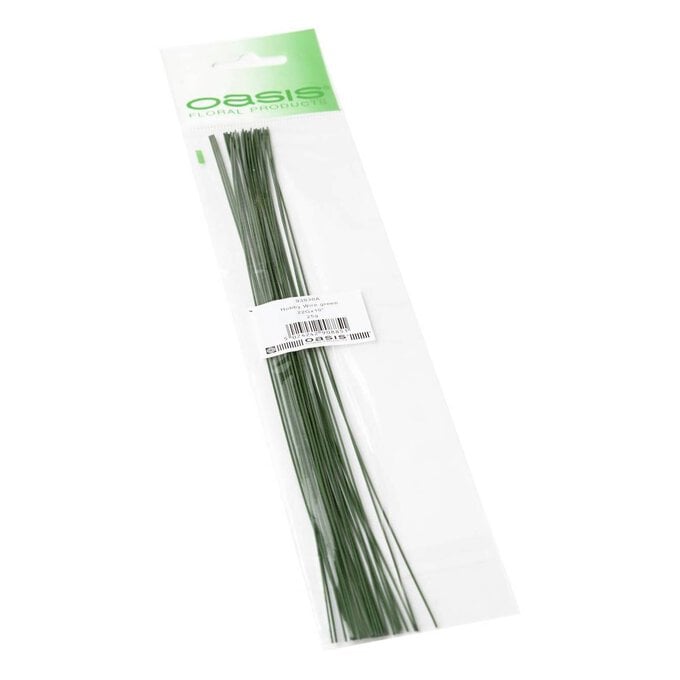
* Wire
* Aluminium foil
* Rolling pin
* Paint
* Paintbrushes
* A kitchen knife
* A sharp pointed tool or a cocktail stick
* A bowl of water
* Ribbon or twine of your choice to hang
How to make
To begin, you will need to make a wire loop that your decoration will hang from, you will have to really anchor it into the clay to make sure that it is strong and it doesn't slip out.
Take a length of wire approximately 30cm long, make a loop in the middle, then tightly twist the two ends together down the length.
Next, roll the wire into a circle leaving about 2cm before the loop.


Take a sheet of aluminium foil and fold a few times to make a strip. Wrap this tightly around the circle of wire to form a square shape.
Take another strip of foil and fold into a smaller rectangle and push onto one side of the square.


Take another long strip and wrap around, you are trying to make a triangular wedge shape. Press the foil into your work surface to help make the sides flat.


Press a thin layer of clay around the wedge of foil, really working it into the surface.
Top Tip: You can build up the entire cake shape by adding bits of clay then forming them into the correct shape, but we found that the easiest way to get a nice smooth and even surface is to roll out a sheet of clay to about 1cm thick then to wrap this around the foil core.


Use your wedge shape as a guide, lay it on it's side with the widest part at the edge on the surface of the clay.
Use a knife to cut around the shape then carry on cutting a long strip.
Wrap it around your wedge then cut at the back.


Now press the clay into the surface, spreading the edges around the top, bottom and back of your wedge shape. You should now have a shape that looks much more like a slice of cake.
Squeeze at the tip to form a sharper triangular shape.
Top Tip: The loop of wire will determine the direction in which the cake will hang. If you want the cake to hang from the tree facing outwards twist the wire so that the hole in the loop is visible from the side.


As the clay dries it can be hard to get pieces to stick together, to help you can make some clay glue (slip).
Take a chunk of clay, wet and squish it together, keep doing this until you get a really thick sticky paste.

You will need to add a bit more clay to the bottom. We've rolled out a slightly thinner piece and again used the cake as a template to cut around.
Top Tip: If the clay feels like it's drying out, spread some slip onto the bottom then press on your new piece of clay.
Spread and smooth the edges into your cake shape.


Now it's time to add the marzipan and icing layer. Again using a rolled out 1cm thick piece of clay use your cake as a guide, cut around the cake then continue in a long strip.
Add some slip to the top and side of the cake then press the icing layer on to the cake, letting the wire loop push through.
Press this layer onto the surface then cut off the excess at the back.
You can use a knife to help press this layer on and to get a really smooth surface on the top.


Next we need to add a bit of crumbly texture to the cake surface. Again using a sharp pointed tool lightly stab the surface all over, making the holes really close together.
When you have covered the sides and bottom use a large brush to smooth the surface with a little water. Use a sharp tool to straighten the edges of the icing if they have gone a bit wonky.


To make some fruit chunks take some tiny pieces of clay and form them into flat circular, triangular and square shapes. Randomly stick the to the surface of the cake.
Make two small ball shapes, press them flat, then stick them to the front to make the eyes, you may need to use some slip to help them stick.


Now use your sharp tool to carve out a small smilng mouth shape. Use a damp brush to smooth the inside.
You may need to rearrange the fruit chunks so they aren't too close to the eyes. I've added two chunks that will look like little rosy cheeks.


The finishing touch is the holly leaves and berries on the top.
Roll out a very thin piece of clay, only a few millimetres thick, use your sharp tool to cut out some holly leaves. Gently squeeze the edges to smooth out and exaggerate the points.
Brush the surface with water, then use the sharp tool to carve the veins of the leaf.


To make the leaves stick up from the surface, add a small tube of clay and some slip to the top of the cake then gently press the base of the leaves into this.
Add three small balls to the base of the leaves to make the berries. Use the end of a brush to blend the tube of clay into the surface of the cake and the back of the leaves.
Finally use a wet brush to smooth any rough surface.


Leave the cake to dry in a warm dry place, this will take 3-4 days. The surface will turn a brighter white when dry.
Top Tip: If any cracks appear in the clay when it is dry wet the crack then push in some more clay to fill the gap.

Once the clay has fully dried it's time for paint.
Start by painting the icing layer white.
Next mix a pale yellow colour for the strip of marzipan.
For the cake, mix a light brown colour. For the first layer it's better to make this quite thin so that it seeps into all of that texture. Take some of your light brown and mix with water until it is the consistency of cream. Brush onto the surface any really try to work it into that texture.
Once that layer has dried paint on a thicker layer of light brown.


Before you paint the fruit pieces it's best to add a little white paint to these, it will help make the lighter colours brighter.
Use a red, dark brown and an apricot colour for the fruit chunks.
Paint the Holly leaves green and the berries red.
Then finally black for the eyes and the inside of the mouth.


To begin you will need to make a wire loop that your decoration will hang from, you will have to really anchor it into the clay to make sure that it is strong and it doesn't slip out.
Take a length of wire approximately 30cm long, make a loop in the middle, then tightly twist the two ends together down the length.
Next roll the wire into a circle leaving about 2cm before the loop.


Take a sheet of aluminium foil and fold a few times to make a strip.
Wrap this tightly around the circle of wire to form a ball, squeezing and compressing it so it is hard.


Press a thin layer of clay around the ball of foil, really working it into the surface.
Now add a thicker layer of clay, you will need this to be at least 1cm thick, if it's too thin it may crack as it is drying.


Once you have an even ball shape smooth the surface of the clay using your fingers to even out any bumps and creases.
Add some water to the surface and gently rub to smooth further.
Top Tip: When clay gets too wet it becomes very soft and can be hard to work with, if this happens just leave it for a while until it firms slightly.


Push the clay onto the upper left corner of the ball then spread the edges into the ball to join and smooth. It should look egg shaped from the side, from the top it should have a slightly flat edge at the front.
Top Tip: The loop of wire will determine the direction in which the frog will hang. If you want the frog to hang facing outwards twist the wire so that the hole in the loop is visible from the side.


We will now make the thigh area.
Make two equal sized balls of clay then flatten slightly.
Add a little blob of slip to one side then press the ball into the side of the body towards the back, twist slightly to help it stick.
Next add the second piece and make sure they line up.


Spread the clay at the back of each ball shape into the body. The front needs a bit more definition so we don't want to spread this part. You can use the end of a paint brush to help press this part into the body without loosing the definition at the front of the thigh.
Once these parts are joined give the surface a smooth with some water.
Top Tip: Try to hold on to the wire whenever possible to avoid pressing your fingers into the back of the clay.


Make two small balls of clay, these will form the front legs.
Roll into a tube shape, make one end slightly thinner, then bend it a little. Add a little slip if needed then press into the body infront of the thigh area.
Blend in the top of the leg to attach. Use a brush to smooth any area that is too small for your fingers.


Now we can make the feet.
Make two small balls of clay, press flat then form into a trapeze shape. Use the end of a small paintbrush to press two indentations into the wider end. This will make three toes.
Add a little slip then gently press into the end of the front leg.


Blend the clay in at the back of the foot to join, then use the brush to wipe away any slip that is visible between the foot and leg.
Make two larger balls of clay for the back feet and repeat the above steps. Join at the bottom of the thigh behind the front leg and point the foot outwards slightly.


To make the lips first roll out a long thin length of clay, cut one end so it's flat (this will be where it joins).
Add a little of the slip to the front of the face, then starting from the middle, gently lay the string of clay around to the right curving downwards and then back up to make a smile. Bend and follow the curve back around, then repeat on the other side.
Cut the clay when it meets the first end, then smooth the clay together at the join.
Remove any excess slip with a brush.


The final touch is the Santa hat.
Make a ball of clay then roll it into a cone shape. Bend the tip of the cone then use a knife to carve a line around the bottom to make the rim.
Brush a little water on to the surface to smooth then add a small ball to the tip of the hat.


Attach to the head with some slip then use a brush and some water to remove any excess slip and to make a final smoothing pass over any areas that look a little rough.
Leave the Frog to dry in a warm dry place, this will take 3-4 days. The surface will turn a brighter white when dry.
Top Tip: If any cracks appear in the clay when it is dry wet the crack then push in some more clay to fill the gap.

Once the clay has fully dried it's time for paint.
Start by using a bright green colour (you may need to mix a little white with your green so it's not too dark), paint the whole body, leaving the lips, eyes and hat. This will require at least two coats for an even coverage.
Then, mix a lighter green colour and paint the lips.


As a finishing touch we have added red and white glitter to the hat for an extra bit of Christmas sparkle.
Once the paint is dry, brush a little glue on to the surface then sprinkle on the glitter, red first then white.


Craft with us at our workshops

Related Products