How to Sew a Bunny Comforter
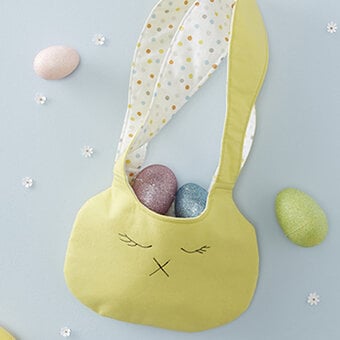
Make this sweet, soft comforter for a child using your favourite fat quarters – perfect for springtime, baby showers, or birthdays. Follow the tutorial below by sewing expert Debbie von Grabler-Crozier, who has provided a template and step by step guide showing how easy it is to create your own!
You will need
How to make
NB: seam allowances are all ½ cm (1/4”) unless otherwise stated. Please read all instructions through and assemble the equipment before beginning.
From the FQs, cut four ear pieces (two outer and two lining) and two squares measuring 31cm x 31cm one each from lining and outer.

Fuse H630 to the wrong side of one of the squares and two of the ear pieces.

Take an interfaced ear piece and an un-interfaced one and with the right sides together, sew around the perimeter leaving the base open for turning. Notch the curves and turn the right way out through the gap in the base. Press lightly.

Softly pleat the bottoms of the ears using the markings on the template to guide you and stitch the pleats into place. The ears are now ready when we get to that step.

Using the water soluble marker and the template as a guide, draw the bunny's eyes and nose into one corner of the plainer square.
Set your machine up for free motion embroidery and embroider the eyes and nose in black thread. Consider using a small embroidery hoop upside down to make the embroidery easier.


Take the ears and attach them firmly to the face corner of the square 7cm down from the corner on each side


With the right sides together, place the floral square over the yellow one (the ears will be tucked in). Sew all around the perimeter leaving a small turning gap on the side somewhere

Clip across the corners and turn out through the gap and push the corners out to nice sharp points.
Close the gap and topstitch all the way around the edge of the comforter.


