Skip to Content (Press Enter) Skip to Footer (Press Enter)

How to Make a Mr & Mr Wedding Card

Level
Beginner
Time
1/2 day
Budget
10 - 30

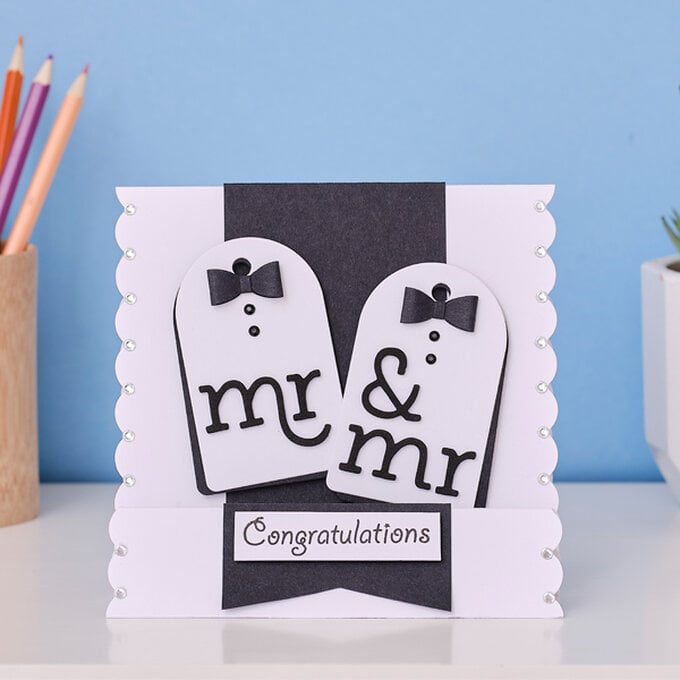
There's no better way to congratulate the newlyweds than with this easy-to-make wedding card! 

You can switch up the colours to suit their colour scheme, or leave it in classic black and white – whatever you decide, they'll love receiving this handmade card.

Project and instructions by Jackie Jasper

Discover more card making projects here >

You will need

Is $ 2.49

3 for £3 on selected Paint & Card
Quantity: 1

Subtotal

Is $ 2.49

Is $ 11.00

Quantity: 1

Subtotal

Is $ 11.00

Out of stock

Is $ 4.49

Quantity: 1

Subtotal

Is $ 4.49

Is $ 6.49

Quantity: 1

Subtotal

Is $ 6.49

Is $ 4.49

Quantity: 1

Subtotal

Is $ 4.49

Out of stock

Is $ 5.49 , was $ 12.00

Quantity: 1

Subtotal

Is $ 5.49 , was $ 12.00

Out of stock

Is $ 5.49

Quantity: 1

Subtotal

Is $ 5.49

You’ve viewed 2 of 7 products

You’ve viewed 4 of 7 products

Total:

You will also need

*Scissors

*A pencil

*A glue stick


How to make

Step 1

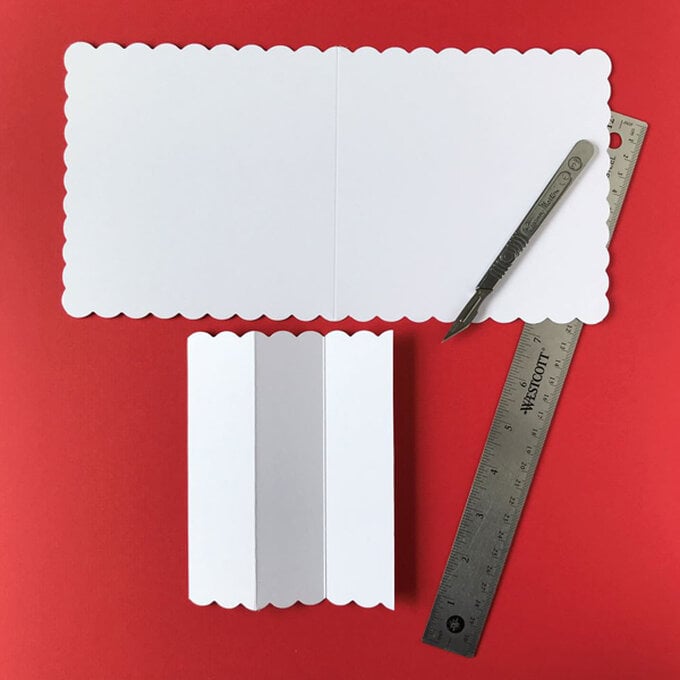
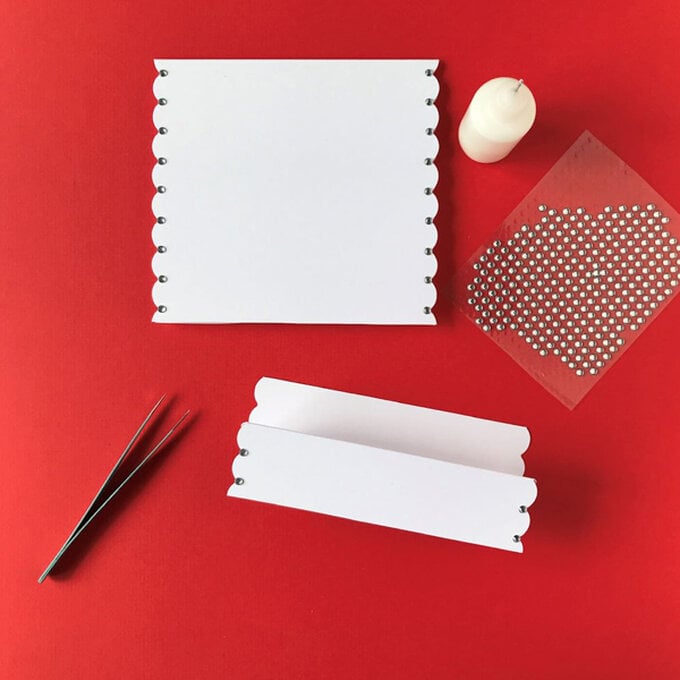
Start by preparing the base of the card. Take a whole scalloped edge card blank, then starting at the centre fold measure and trim 4cm one way and 8cm the other way making another crease shown in the photo below.


Take another scalloped edge card blank and trim the scallops off the two sides creating a straight edge.
idea_mr-and-mr-wedding-card_step1.jpg?sw=680&q=85
Step 2
Add a gem to each scallop point on the main card blank, then four gems on the front of the extra piece.
idea_mr-and-mr-wedding-card_step2.jpg?sw=680&q=85
Step 3
Glue the card blank to the extra piece as shown in the photo.
idea_mr-and-mr-wedding-card_step3.jpg?sw=680&q=85
Step 4
Make two bow ties using the bow tie template; trim a small thin piece of black card to glue around the centre of the bow.
idea_mr-and-mr-wedding-card_step4.jpg?sw=680&q=85
Step 5

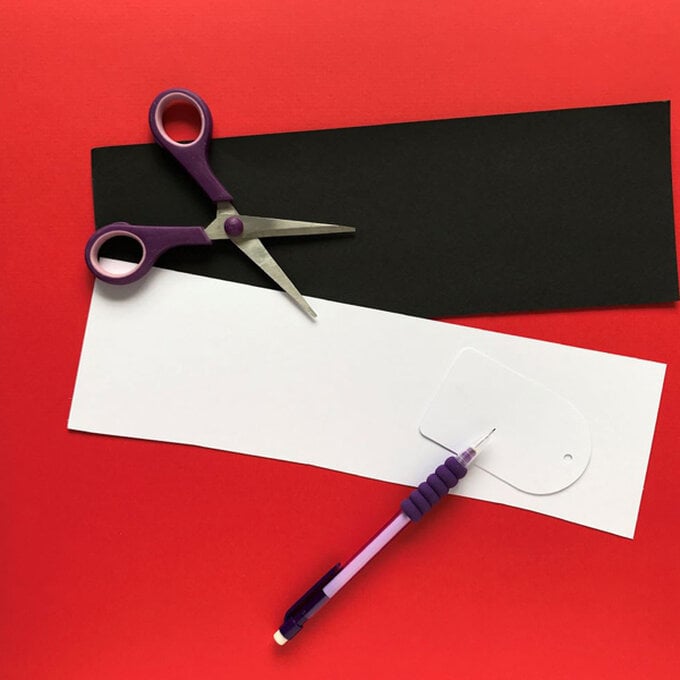
Use the tag template to draw and cut out two tags, then punch a hole in the very top of each one. Repeat into black card and layer together at a slight angle.


Add the bow tie to the top, then fix two black gems underneath followed by the thicker alphas.
idea_mr-and-mr-wedding-card_step5.jpg?sw=680&q=85
Step 6
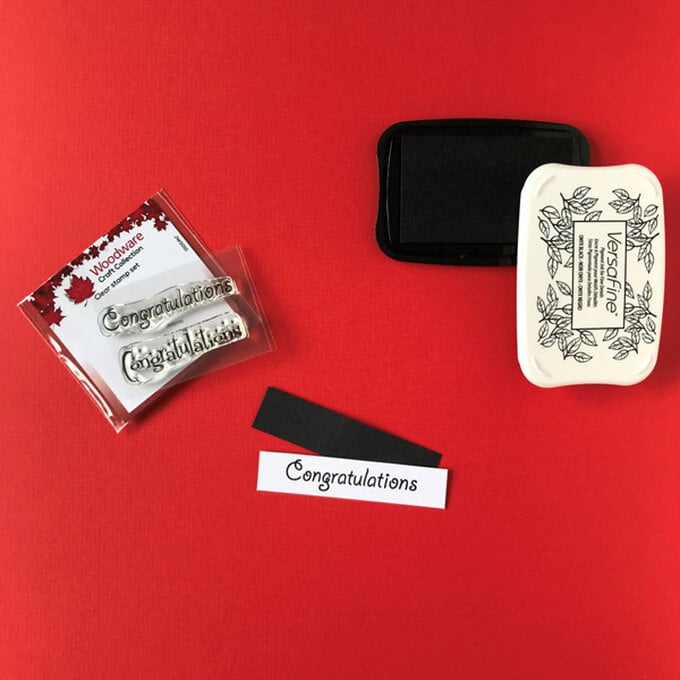
Stamp out the sentiment onto white card using black ink and the congratulations clear stamp.
idea_mr-and-mr-wedding-card_step6.jpg?sw=680&q=85
Step 7

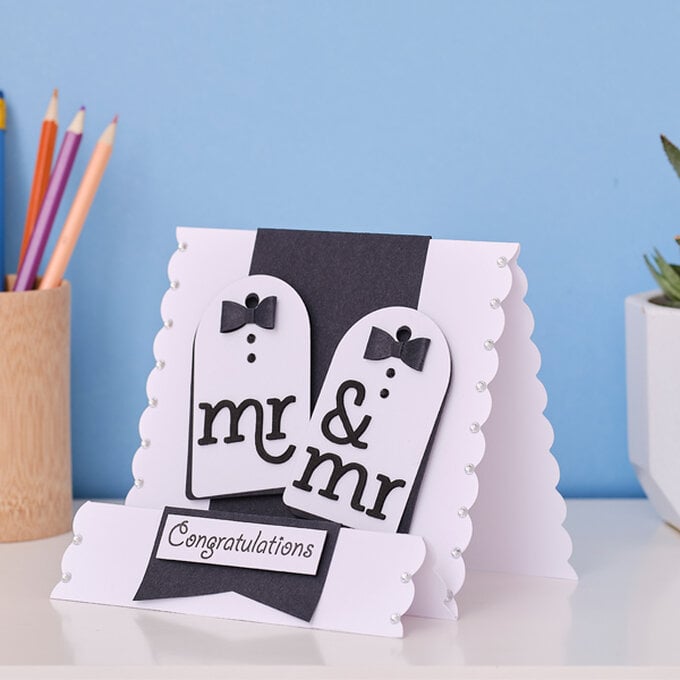
Cut a long panel of black card measuring approximately 25cm long by 8cm. Then cut a fish tail into one end then carefully wrap the panel over the top folding and crease where needed then add a dab of glue to hold in place.


Add the tags and sentiment to finish.
idea_mr-and-mr-wedding-card_step7.jpg?sw=680&q=85
Step 8
You have created a beautiful card that is sure to impress the newlyweds.
idea_mr-and-mr-wedding-card_step8.jpg?sw=680&q=85
  • bvseo_sdk, dw_cartridge, 18.2.0, p_sdk_3.2.0
  • CLOUD, getReviews, 4ms
  • reviews, product
  • bvseo-msg: Unsuccessful GET. status = 'ERROR', msg = 'Not Found.'; Unsuccessful GET. status = 'ERROR', msg = 'Not Found.';

Related Products

Top