Skip to Content (Press Enter) Skip to Footer (Press Enter)

Your Cricut Explore Merry and Bright Layered Card

Level
Intermediate
Time
1 hour
Budget
10 - 30

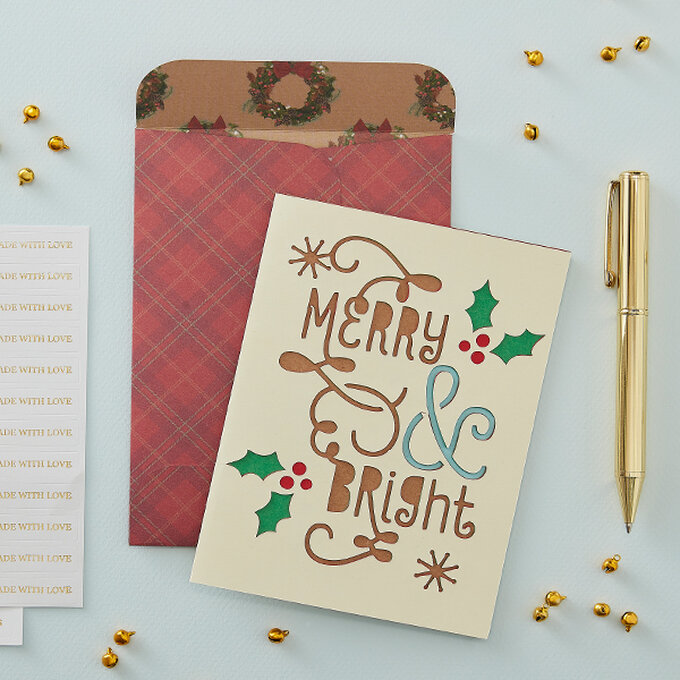
If you've got lots of festive greetings to send out this year, this super-simple merry and bright layered card is perfect. Create in any colour palette you wish to suit the lucky recipient; we've opted for traditional reds and greens, using a selection of Premium Cardstocks, however why not try experimenting with other types of cardstock like glitter or even pearlised? The possibilities are literally endless!

You will need

Is $ 4.49

Quantity: 1

Subtotal

Is $ 4.49

Out of stock

Is N/A

Quantity: 1

Subtotal

Is N/A

Out of stock

Is $ 5.49

Quantity: 1

Subtotal

Is $ 5.49

Out of stock

Is $ 11.00 , was $ 15.00

Quantity: 1

Subtotal

Is $ 11.00 , was $ 15.00

Is $ 329.00 , was $ 429.00

Quantity: 1

Subtotal

Is $ 329.00 , was $ 429.00

You’ve viewed 2 of 5 products

You’ve viewed 4 of 5 products

Total:

How to make

Step-1
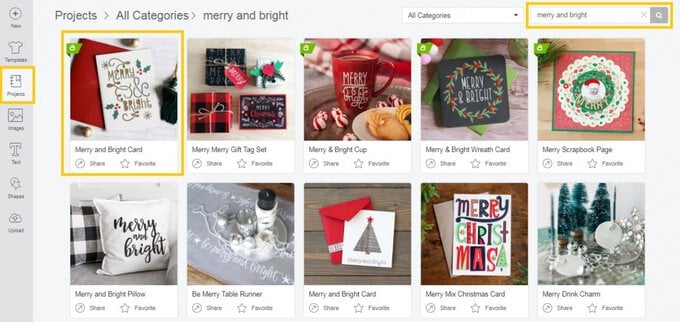
Using an iPad, log on to your Design Space™ account and make sure you are connected to your Explore machine. Open a new project. From the left-hand toolbar select projects, and search “Merry and Bright” in the top search bar, and select the below project.
step-1.jpg?sw=680&q=85
Step-2
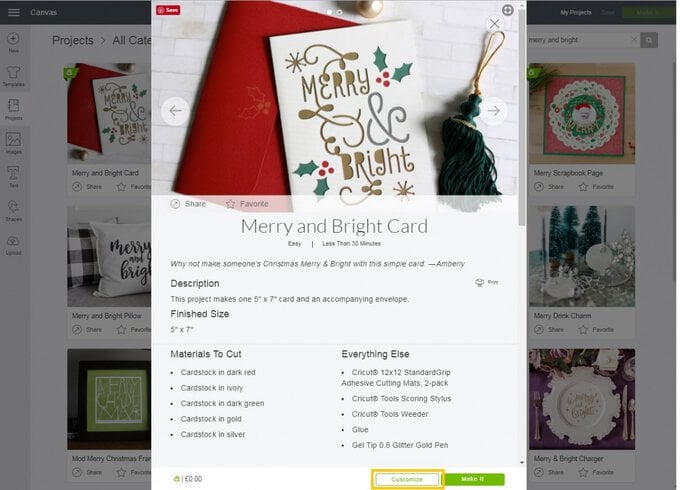
Select customise.
step-2.jpg?sw=680&q=85
Step-3
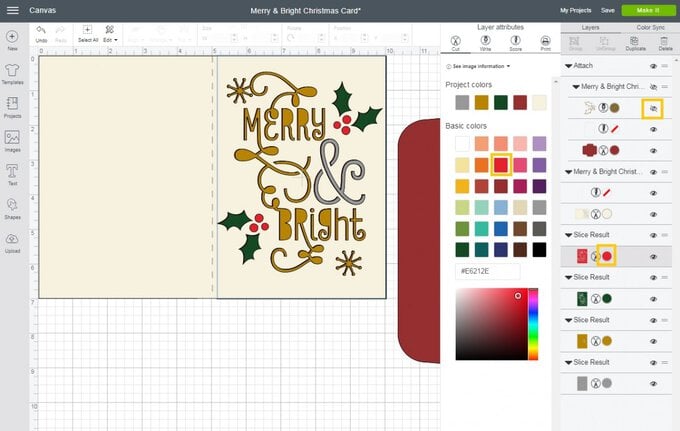
Hide the drawn holly element of the project by clicking on the eye in the layers window. Then amend the colour of the red layer within the card so that this is not the same colour of the envelope – this will ensure it is cut on a different cutting mat. To do this, click on the red circle, a “Layer Attributes” toolbar will pop up, select the highlighted red swatch below.
step-3.jpg?sw=680&q=85
Step-4
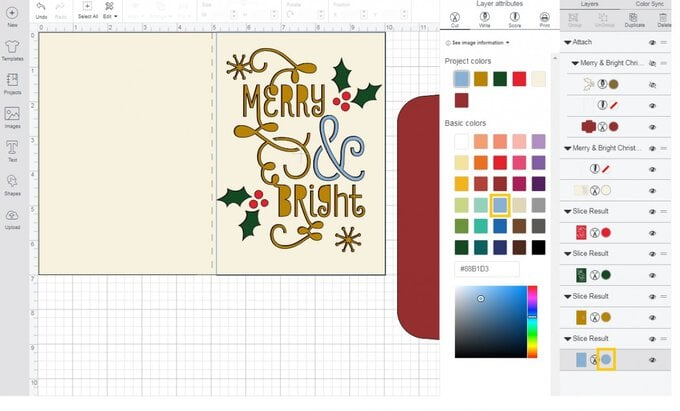
Repeat the same process for the grey layer, changing this to blue.
step-4.jpg?sw=680&q=85
Step-5

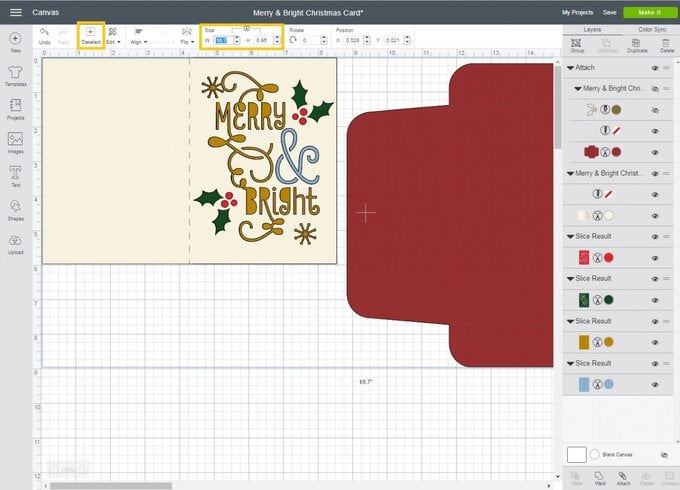
To resize the design, first 'group' all the images together by dragging a box over them and selecting 'group' from the actions button (bottom of screen). With the image highlighted, resize it either by dragging the size button (bottom right of highlighted image) or manually inputting 18.7” in the width of the edit button.

NOTE: with the padlock locked(bottom left of highlighted image), the height will automatically synchronise.
step-5.jpg?sw=680&q=85
Step-6
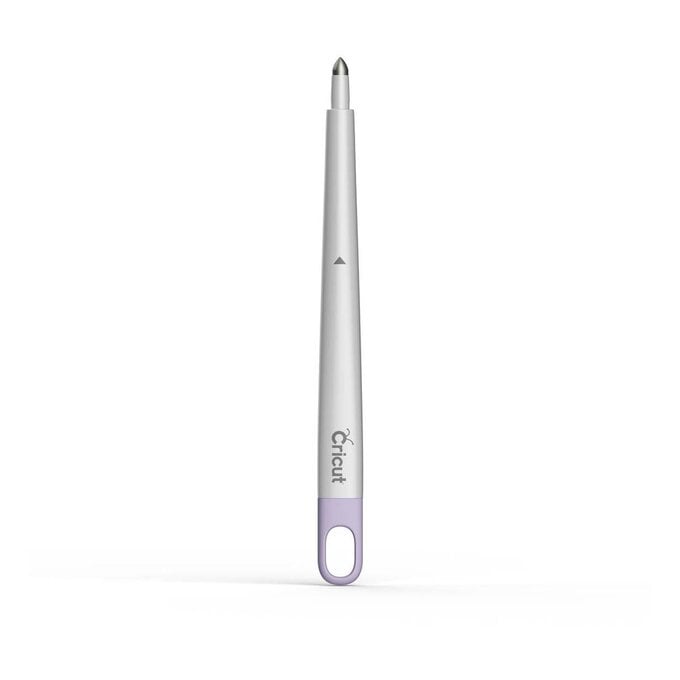
Select the green “Make it” button in the bottom right-hand corner of the screen. Use the red and green cardstock from the Brights A4 premium cardstock pack, and the cream, kraft and light blue from the Seaside pack. Set the cutting dial to cardstock and follow the on screen instructions to complete the design, ensuring the scoring tool is inserted into the accessory port 'A' (you will also receive an onscreen prompt to insert this).
Step-7
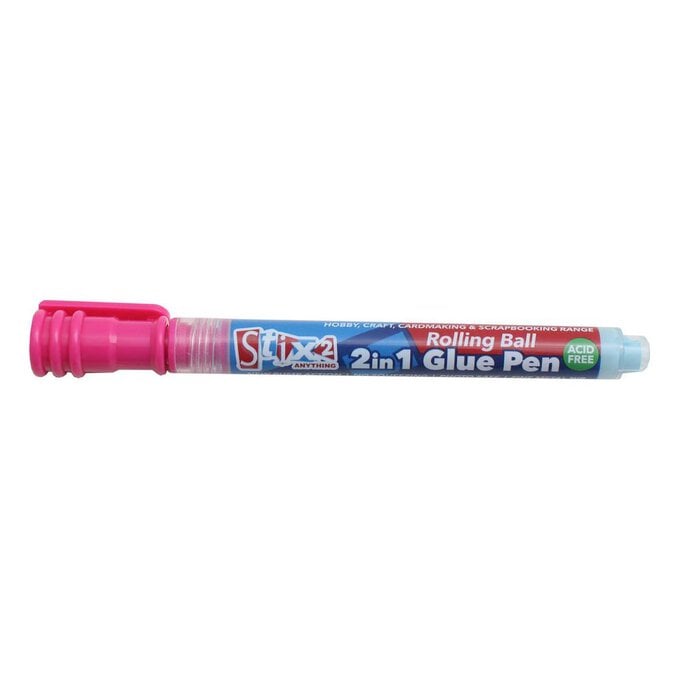
To assemble the design, fold the cream panel in half along the score line using the handle of the scraper/XL applicator tool to ensure strong creases, then secure the remaining panels to the inside front of the card with a glue pen. Place the glue on to the back of the next layer so that it is only added where required.
Step-8
With the envelope in a portrait orientation, fold the envelope along the score lines and use double-sided tape to secure left hand flap on top of the right one. Secure the bottom flap over the top and leave the top flap loose so that the card can be inserted into the envelope. To secure the flap down use a strip of double-sided tape.
merry-and-bright-card-sq.jpg?sw=680&q=85
  • bvseo_sdk, dw_cartridge, 18.2.0, p_sdk_3.2.0
  • CLOUD, getReviews, 4ms
  • reviews, product
  • bvseo-msg: Unsuccessful GET. status = 'ERROR', msg = 'Not Found.'; Unsuccessful GET. status = 'ERROR', msg = 'Not Found.';

Related Products

Top