Cricut: How To Make Spring Cake Toppers
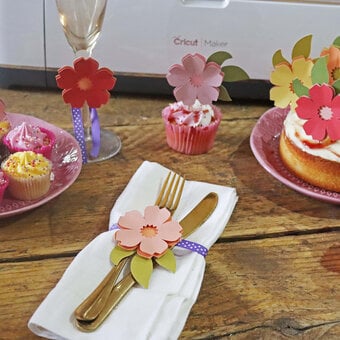
Creating bespoke cake toppers for celebration cakes is a doddle when using Cricut's Design Space app and your Cricut Maker or Explore. This super-simple project is perfect for beginners who've already got a few Cricut projects under their belt and are looking to experiment with more of the functions within Design Space.
Project and how-to make instructions by Hobbycraft Artisan Chrissie Ellson
This project includes paid for Design Space images
Screen reference images are taken from the Desktop version of Design Space
You will need
How to make
You will also need:
Cricut Design Space app installed on a laptop, PC, Tablet or mobile device
Cocktail sticks
Open the Cricut Design Space app and start a new project. To find the cake topper components click on “Images” and search “rabbit”. , find the image and click “Insert”.

Scroll through the images and select the rabbit folksy-style rabbit design.

To make the rabbit into a solid image without the cut out detail, click on “Contour” within the layers panel.

At this point you can either select each detail individually, or if you want to remove all of the internal elements within the rabbit design as we have, click the “Hide All Contours” button.


Resize the rabbit image to the desired size by amending the dimensions in the width and height fields in the toolbar at the top of the screen, ensuring the padlock icon is locked.

Open the “Images” menu once more and search “foliage” or “leaves” in the search bar and select two different designs. Once happy with your selection click “Insert”.

Resize the foliage/leaf images to the required sizes, taking the measurements of the cake you intend to display the cake toppers in into account.

To make sure your images all cut from the same colour cardstock on the same mat click “Color Sync”, and drag each if the elements to sit under the same colour. Once happy with the design, click the green “Make It” button.

Once through to the mat preview screen change the number of “Project Copies” to two, then click “apply”.

Place a sheet of the Kraft Board on to a StandardGrip Cutting Mat using the Cricut Brayer of the XL Scraper tool, ensuring that all areas of the kraft board are adhered to the mat.

Once through to the mat set up screen click “Browse All Materials” and type “kraft” into the search bar.


Select the “Kraft Board” option that features the Cricut icon.

Load the mat into the machine and make sure the Fine point or Premium Fine Point blade is loaded in clamp B. Then when the machine is ready to go, press the flashing “Go” button.

Once the cut is complete carefully remove each piece from the cutting mat.


Use a hot melt glue gun to adhere cocktail sticks to the back of each of the cake toppers before placing into your cake.


