Cricut: How to Make a Front Door Decal
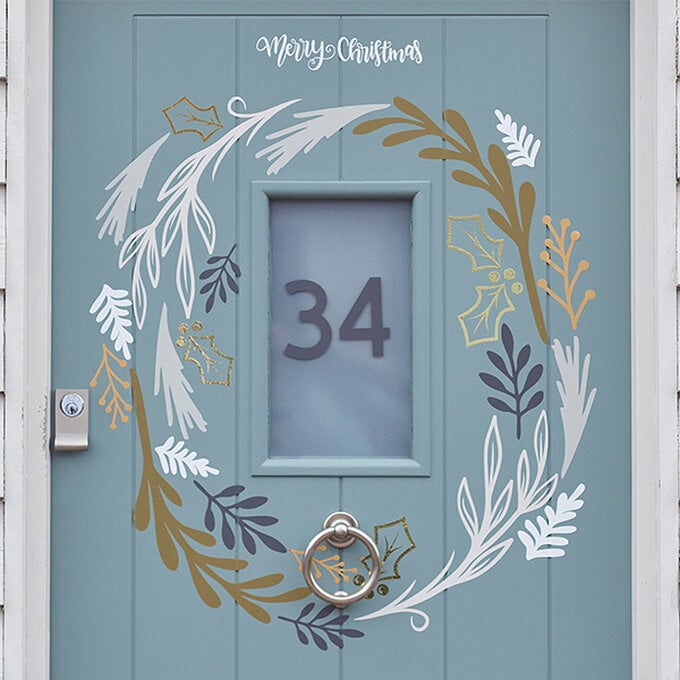
Create a one-of-a-kind design for your front door with our door decal how-to guide. Cricut removable vinyls have been used to create the elements for this design and there are lots of colours to choose from to make sure your design complements your style perfectly!
Use the link below to be taken to the project in the Design Space app. The design is ready and waiting to be resized, cut, weeded and applied to your front door.
Project and instructions by Aisha Cluitt
Please Note: This project contains paid-for content from Cricut's Design Space app. Screen grab reference images are taken from the desktop version of Design Space. This project was created using the Cricut Maker however, it can also be recreated on any of the Cricut Explore machines.
Permanent adhesive vinyls are not advised for use when creating decals for your front door.
You will need
Subtotal
Is $ 584.00
Subtotal
Is $ 16.00 , was $ 20.00
Subtotal
Is $ 9.49 , was $ 11.00
Subtotal
Is $ 11.00 , was $ 14.00
You Will Need
* Cricut Machine
* Cricut Standard Grip Cutting Mat
* Cricut Basic Tools
* Cricut Scraper
* Cricut Removable Matt Vinyl - Griege, White, Gold, Clay, Grey
* Cricut Transfer Tape
* Cricut Design Space app installed on a PC or laptop
Cricut Design Space Project Link: Front Door Decals
How to Make
Start by opening the project in the Cricut Design Space app using the project link at the top of this post, or alternatively use this link - https://design.cricut.com/landing/project-detail/60ea29e1c97bd00fa82c978e
To access the project, copy and paste the link into your browser, you will be directed to a Cricut landing page, select 'Open' followed by 'Open Cricut Design Space Application'.
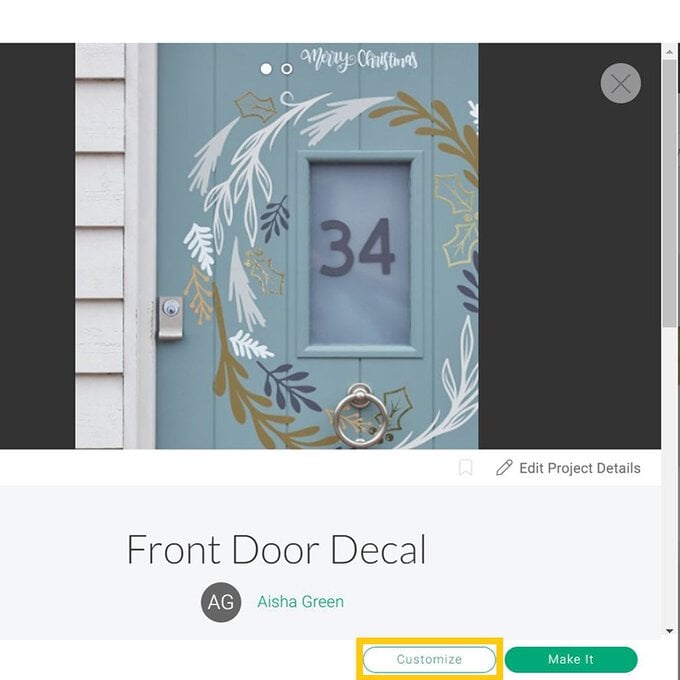
The app will open (you may be prompted to log in) and the project overview screen will appear. Select 'Customise'.


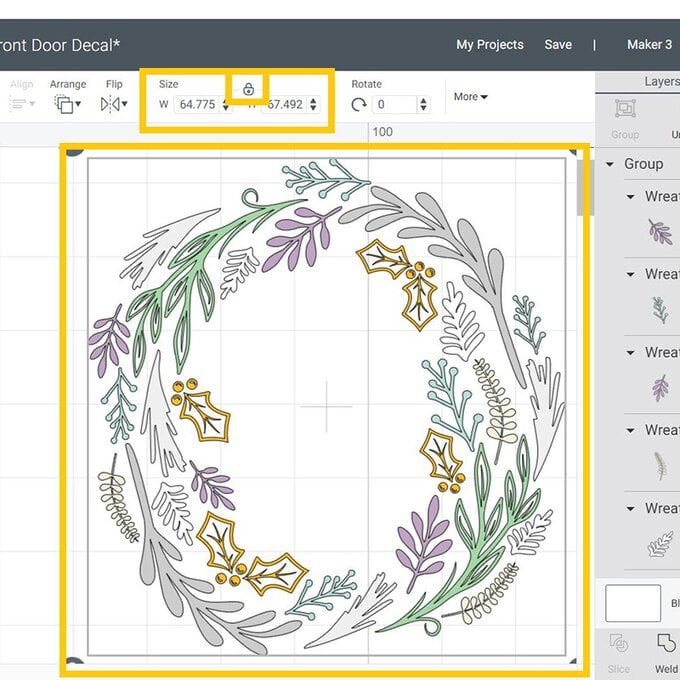
Once through to the Canvas screen, re-size the wreath to your desired size, then re-size the 'Merry Christmas' greeting.
Tip: Ensure the padlock icon is locked to ensure the design resizes proportionately.
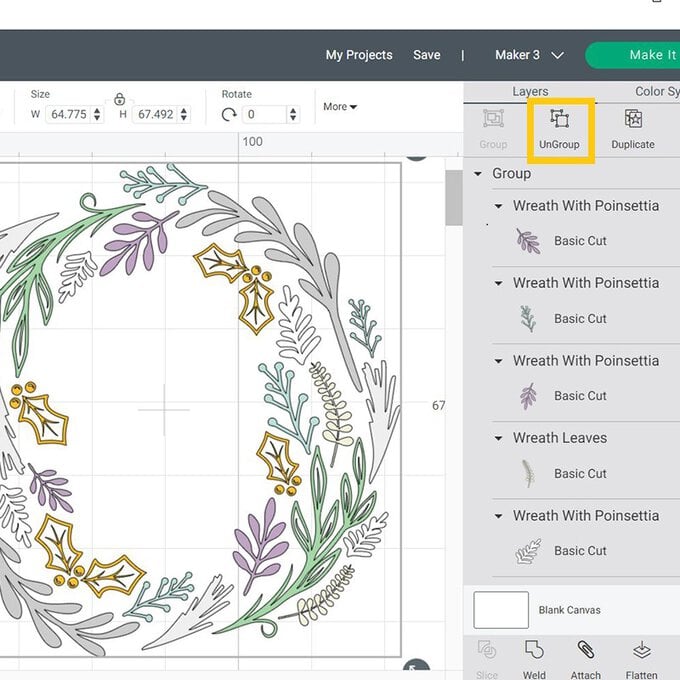
Select the wreath design, and 'Ungroup' the elements.
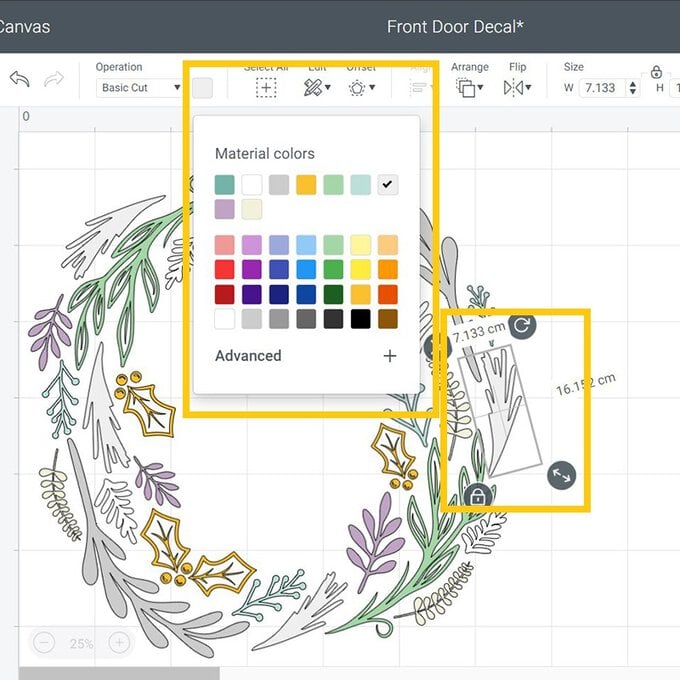
Change the colour of the elements to suit the vinyl colours you wish to use, this can be done element by element or you can use the 'Colour' Sync function in the toolbar on the right-hand side of the screen.
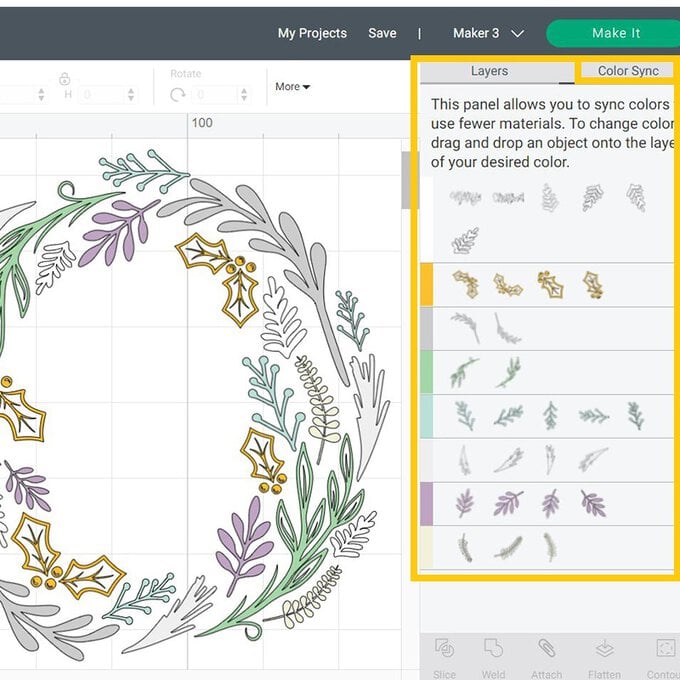
Once happy with the design click 'Make it'.
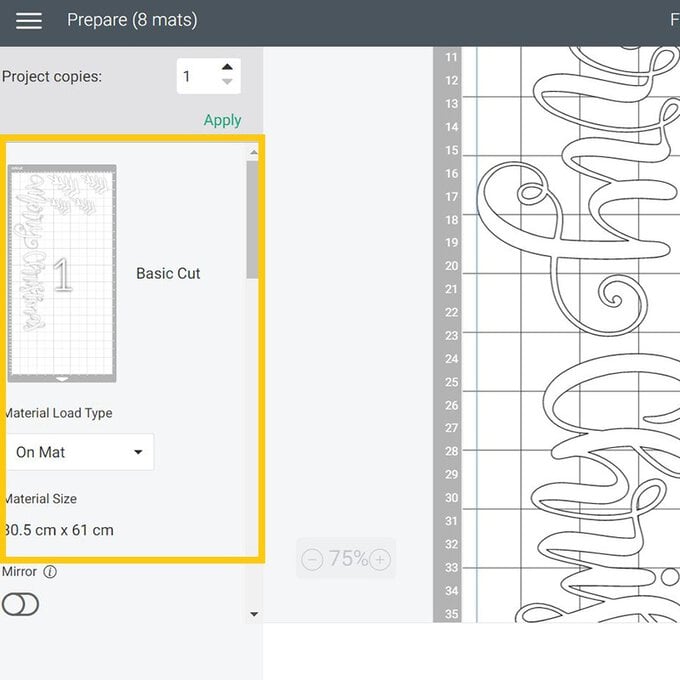
You'll then be taken through to the mat preview screen, check everything is present and correct, and that you have the correct material size selected for each mat. Click 'Continue'.
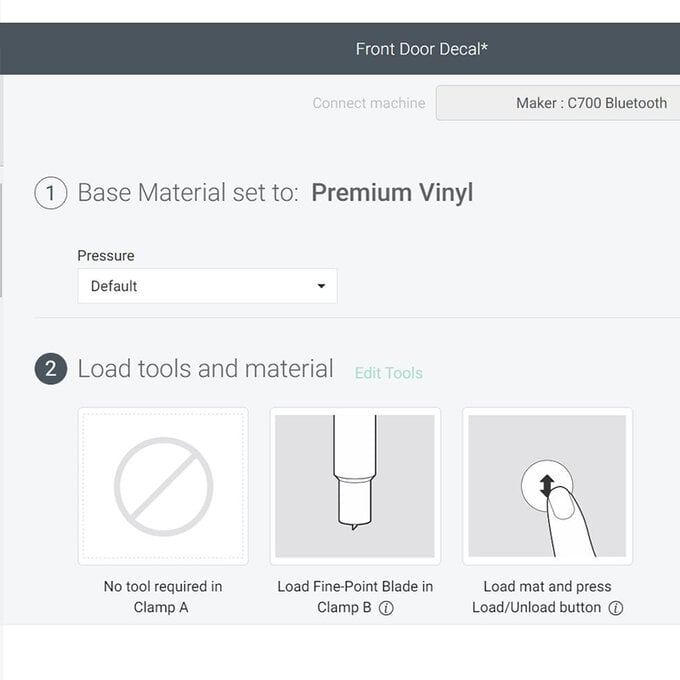
Once through to the machine set up screen select the appropriate cut setting, secure you material to the cutting mat, then follow the on-screen instructions to carry out the cut.
When the cut is complete, remove the vinyl from the mat and use a Weeder tool to remove elements of the design you don't wish to transfer to your door.
Using the mock-up of the design on the Canvas screen in Design Space, start applying the elements to your door using Transfer Tape.
Keep adding the elements until the design is complete!
When it comes to removing your design, simply peel the vinyl from the door using a Scraper tool to help.
