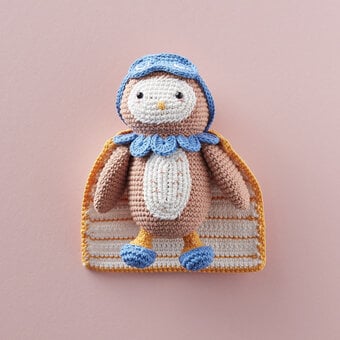
How to Crochet Carrie the Cherry Girl
Carrie is the first character to be released for Amigurumi April 2019. Carrie the Cherry Girl was designed by Irene Strange who loves sketching new designs and then bringing them to life through crochet.
Meet the designer
Irene is an amigurumi crochet designer with a sketchbook full of odd characters waiting to come to life. A frequent contributor to several UK crochet magazines and blogs, she loves experimenting with characters, shapes and textures. When not crocheting away she likes to drink many cups of tea, potter around at the allotment with the kids or curl up with a good book somewhere cozy! See what she's making next @irenestrange on Instagram
You will need
Subtotal
Is $ 4.49
Subtotal
Is $ 6.49
Subtotal
Is $ 6.49
Subtotal
Is $ 6.49
Out of stock
Subtotal
Is $ 6.49
Subtotal
Is $ 5.49
Subtotal
Is $ 7.49
Subtotal
Is $ 6.49
Subtotal
Is $ 10.00
How to make
Abbreviations
Ch – chain stitch; Dc – double crochet; Inc – increase; Inv dec – invisible decrease; Sl st – slip stitch; St(s) – stitch(es)
Notes
Invisible decrease
Insert the hook into the front loop of the first stitch (2 loops on hook). Insert the hook into the front loop of the next stitch (3 loops on hook).
Yarn over and draw through the first two loops on the hook. (2 loops on hook).
Yarn over and draw through both loops on the hook.
Head
Make in Yarn A.
Rnd 1: Start 7 dc in a magic ring [7]
Rnd 2: Inc in each stitch around [14]
Rnd 3: (1dc, inc in next st) seven times [21]
Rnd 4: (2dc, inc in next st) seven times [28]
Rnd 5: (3dc, inc in next st) seven times [35]
Rnd 6: (4dc, inc in next st) seven times [42]
Rnd 7: (5dc, inc in next st) seven times [49]
Rnd 8 – 14: dc around
Rnd 15: (Inv dec, 5dc) seven times [42]
Rnd 16: (Inv dec, 4dc) seven times [35]
Rnd 17: (Inv dec, 3dc) seven times [28]
Rnd 18: Sl st in each st around.
Fasten off.
Body
Make in Yarn B.
Rnd 1-17: Make same as the Head
Fasten off, leave a tail for sewing.
Cheeks
Make 2 in Yarn B.
Rnd 1: Start 8 dc in a magic ring [8]
Sl st in next st, fasten off, leave a tail for sewing.
Cone Hat
Make in Yarn C.
Rnd 1: Start 6 dc in a magic ring [6]
Carry on work in back loops only for the rest of the piece.
Rnd 2: (1dc, inc in next st) three times [9]
Rnd 3: (2dc, inc in next st) three times [12]
Rnd 4: (3dc, inc in next st) three times [15]
Rnd 5: (4dc, inc in next st) three times [18]
Rnd 6: Dc around
Rnd 7: (5dc, inc in next st) three times [21]
Rnd 8: Dc around
Rnd 9: (6dc, inc in next st) three times [24]
Rnd 10: Dc around
Rnd 11: (7dc, inc in next st) three times [27]
Rnd 12: Dc around
Rnd 13: (8dc, inc in next st) three times [30]
Rnd 14: dc around
Sl st in next st, fasten off, leave a tail for sewing.
Feet
Make 2, start in Yarn C.
Rnd 1: Start 6 dc in a magic ring [6]
Rnd 2: Inc in next 3 st, 3dc [9]
Rnd 3: (1dc, inc in next st) three times, 3dc [12]
Rnd 4: Dc around
Rnd 5: Inv dec four times, 4dc [8]
Rnd 6: Change to White, dc around
Add a bit of stuffing to end.
Rnd 7-9: Dc around.
Fasten off, leave a tail for sewing.
Arms
Make 2 in Yarn A
Rnd 1: Start 6 dc in a magic ring [6]
Rnd 2 – 6: Dc around
Fasten off, leave a tail for sewing.
Cherry
Make in Yarn B.
Rnd 1: Start 5 dc in a magic ring [5]
Rnd 2: Inc in each st around [10]
Rnd 3: (1dc, inc in next st) five times [15]
Rnd 4 – 6: dc around
Rnd 7: (Inv dec, 1dc) five times [10]
Add stuffing.
Rnd 8: Inv dec five times [5]
Fasten off, pick up all the front loops and pull tight.
Cherry Stalk
Make in Yarn D, ch 10.
Row 1: Start 2nd ch from hook, 9sl st along the back hump of the chain [9]
Row 2: Ch7, start 2nd ch from hook, 1dc, 2htr, 1tr, 1htr, 1dc [6]
Fasten off, leave a tail for sewing.
Assembly
Add lots of stuffing to the head and the body.
Place safety eyes into the head along the centre.
Sew the body to the head with the yarn tail through the round of slip stitches.
Add a bit of stuffing to the cone and sew to the top of the head through the back loops.
Sew the arms and legs to the body.
Sew the stalk to the cherry, leave it as a separate piece or sew to the arms so she holds it.
Embroider the smile between the eyes in Yarn B.
Decorate the body with Yarn A, C and D sprinkles to finish.
