How to Make a WI Wool Week Hat
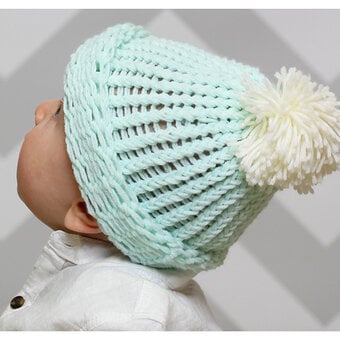
Create this woolly hat using WI Homegrown Yarn for Wool Week. It is a great easy knit and will keep you warm all winter!
You will need
Subtotal
Is $ 10.00
Subtotal
Is $ 6.49
How to make
Abbreviation
k – knit p – purl st(s) – stitches p2tog – purl 2 stitches together k2tog – knit 2 stitches together skpsso – slip 1, knit 1, pass slip stitch over rep – repeat ws – wrong side facing
Tension
28 sts and 28 rows to 10cm
Using 3 1/2mm needles cast on 128 sts
Row 1 :* k2, p2 * rep from *to* to the end of the row.
Row 2 :* p2, k2 * rep from *to* to the end of the row.
Rep rows 1 to 2 seven more times.
Change to 4mm needles now.
Next row : p1, * k2, p4*- rep *to* to the last st and k1.
Next row : p1, *k4, p2* – rep *to* to the last st and k1.
Rep these 2 rows until until the work measures 12cm from top of rib.
Shaping the crown:
Row 1 : p1, *k1, k2tog, k1, p2, k4, p2* rep *to* to the last 7 sts, k1, k2tog, k1, p2, k1. (118)
Row 2 : p1, *k2, p3, k2, p1, p2tog, p1* rep *to* to the last 6 sts – k2, p3, k1.. (108)
Row 3 : p1 * k3, p2* rep *to* to the last st and p1. (108)
Row 4 : p1 * k2, p3* rep *to* to the last st and k1. (108)
Row 5 : p1, *k3, p2, k1, k2tog, p2* rep *to* to the last 6 sts, k3, p2, k1 (97)
Row 6 : p1 * k2, p1, p2tog, k2, p2 * rep *to* to the last 6 sts, k2, p1, p2tog, k1 (88)
Row 7 : p1 *k2, p2 rep *to* to the last st, k1, (88)
Row 8 : p1 *skpsso, p2, k2, p2 * rep *to* to the last 5 sts, skpsso, p2, k1 (76)
Row 9 : p1 * k2, p1, k2, p2tog* rep *to* to the last 4 sts, k2, p1, k1 (65)
Row 10 : p1 * k1, p2tog, k1, p2 * rep *to* to the last 4 sts, k1, p2tog, k1 (54)
Row 11 : *p1, k1, p1, k2tog * rep *to* to the last 4 sts, p1, k1, p1, k1 (44)
Row 12 : p1 * k1, skpsso, p1 * rep *to* to the last 3 sts, k1, p1, k1 (34)
Row 13 : p1, k1, skpsso, p2tog * k1, p2tog* rep *to* to the last st, k1 (23)
Row 14 : p1, k1 *skpsso* rep *to* to the last st, k1. (13)
Row 15 : *skpsso* rep *to* to the last st, k1. (7)
Row 16 : *skpsso* rep *to* to the last st, k1. (4)
Row 17 : sL1, k2tog, psso, k1 (2)
Row 18 : k2tog. Break yarn, leaving a long enough tail to thread through the remaining sts and secure.
Use a cool iron, gently press and iron.
With WS facing sew seam using a blanket stitch from the crown to the bottom edge. Secure and weave in the ends.
Make your pom pom using the maker and secure it to the top of the hat.
