How to Crochet an Amigurumi King Charles
Mark the royal occasion by bringing your very own King Charles to life, complete with robe, orb and sceptre. This is the perfect crochet project to commemorate King Charles III’s Coronation.
This amigurumi doll is sure to become a keepsake in the years to come, helping to embrace the unique moment in history and the start of the new king’s reign.
Pattern by Kate McCully @makemeroardesign
You will need
Subtotal
Is $ 8.49
Subtotal
Is $ 3.49
Subtotal
Is $ 3.49
Subtotal
Is $ 3.49
Subtotal
Is $ 3.49
Subtotal
Is $ 3.49
Subtotal
Is $ 3.49
You will need
2.5mm crochet hook
Toy stuffing
Pair of 8mm black safety eyes
Tapestry needle
Stitch markers
DK cotton blend yarn in:
Peach 10g
Navy 27g
Yellow 17g
White 20g
Red 28g
Purple 11g
Black / dark green / light green / orange / light pink: less than 5g

Abbreviations (UK terms)
Ch Chain
Sl st Slip stitch
Dc Double crochet
Dc2tog Decrease
St(s) Stitch(es)
PM Place marker
BLO Back loops only
FLO Front loops only
RS Right side
Htr half treble
Tr treble

Round 1: Using Peach, work into a magic ring, 6dc. (6 sts)
Round 2: 2dc in each st around. (12 sts)
Rounds 3–5: Dc in each st around, change to Navy on last yo of last rnd. (12 sts)
Rounds 6-7: Dc in each st around. (12 sts)
Round 8: Dc2tog, 10dc. (11sts)
Rounds 9–10: Dc in each st around. (11 sts)
Round 11: Dc2tog, 9dc. (10 sts)
Rounds 12–14: Dc in each st around. (10 sts)
Round 15: Dc2tog, 8dc. (9 sts)
Rounds 16–17: Dc in each st around. (9 sts)
Round 18: Dc2tog, 7dc. (8 sts)
Rounds 19–21: Dc in each st around. (8 sts)
Round 22: Dc2tog, 6dc. (7 sts)
Rounds 23–24: Dc in each st around. (7 sts)
Round 25: 3dc, sl st, leave the remaining sts unworked.
Stuff arms.
Fasten off leaving a long tail for sewing. Pm in next st.
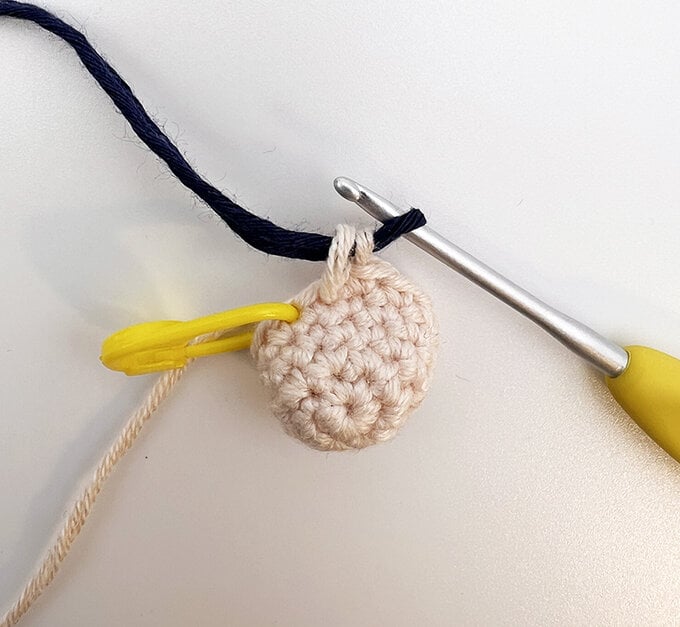
Round 1: Using Black colour, work into a magic ring, 7dc. (7 sts)
Round 2: 2dc in each st around. (14 sts)
Rounds 3–5: Dc in each st around. (14 sts) Change colour to Navy.
Rounds 6–25: Dc in each st around. (14 sts)
Round 26: 4dc, sl st, leave remaining sts unworked.
Fasten off first leg, pm in next st. Do not fasten off second leg. Stuffs legs.
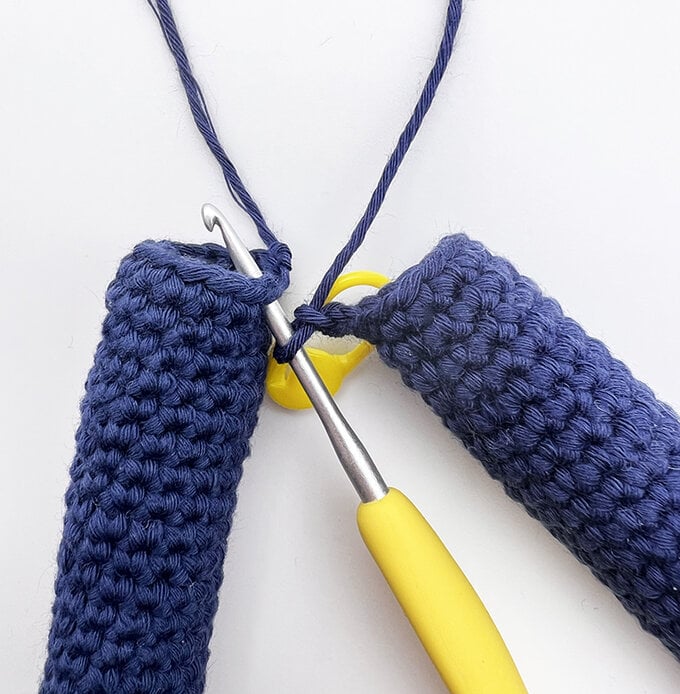
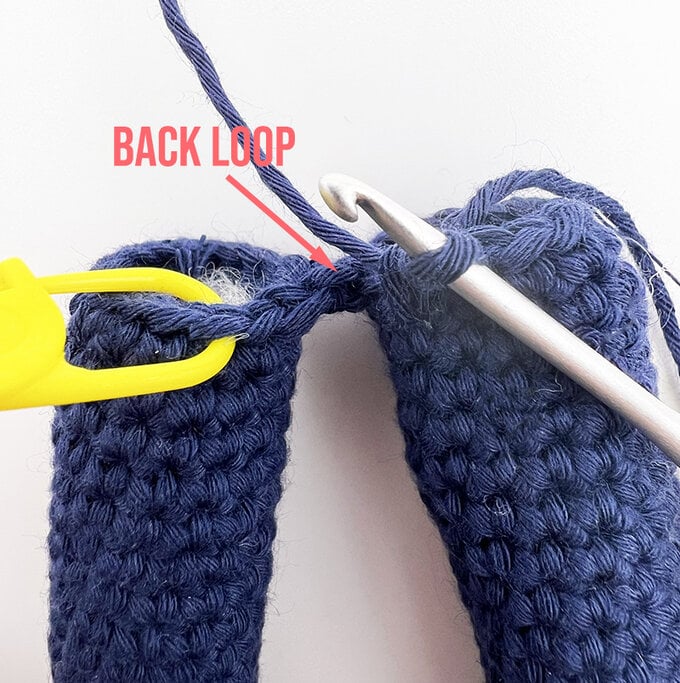
Round 1: Continue with second leg, 14dc, ch1 (counts as 1 st), starting in marked st on first leg, 14dc, 1dc in BLO of ch. (30 sts)
Rounds 2–7: Dc in each st around. (30 sts)
Stuff body as you go.
Round 8: In BLO dc in each st around. (30 sts)
Rounds 9–10: Dc in each st around. (30 sts) 8dc, pm in next st to denote new start of round.
Round 11: (dc2tog, 13dc) twice. (28 sts)
Round 12: Dc in each st around. (28 sts)
Round 13: (dc2tog, 12dc) twice. (26 sts)
Round 14: Dc in each st around. (26 sts)
Round 15: (dc2tog, 11dc), twice. (24 sts)
Round 16: Dc in each st around. (24 sts)
Round 17: (dc2tog, 10dc), twice. (22 sts)
Round 18: Dc in each st around. (22 sts)
Round 19: (dc2tog, 9dc), twice. (20 sts)
Round 20: Dc in each st around. (20 sts)
Round 21: (dc2tog, 8dc), twice. (18 sts)
Round 22: Dc in each st around. (18 sts)
In the next round you will join the arms, make sure to continue to mark the start of each round.
Round 23: 1dc in next st of body, starting in marked st on first arm, 7dc, starting in next st on body, 9dc, starting in marked st on second arm, 7dc, starting in next st on body 8dc. (32 sts)
Round 24: 2dc, dc2tog, 1dc, dc2tog, 11dc, dc2tog, 1dc, dc2tog, 9dc. (28 sts)
Round 25: (1dc, dc2tog) twice, 9dc, dc2tog, 1dc, dc2tog, 8dc. (24 sts)
Use a tapestry needle and the tail ends left on the arms to sew closed the small holes created when joining them.
Round 26: (dc2tog, 1dc, dc2tog, 7dc) twice. (20 sts)
Round 27: (dc2tog, 1 dc, dc2tog, 5dc) twice, change to Peach on last yo. (16 sts)
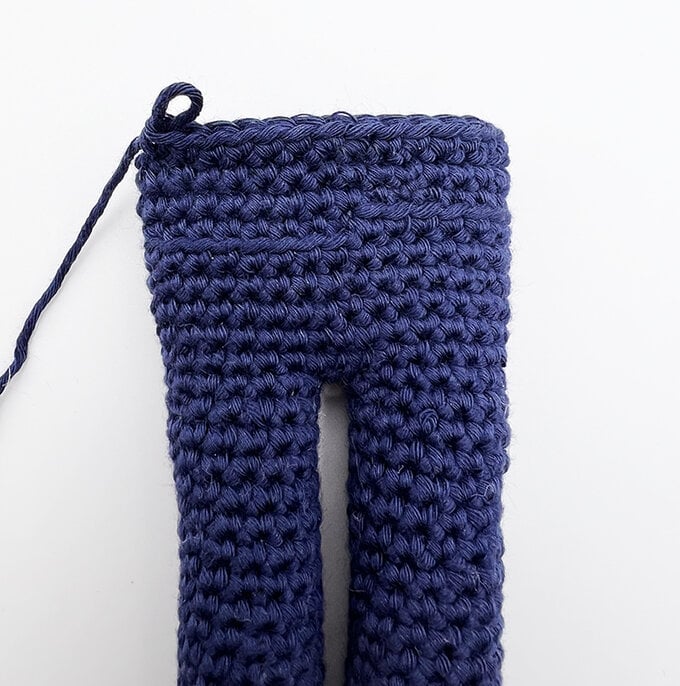
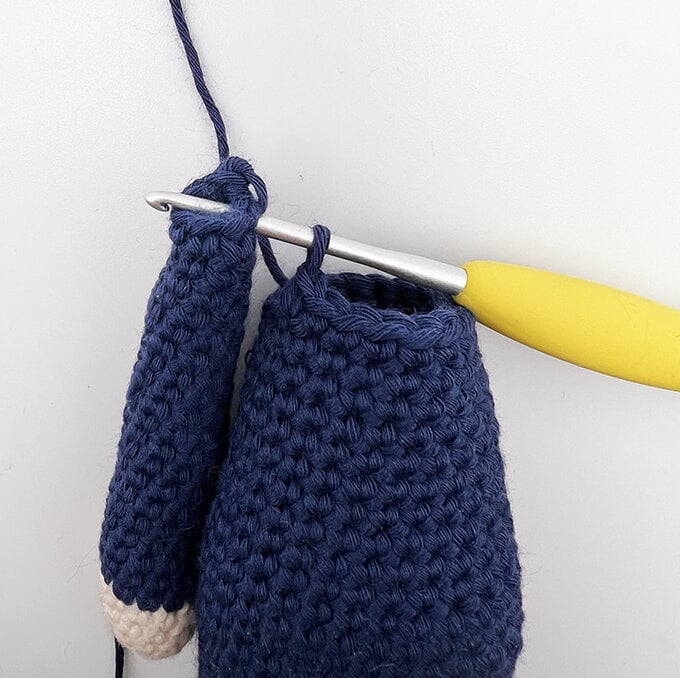
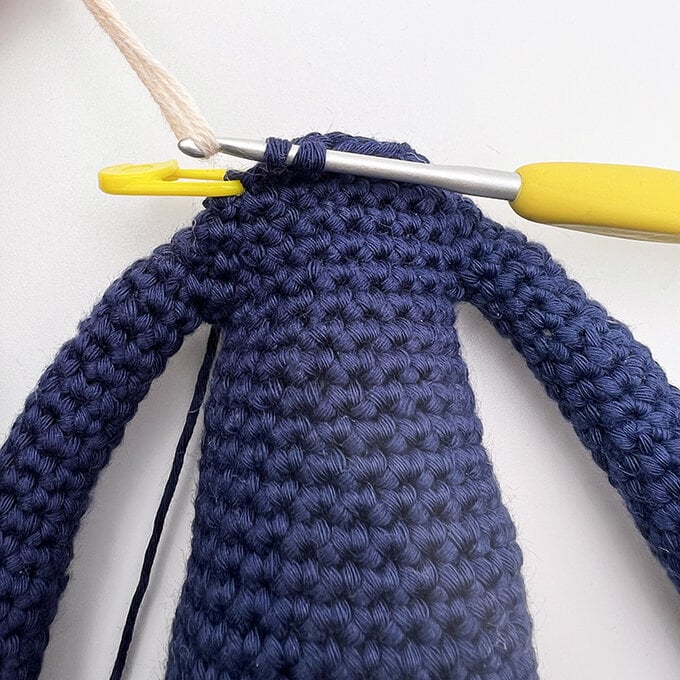
Round 28: In BLO dc in each st around. (16 sts)
Round 29: Dc in each st around. (16 sts)
Round 30: (2dc in next st) 14 times, 2dc. (30 sts)
Round 31: (2dc in next st, 4dc) 6 times. (36 sts)
Round 32: (2dc in next st, 5dc) 6 times. (42 sts)
Rounds 33–42: Dc in each st around.
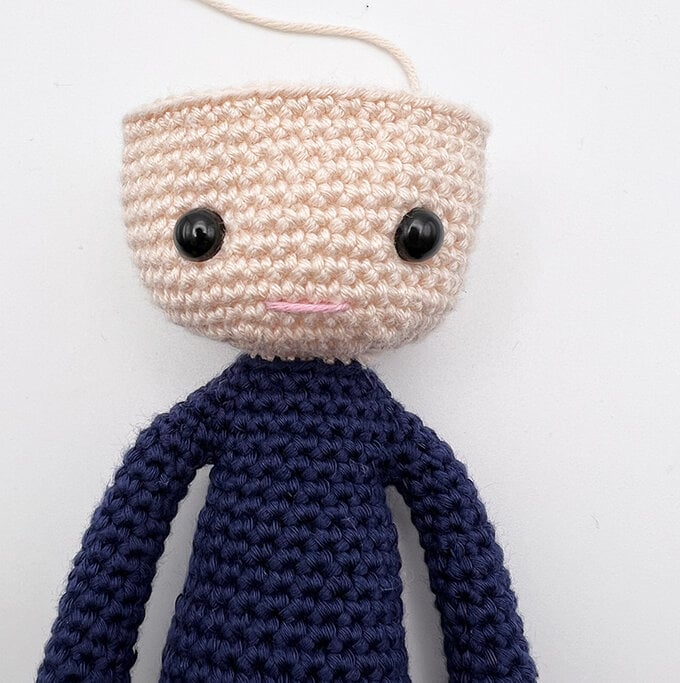
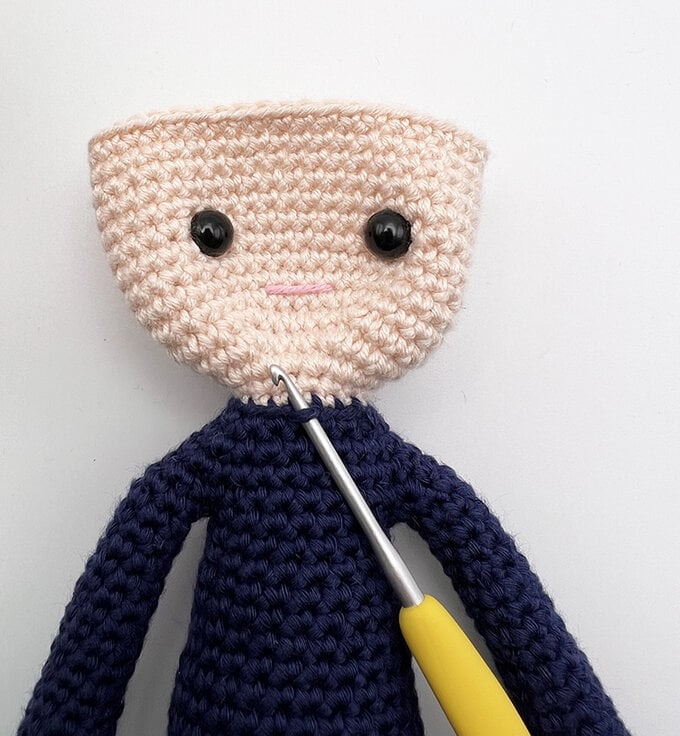
Secure work to continue later. Insert safety eyes between rounds 36 and 37 and about 2.5cm (or 8 sts) apart. Thread a tapestry needle with a short length of Light Pink and embroider a small (1cm long) stitch for the mouth 3 rounds below the eyes.
Collar
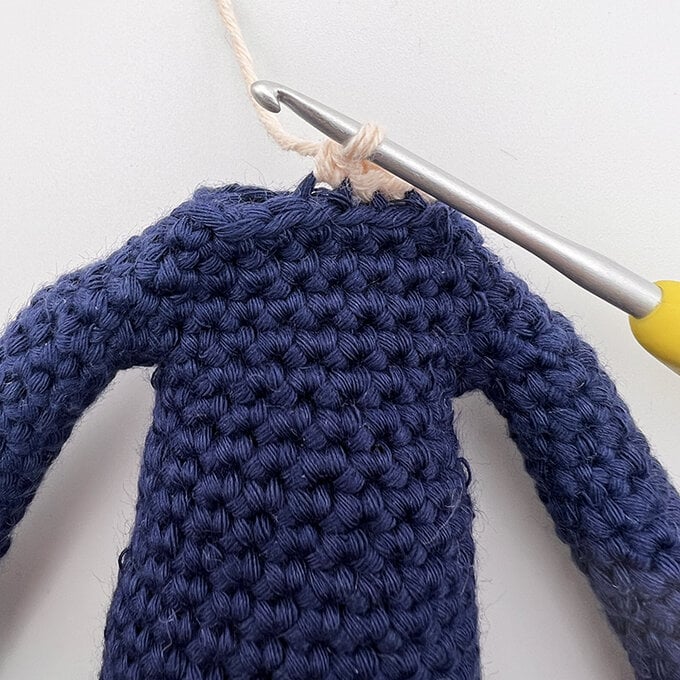
Row 1: Join Navy to the FL of the front centre st of Round 27, ch1, 1dc in same st as join, 16dc (last st will be in the same st you started in). (17 sts)
Fasten off and weave in ends.
Bottom of Jacket
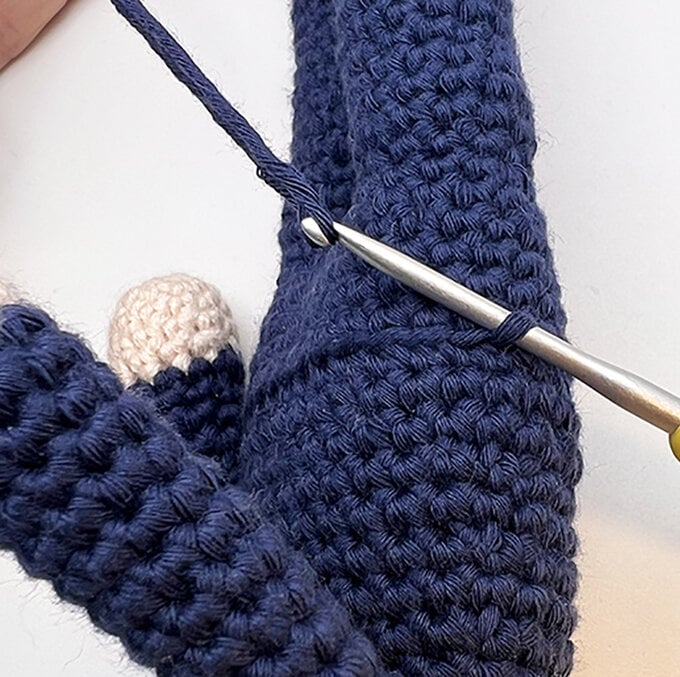
Row 1: Hold doll upside down and, leaving a long starting tail, join Navy to the front loop of a st on the side of the Body of round 7, ch 1, 2dc in same st, 11dc, 2dc in the next st, 11dc. (32 sts)
Row 2: Dc in each st around. (32 sts)
Row 3: Dc in each st around with 2 increases, one on each side of the doll. (34 sts)
Row 4: Dc in each st around. (34 sts)
Row 5: Dc in each st around with 2 increases, one on each side of the doll. (36 sts)
Row 6: Dc in each st around. (36 sts)
Fasten off and weave in ends.
Continue from where you secured work, stuff as you go.
Round 43: (dc2tog, 5dc) 6 times. (36 sts)
Round 44: (dc2tog, 4dc) 6 times. (30 sts)
Round 45: (dc2tog, 3dc) 6 times. (24 sts)
Round 46: (dc2tog, 2dc) 6 times. (18 sts)
Round 47: (dc2tog, 1dc) 6 times. (12 sts)
Round 48: (dc2tog) 6 times. (6 sts)
Fasten off. Thread a tapestry needle with the tail end and make some sts to pull the hole closed. Weave in end.
Ch 3 in Peach.
Row 1: 2dc in 2nd ch from hook, 2dc in next ch, working on other side of ch, 2dc in same ch, 2dc in last ch. (8 sts)
Row 2-3: Dc in each st around. (8 sts)
Sl st in next st, fasten off, leaving a long tail for sewing on.
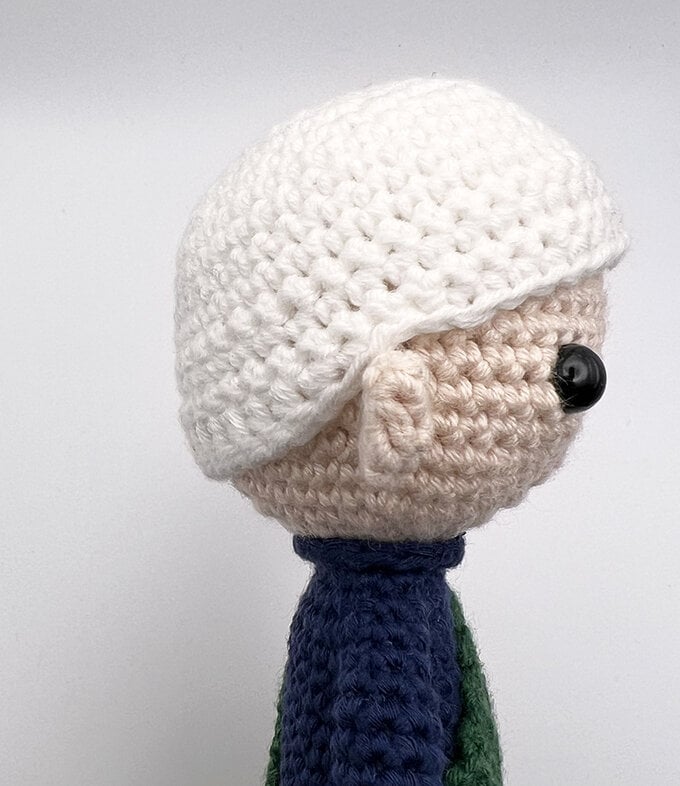
Place the hair in position and you should see 2 indents where the ears should be sewn on. The ears should line up with the top of the eye, and in line with the shoulder.
Round 1: Using White, work into a magic ring, 6 dc. (6 sts)
Round 2: 2dc in each st around. (12 sts)
Round 3: (2dc in next st, 1dc) 6 times. (18 sts)
Round 4: (2dc in next st, 2dc) 6 times. (24 sts)
Round 5: (2dc in next st, 3dc) 6 times. (30 sts)
Round 6: (2dc in next st, 4dc) 6 times. (36 sts)
Round 7: (2dc in next st, 5dc) 6 times. (42 sts)
Rounds 8–11: Dc in each st around.
We will now continue in rows without a ch1 at the start of the rows.
Row 12: Turn, skip 1st st, 41dc. (41 sts)
Row 13: Turn, skip 1st st, 40dc. (40 sts)
Row 14: Turn, skip 1st st, 39dc. (39 sts)
Row 15: Turn, skip 1st st, 5dc, 2 sl st, 1dc, 1htr, 15tr. 1htr, 1dc, 2 sl st, 9dc, sl st into last st. (38 sts)
Fasten off, leaving a long tail for sewing on. Place the hair onto the head. There should be a little ‘dip’ on each side, these line up with the ears.
Uniform Details
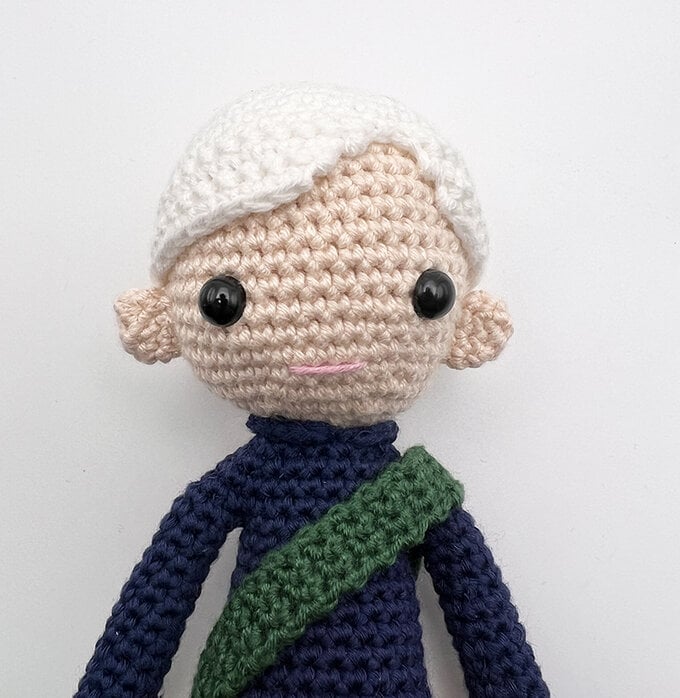
There is a lot of little details to make. Please refer to the photos for placement of each item. You may need to adjust the length of some of these details to suit your doll. If this is the case then just add some more rows, or stop when it has reached the desired length.
Sash
Ch4 in Green
Row 1: Dc in second chain from hook, dc to end, turn. (3 sts)
Row 2-50: Ch1, dc to end, turn. (3 sts)
Fasten off and use the tail end to sewing the short ends together. Place onto the body and sew a couple of stitches at the shoulder and waist to secure it in place. Weave in any remaining ends.
Ch4 in Yellow
Row 1: Dc in second chain from hook, dc to end, turn. (3 sts)
Row 2-38: Ch1, dc to end, turn. (3 sts)
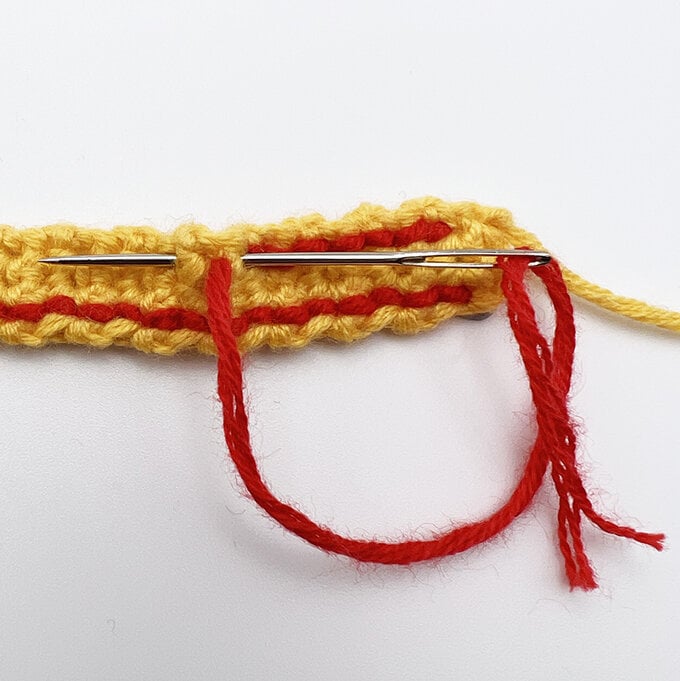
Fasten off and use the tail end to sewing the short ends together. Use Red and a tapestry needle to sew 2 lines around the band using a back stitch. Weave in any remaining ends. Place onto the body and secure in place in the in the same way as the sash.
Ch3 in Yellow
Row 1: Dc in second chain from hook, dc to end, turn. (2 sts)
Row 2-14: Ch1, dc to end, turn. (2 sts)
Fasten off and use the tail end to sewing the short ends together. Weave in any remaining ends. Place onto the arms. You shouldn’t need to sew these on unless you want to.
Ch3 in Yellow
Row 1: Dc in second chain from hook, dc to end, turn. (2 sts)
Row 2-25: Ch1, dc to end, turn. (2 sts)
Fasten off. Pin in place on the side of the legs then sew in place. You can use the tail end or you may find it easier to use a sewing thread in a similar colour. If you don't have a sewing thread, splitting the yellow yarn so you only have 2 strands will also work. Weave in any remaining ends.
Ch3 in Yellow
Row 1: Dc in second chain from hook, dc to end, turn. (2 sts)
Row 2-3: Ch1, dc to end, turn. (2 sts)
Fasten off. Sew onto the shoulders. Weave in any remaining ends.
Ch15 in Yellow.
Sew one end to the right epaulette and the other to the green sash.
Make 2, 1 in Yellow and 1 in Grey.
Round 1: Work into a magic ring, 6dc. (6 sts)
Join with a sl st to the first dc.
Fasten off. Sew onto the sash.
Weave in any remaining ends.
Use colours White, Red and Grey and sew small lines above the medals (on the sash) to suggest the ribbons.
Cap
Round 1: Using Purple, work into a magic ring, 6dc. (6 sts)
Round 2: 2dc in each st around. (12 sts)
Round 3: (2dc in next st, 1dc). (18 sts)
Round 4: (2dc in next st, 2dc). (24 sts)
Round 5: (2dc in next st, 3dc). (30 sts)
Round 6: (2dc in next st, 4dc). (36 sts)
Round 7: (2dc in next st, 5dc). (42 sts)
Round 8: (2dc in next st, 6dc). (48 sts)
Round 9: (2dc in next st, 7dc). (54 sts)
Round 10: (2dc in next st, 8dc). (60 sts)
Rounds 11-15: Dc in each st around. (60 sts)
Round 16: (dc2tog in next st, 8dc). (54 sts)
Round 17: Dc in each st around. (54 sts)
Round 18: (dc2tog in next st, 7dc). (48 sts)
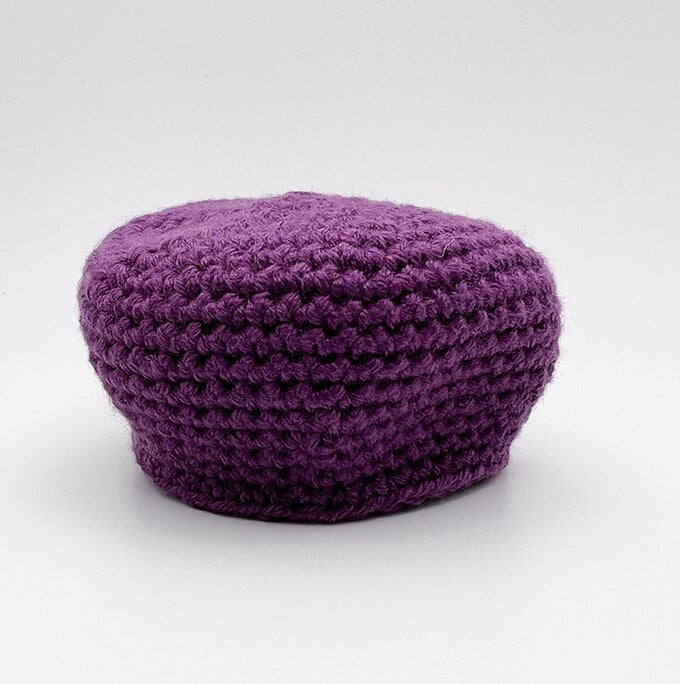
Round 19: Dc in each st around. (48 sts) Fasten off and weave in ends.
Band
Ch5 in Yellow
Row 1: Dc in second chain from hook, dc to end, turn. (4 sts)
Row 2-56: Ch1, dc to end, turn. (4 sts)
Fasten off leaving a long tail. Use the tail end to sew the band onto the base of the cap overlapping it slightly. Weave in any remaining ends.
White trim
Ch5 in White
Row 1: Dc in second chain from hook, dc to end, turn. (4 sts)
Row 2-57: Ch1, dc to end, turn. (4 sts)
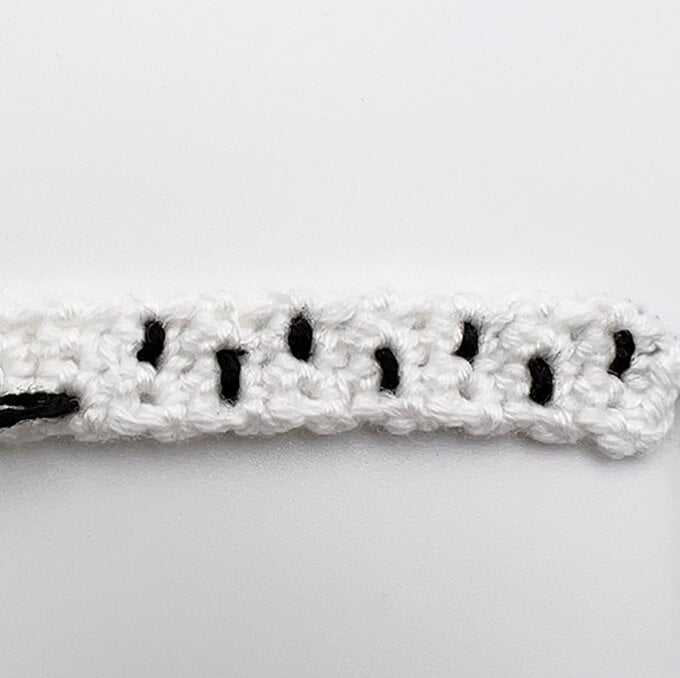
Fasten off leaving a long tail. Use Black and a tapestry needle to sew short vertical stitches all around the band. Use the tail end to sew the trim onto the yellow band overlapping it slightly. Weave in any remaining ends.
Arches (Make 2)
Ch4 in Yellow
Row 1: Dc in second chain from hook, dc to end, turn. (3 sts)
Row 2-50: Ch1, dc to end, turn. (3 sts)
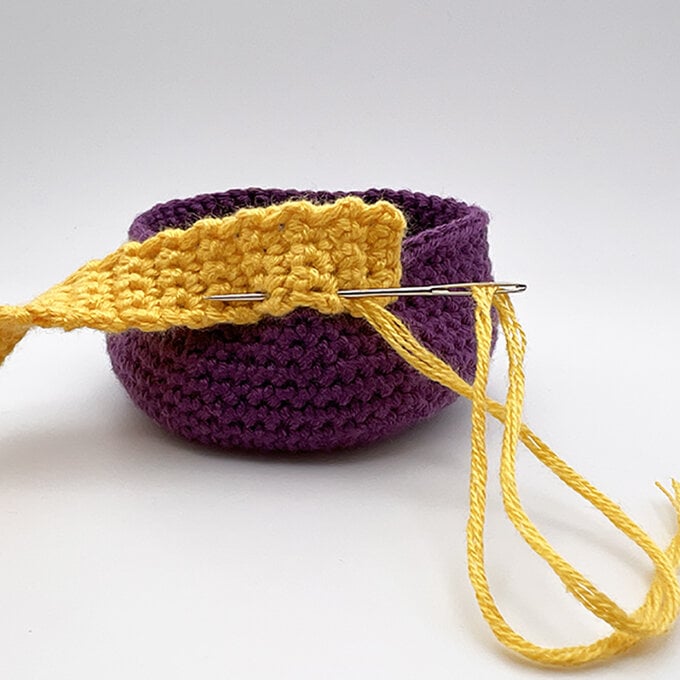
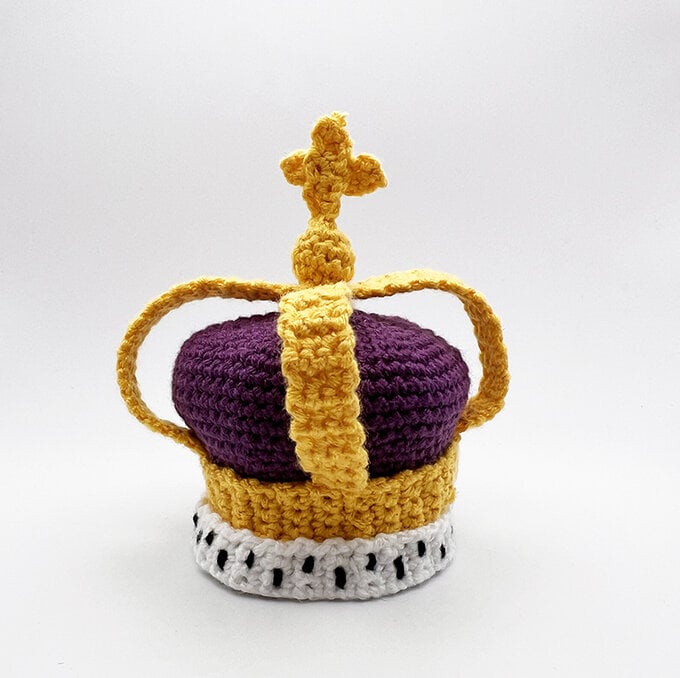
Fasten off leaving a long tail. Place the arches together forming a cross and sew the middle sections together to secure. Next, pin the 4 ends equally around the crown making sure the ends meet the yellow band. Sew each end in place. Weave in any remaining ends.
Ball
Round 1: Using Yellow, work into a magic ring, 6dc. (6 sts)
Round 2: 2dc in each st around. (12 sts)
Rounds 3-4: dc in each st around. (12 sts)
Place a small amount of stuffing in the ball.
Round 5: (dc2tog) 6 times. (6 sts)
Fasten off leaving a long tail end. Thread a tapestry needle with the tail end and make some sts to pull the hole closed. Use the tail end to sew the ball to the top of the crown.
Cross (Make 2)
Ch3 in Yellow
Row 1: Dc in second chain from hook, dc to end, turn. (2 sts)
Row 2-6: Ch1, dc to end, turn. (2 sts)
Fasten off. Place the 2 pieces together forming a cross and sew the middle sections together to secure. Next, sew the cross to the top of the ball. Weave in any remaining ends.
Jewels
Use Dark green, Light Green and orange and sew French knots around the yellow band to represent the jewels. There are 4 jewels of each colour in total.
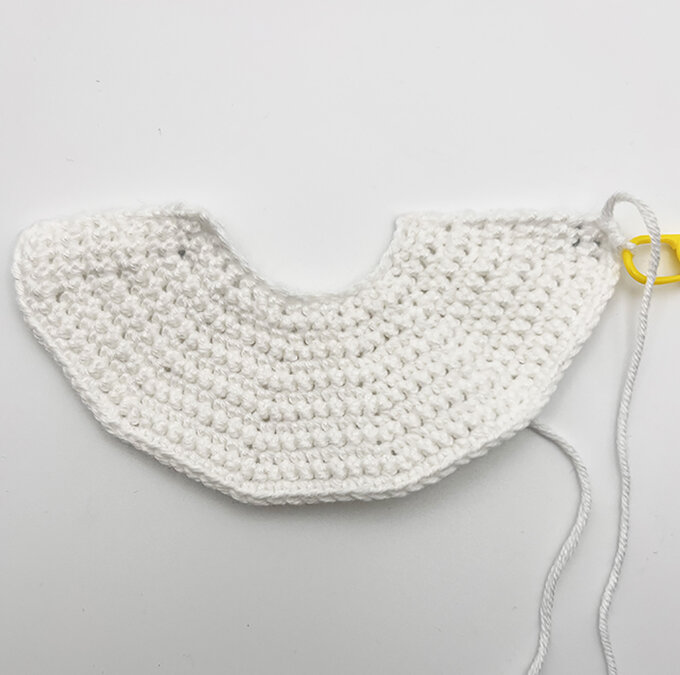
Ch19 in White
Row 1: Dc in second chain from hook, dc to end, turn. (18 sts)
Row 2: Ch1, 1dc, (2dc in next st, 2dc) 5 times, 2dc in next st, 1dc, turn. (24 sts)
Row 3: Ch1, dc to end, turn. (24 sts)
Row 4: Ch1, 1dc, (2dc in next st, 3dc) 5 times, 2dc in next st, 2dc, turn. (30 sts)
Row 5: Ch1, dc to end, turn. (30 sts) #
Row 6: Ch1, 2dc, (2dc in next st, 4dc) 5 times, 2dc in next st, 2dc, turn. (36 sts)
Row 7: Ch1, dc to end, turn. (36 sts)
Row 8: Ch1, 2dc, (2dc in next st, 5dc) 5 times, 2dc in next st, 3dc, turn. (42 sts)
Row 9: Ch1, dc to end, turn. (42 sts)
Row 10: Ch1, 3dc, (2dc in next st, 6dc) 5 times, 2dc in next st, 3dc, turn. (48 sts)
Row 11: Ch1, dc to end, turn. (48 sts)
Row 12: Ch1, 3dc, (2dc in next st, 7dc) 5 times, 2dc in next st, 4dc, turn. (54 sts)
Row 13: Ch1, dc to end, turn. (54 sts)
Change colour to Red
Rows 14-32: Ch1, dc in each st to end, turn. (54 sts)
Row 33: Ch1, dc2tog, 50dc, dc2tog. (52 sts)
Row 34: Ch1, dc to end, turn. (52 sts)
Row 35: Ch1, dc2tog, 48dc, dc2tog. (50 sts)
Row 36: Ch1, dc to end, turn. (50 sts)
Row 37: Ch1, dc2tog, 46dc, dc2tog. (48 sts)
Row 38: Ch1, dc to end, turn. (48 sts)
Row 39: Ch1, dc2tog, 44dc, dc2tog. (46 sts)
Row 40: Ch1, dc to end, turn. (46 sts)
Row 41: Ch1, dc2tog, 42dc, dc2tog. (44 sts)
Row 42: Ch1, dc to end, turn. (44 sts)
Row 43: Ch1, dc2tog, 40dc, dc2tog. (42 sts)
Row 44: Ch1, dc to end, turn. (42 sts)
Row 45: Ch1, dc2tog, 38dc, dc2tog. (40 sts)
Row 46: Ch1, dc to end, turn. (40 sts)
Row 47: Ch1, dc2tog, 36dc, dc2tog. (38 sts)
Row 48: Ch1, dc to end, turn. (38 sts)
Row 49: Ch1, dc2tog, 34dc, dc2tog. (36 sts)
Row 50: Ch1, dc to end, turn. (36 sts)
Row 51: Ch1, dc2tog, 32dc, dc2tog. (34 sts)
Row 52: Ch1, dc to end, turn. (34 sts)
Row 53: Ch1, dc2tog, 30dc, dc2tog. (32 sts)
Row 54: Ch1, dc to end, turn. (32 sts)
Row 55: Ch1, dc2tog, 28dc, dc2tog. (30 sts)
Row 56: Ch1, dc to end, turn. (30 sts)
Row 57: Ch1, dc2tog, 26dc, dc2tog. (28 sts)
Row 58: Ch1, dc to end, turn. (28 sts)
Row 59: Ch1, dc2tog, 24dc, dc2tog. (26 sts)
Row 60: Ch1, dc to end, turn. (26 sts)
Row 61: Ch1, dc2tog, 22dc, dc2tog. (24 sts)
Row 62: Ch1, dc to end, turn. (24 sts)
Rows 63-70: Ch1, dc in each st to end, turn. (24 sts)
We will now continue without a ch1 at the start of the rows.
Row 71: Skip 1st st, 21dc, dc2tog, turn. (22 sts)
Row 72: Skip 1st st, 19dc, dc2tog, turn. (20 sts)
Row 73: Skip 1st st, 17dc, dc2tog, turn. (18 sts)
Row 74: Skip 1st st, 15dc, dc2tog, turn. (16 sts)
Row 75: Skip 1st st, 13dc, dc2tog, turn. (14 sts)
Row 76: Skip 1st st, 11dc, dc2tog, turn. (12 sts)
Row 77: Skip 1st st, 9dc, dc2tog, turn. (10 sts)
Fasten off.
Robe trim
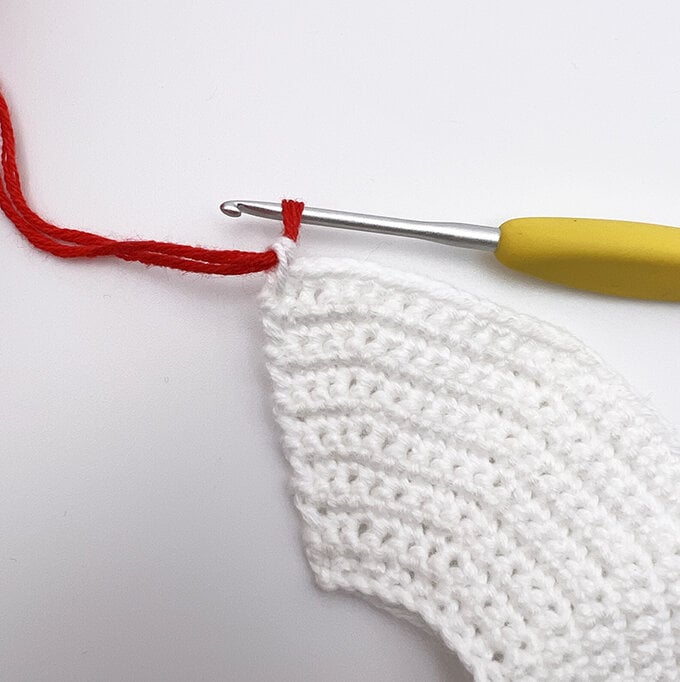
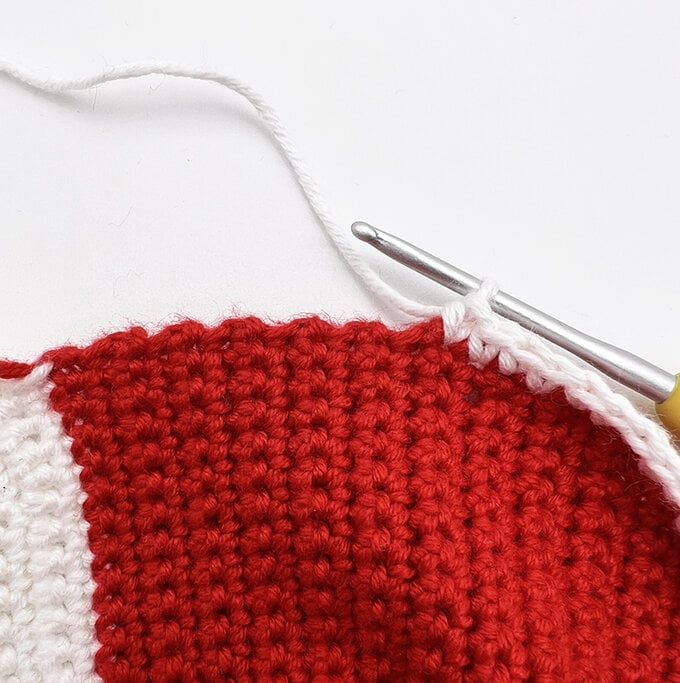
Join White into one of the top corners. This will be the RS.
Row 1: RS. Ch1, dc all the way around the edge of the robes (excluding the top edge where the neck will be). Place 1dc in a gap per row. It won’t always obvious where to place the hook but take your time so it is as neat as possible, turn.
Row 2-3: Ch1, dc to end, turn.
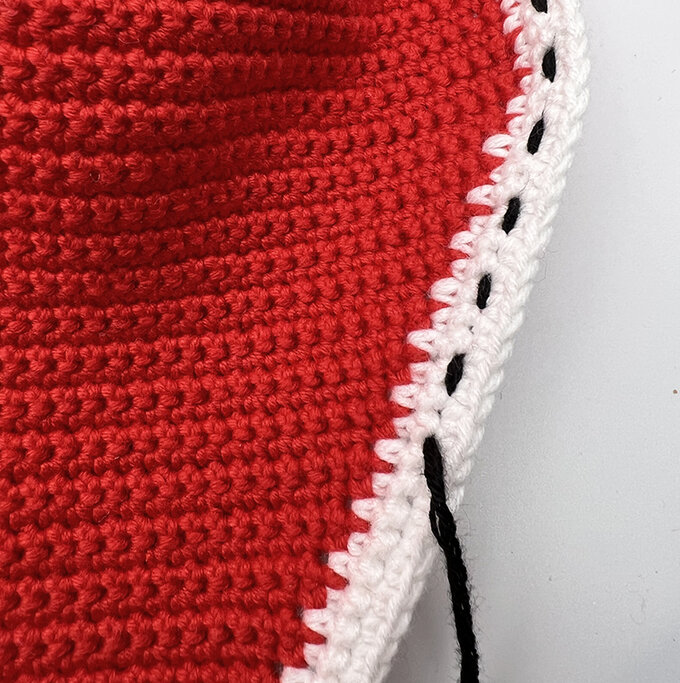
Fasten off. Use Black and a tapestry needle to sew short vertical stitches all around the white part of the robes. Weave in any remaining ends.
Ball
Round 1: Using Yellow, work into a magic ring, 6dc. (6 sts)
Round 2: 2dc in each st around. (12 sts)
Round 3: (2dc in next st, 1dc) 6 times. (18 sts)
Rounds 4-6: dc in each st around. (18 sts)
Round 7: (dc2tog, 1dc) 6 times. (12 sts)
Place a small amount of stuffing in the ball.
Round 8: (dc2tog) 6 times. (6 sts)
Fasten off leaving a long tail end. Thread a tapestry needle with the tail end and make some sts to pull the hole closed.
Details (Make 2)
Ch 20 in grey. Fasten off.
Place around the ball crossing the chains over each other and sew to secure.
Cross (Make 2)
Ch6 in Yellow
Row 1: Dc in second chain from hook, dc to end, turn. (5 sts)
Fasten off. Place the 2 pieces together forming a cross and sew the middle section sections together to secure. Next, sew the cross to the top of the ball. Weave in any remaining ends.
Round 1: Using Yellow, work into a magic ring, 4dc. (4 sts)
Round 2: dc in each st around. (4 sts)
Repeat round 2 until the piece measures around 9cm in length. There is no need to mark your rounds here. This piece will remain inside out as it’s too small to turn the right way.
Top piece
Round 1: Using Yellow, work into a magic ring, 6dc. (6 sts)
Join with sl st to the first dc. Fasten off then sew to the top of the Sceptre.

