Cricut: How to Personalise a Mug Using Infusible Ink Sheets
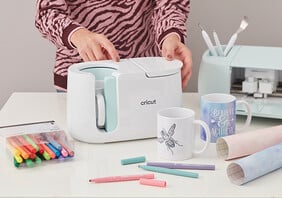
Personalise a beautiful handmade mug that has a professional finish that's long-lasting! You'll be able to craft a motivational mug design in no time using Infusible Ink Transfer Sheets and the Cricut Mug Press.
You'll also need a Cricut machine on hand to cut your Infusible Ink Transfer Sheets. We've used the Cricut Maker 3, but the project can be made on any Cricut machine.
Project and instructions by Hobbycraft Artisan Chrissie Ellson.
Discover other projects by this maker:
Cricut: How to Create a Mug with Infusible Ink Pens
Please note: This project contains paid-for content from the Cricut Design Space app. Screen reference images are taken from the desktop version of Design Space.
You will need
Subtotal
Is $ 498.00 , was $ 569.00
Subtotal
Is $ 24.00
Subtotal
Is $ 11.00
Subtotal
Is $ 23.00
Subtotal
Is $ 23.00
Subtotal
Is $ 9.49
You will also need:
*Cricut Design Space installed on a laptop. PC, Tablet or Mobile Device
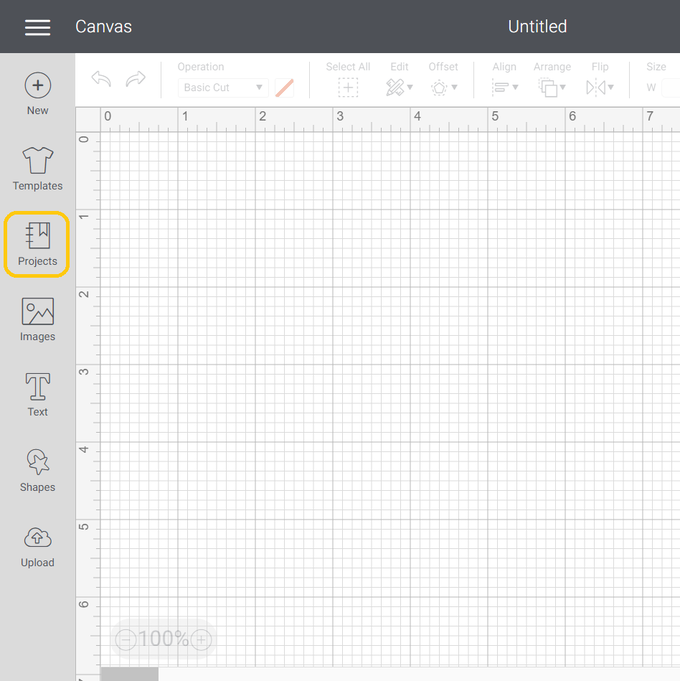
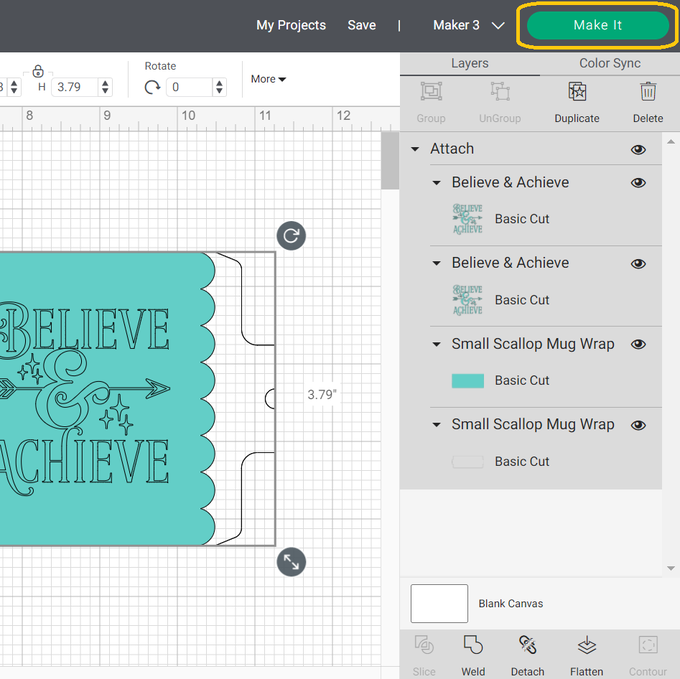
Open Design Space and click “New Project”
![cricutinfusibleinkmugproject_step1.png?sw=680&q=85](https://www.hobbycraft.co.uk/dw/image/v2/BHCG_PRD/on/demandware.static/-/Library-Sites-hobbycraft-uk-content/default/dwc6809df4/images/ideas/cricut/cricut-how-to-personalise-a-mug-using-infusible-ink-sheets/cricutinfusibleinkmugproject_step1.png?sw=680&q=85)
Once in a new blank canvas click on “Projects”
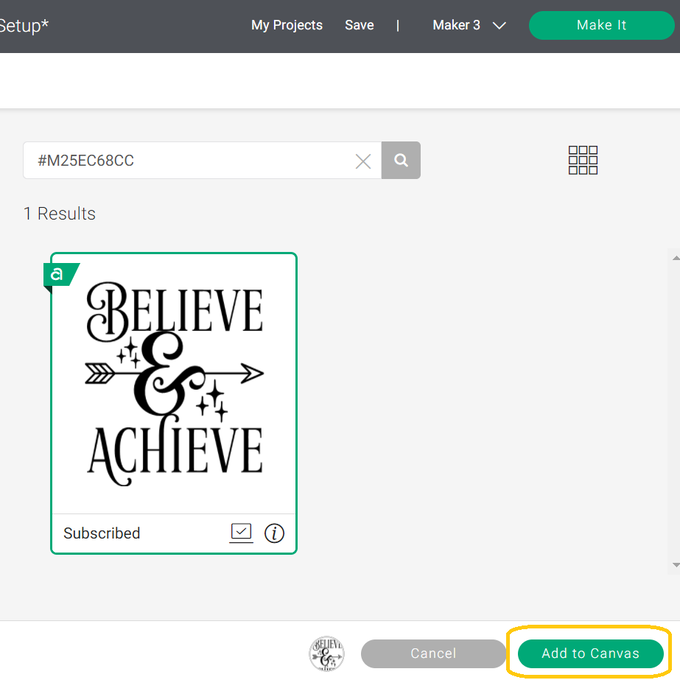
![cricutinfusibleinkmugproject_step2.png?sw=680&q=85](https://www.hobbycraft.co.uk/dw/image/v2/BHCG_PRD/on/demandware.static/-/Library-Sites-hobbycraft-uk-content/default/dw596d996d/images/ideas/cricut/cricut-how-to-personalise-a-mug-using-infusible-ink-sheets/cricutinfusibleinkmugproject_step2.png?sw=680&q=85)
Search "Mug"
![cricutinfusibleinkmugproject_step3.png?sw=680&q=85](https://www.hobbycraft.co.uk/dw/image/v2/BHCG_PRD/on/demandware.static/-/Library-Sites-hobbycraft-uk-content/default/dwdea484ca/images/ideas/cricut/cricut-how-to-personalise-a-mug-using-infusible-ink-sheets/cricutinfusibleinkmugproject_step3.png?sw=680&q=85)
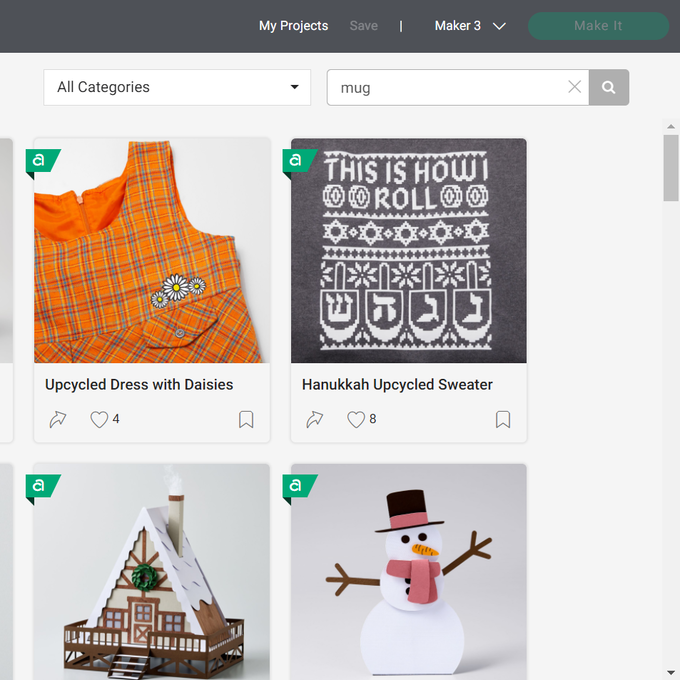
Scroll and find the project named “Mug Design Set-up”
![cricutinfusibleinkmugproject_step4.png?sw=680&q=85](https://www.hobbycraft.co.uk/dw/image/v2/BHCG_PRD/on/demandware.static/-/Library-Sites-hobbycraft-uk-content/default/dwd9619f36/images/ideas/cricut/cricut-how-to-personalise-a-mug-using-infusible-ink-sheets/cricutinfusibleinkmugproject_step4.png?sw=680&q=85)
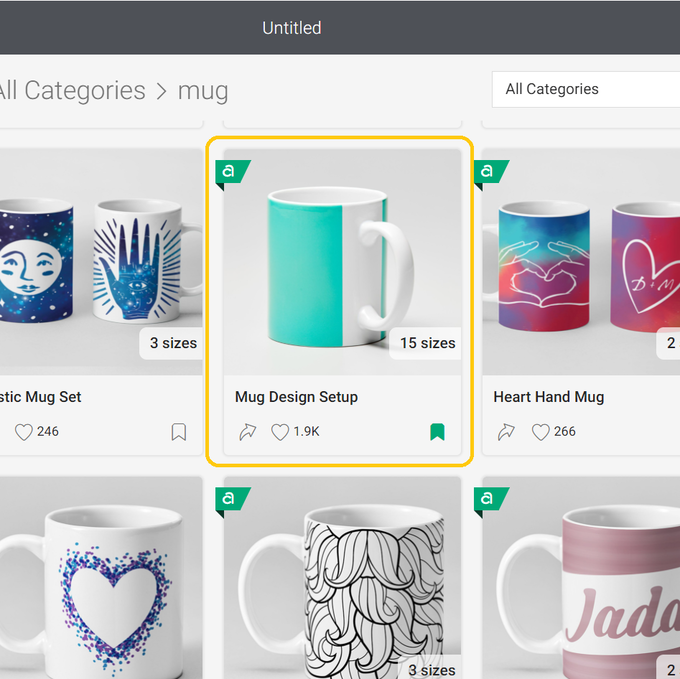
Once you have got your chosen design click on “Add To Canvas”
![cricutinfusibleinkmugproject_step9.png?sw=680&q=85](https://www.hobbycraft.co.uk/dw/image/v2/BHCG_PRD/on/demandware.static/-/Library-Sites-hobbycraft-uk-content/default/dw20046048/images/ideas/cricut/cricut-how-to-personalise-a-mug-using-infusible-ink-sheets/cricutinfusibleinkmugproject_step9.png?sw=680&q=85)
Resize your image to 2.5” in height
![cricutinfusibleinkmugproject_step10.png?sw=680&q=85](https://www.hobbycraft.co.uk/dw/image/v2/BHCG_PRD/on/demandware.static/-/Library-Sites-hobbycraft-uk-content/default/dwe7330a15/images/ideas/cricut/cricut-how-to-personalise-a-mug-using-infusible-ink-sheets/cricutinfusibleinkmugproject_step10.png?sw=680&q=85)
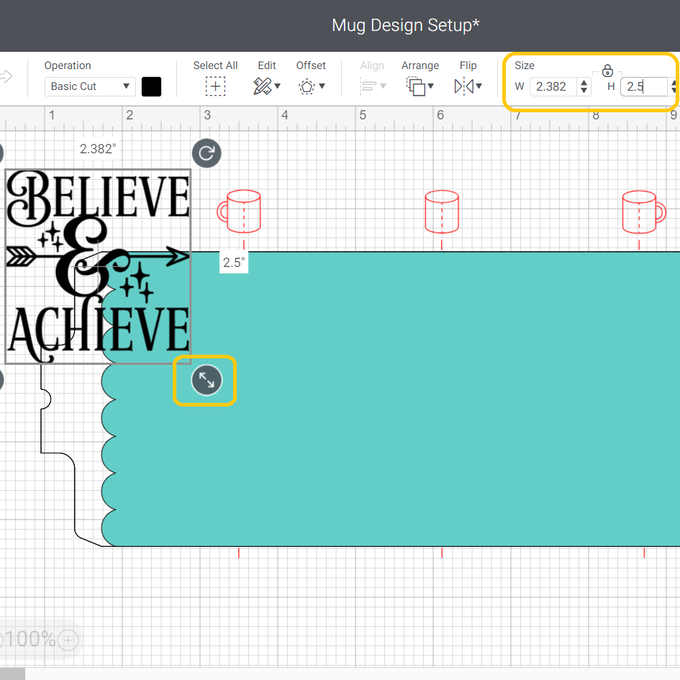
Using the red lines as a guide line up your design in to position
![cricutinfusibleinkmugproject_step11.png?sw=680&q=85](https://www.hobbycraft.co.uk/dw/image/v2/BHCG_PRD/on/demandware.static/-/Library-Sites-hobbycraft-uk-content/default/dwe4b721cc/images/ideas/cricut/cricut-how-to-personalise-a-mug-using-infusible-ink-sheets/cricutinfusibleinkmugproject_step11.png?sw=680&q=85)
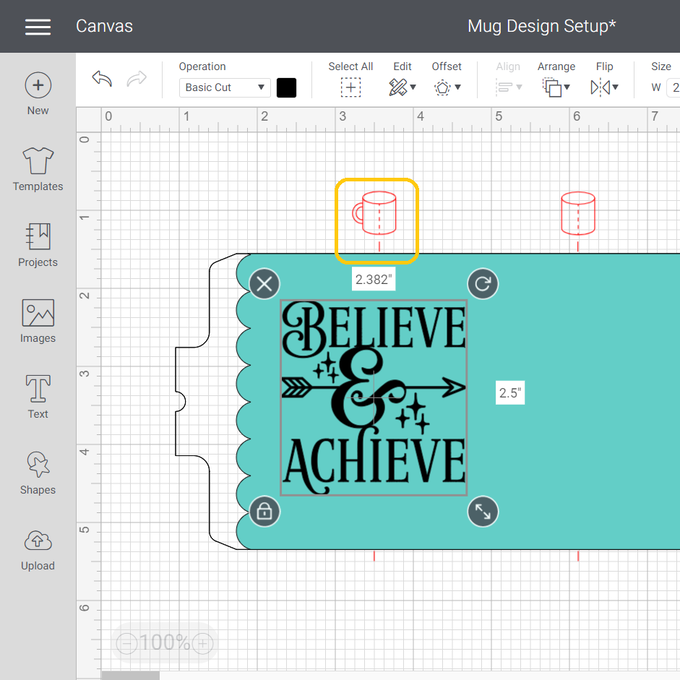
To create your design on both sides of the mug first duplicate your image
![cricutinfusibleinkmugproject_step12.png?sw=680&q=85](https://www.hobbycraft.co.uk/dw/image/v2/BHCG_PRD/on/demandware.static/-/Library-Sites-hobbycraft-uk-content/default/dw491c8fe4/images/ideas/cricut/cricut-how-to-personalise-a-mug-using-infusible-ink-sheets/cricutinfusibleinkmugproject_step12.png?sw=680&q=85)
As the red mug image and lines are only for guide purposes you can now delete that layer
![cricutinfusibleinkmugproject_step15.png?sw=680&q=85](https://www.hobbycraft.co.uk/dw/image/v2/BHCG_PRD/on/demandware.static/-/Library-Sites-hobbycraft-uk-content/default/dw11ccc69e/images/ideas/cricut/cricut-how-to-personalise-a-mug-using-infusible-ink-sheets/cricutinfusibleinkmugproject_step15.png?sw=680&q=85)
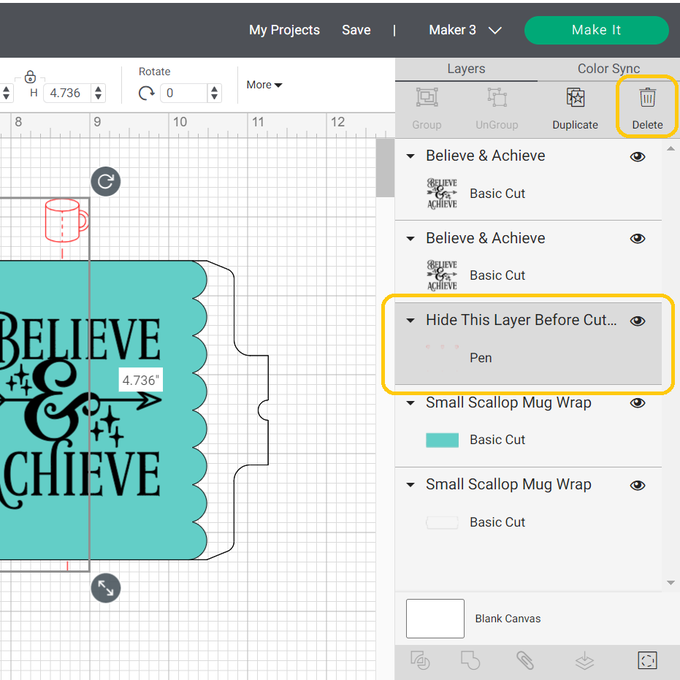
Now you are ready to “Make It”
![cricutinfusibleinkmugproject_step18.png?sw=680&q=85](https://www.hobbycraft.co.uk/dw/image/v2/BHCG_PRD/on/demandware.static/-/Library-Sites-hobbycraft-uk-content/default/dw2d1397a2/images/ideas/cricut/cricut-how-to-personalise-a-mug-using-infusible-ink-sheets/cricutinfusibleinkmugproject_step18.png?sw=680&q=85)
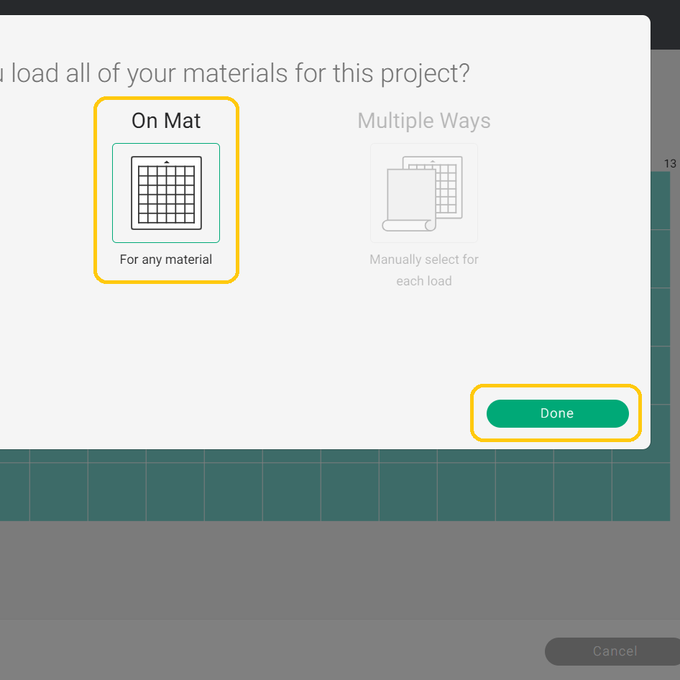
If you are working with a Maker 3, Explore 3 or a Joy select “On Mat” and then “Done”
![cricutinfusibleinkmugproject_step19.png?sw=680&q=85](https://www.hobbycraft.co.uk/dw/image/v2/BHCG_PRD/on/demandware.static/-/Library-Sites-hobbycraft-uk-content/default/dw597c6920/images/ideas/cricut/cricut-how-to-personalise-a-mug-using-infusible-ink-sheets/cricutinfusibleinkmugproject_step19.png?sw=680&q=85)
To find your cut setting for your Infusible Ink Transfer Sheet click on “Browse All Materials”
![cricutinfusibleinkmugproject_step22.png?sw=680&q=85](https://www.hobbycraft.co.uk/dw/image/v2/BHCG_PRD/on/demandware.static/-/Library-Sites-hobbycraft-uk-content/default/dwbc2edd84/images/ideas/cricut/cricut-how-to-personalise-a-mug-using-infusible-ink-sheets/cricutinfusibleinkmugproject_step22.png?sw=680&q=85)
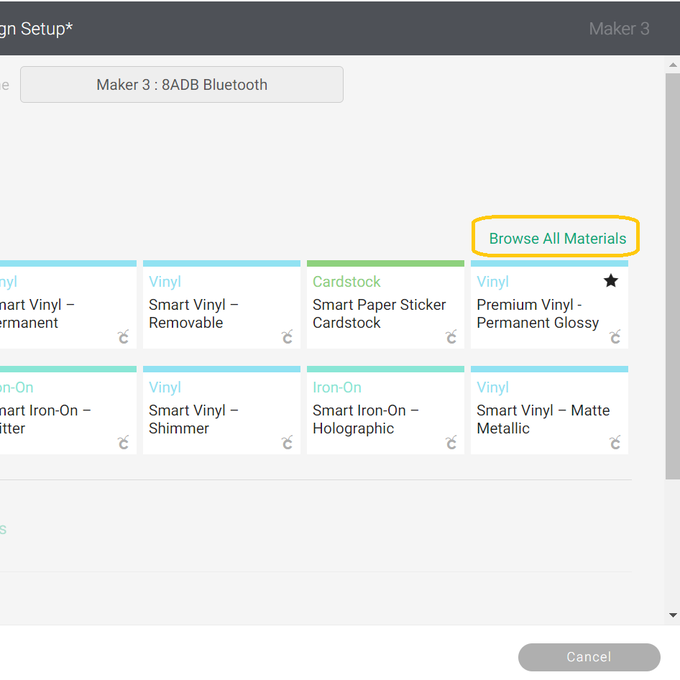
Search and select “Infusible Ink Transfer Sheets”
![cricutinfusibleinkmugproject_step23.png?sw=680&q=85](https://www.hobbycraft.co.uk/dw/image/v2/BHCG_PRD/on/demandware.static/-/Library-Sites-hobbycraft-uk-content/default/dw29fef32d/images/ideas/cricut/cricut-how-to-personalise-a-mug-using-infusible-ink-sheets/cricutinfusibleinkmugproject_step23.png?sw=680&q=85)
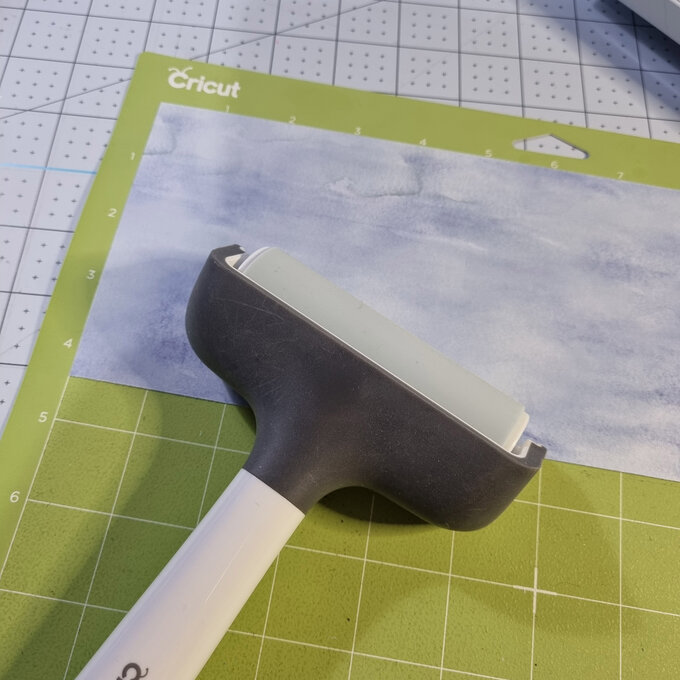
Apply your sheet to your mat and load your machine
![cricutinfusibleinkmugproject_step24.jpg?sw=680&q=85](https://www.hobbycraft.co.uk/dw/image/v2/BHCG_PRD/on/demandware.static/-/Library-Sites-hobbycraft-uk-content/default/dwb6d1f367/images/ideas/cricut/cricut-how-to-personalise-a-mug-using-infusible-ink-sheets/cricutinfusibleinkmugproject_step24.jpg?sw=680&q=85)
Cut your design
![cricutinfusibleinkmugproject_step25.jpg?sw=680&q=85](https://www.hobbycraft.co.uk/dw/image/v2/BHCG_PRD/on/demandware.static/-/Library-Sites-hobbycraft-uk-content/default/dw31566339/images/ideas/cricut/cricut-how-to-personalise-a-mug-using-infusible-ink-sheets/cricutinfusibleinkmugproject_step25.jpg?sw=680&q=85)
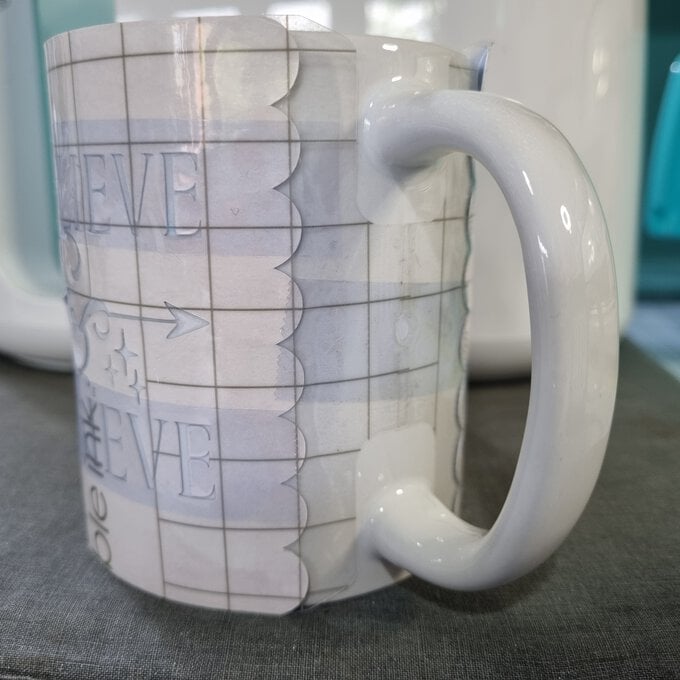
Weed your design. You should be able to do this with just your fingers but you might find it useful to use a pair of tweezers
Wrap your design around your clean mug (you may want to use a lint roller to make sure it is extra clean and dust free) with your ink sheet facing the mug. Secure in place with heat resistant tape
![cricutinfusibleinkmugproject_step27.jpg?sw=680&q=85](https://www.hobbycraft.co.uk/dw/image/v2/BHCG_PRD/on/demandware.static/-/Library-Sites-hobbycraft-uk-content/default/dwf16b9a1b/images/ideas/cricut/cricut-how-to-personalise-a-mug-using-infusible-ink-sheets/cricutinfusibleinkmugproject_step27.jpg?sw=680&q=85)
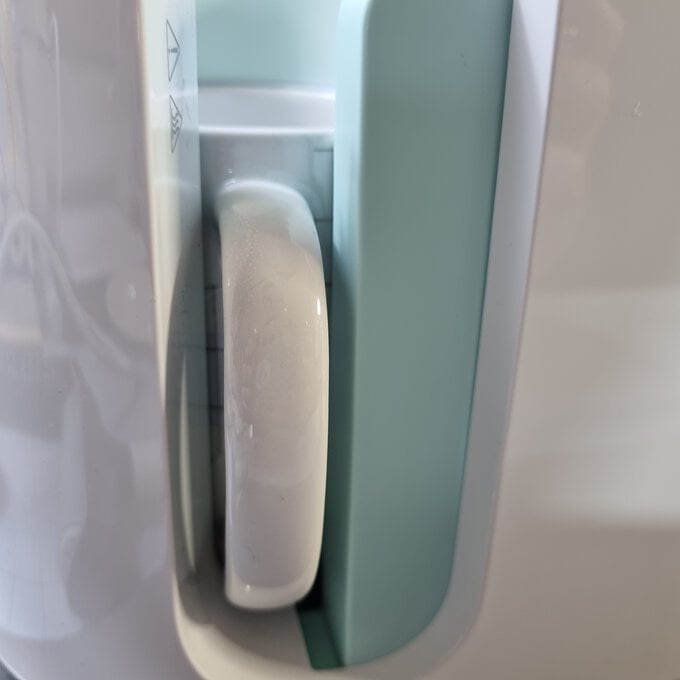
Place your mug in to your pre-heated Mug Press and close down the lever. Ensure that the press covers the sides of the design
![cricutinfusibleinkmugproject_step28.jpg?sw=680&q=85](https://www.hobbycraft.co.uk/dw/image/v2/BHCG_PRD/on/demandware.static/-/Library-Sites-hobbycraft-uk-content/default/dweec2d96a/images/ideas/cricut/cricut-how-to-personalise-a-mug-using-infusible-ink-sheets/cricutinfusibleinkmugproject_step28.jpg?sw=680&q=85)