How to Make a Macrame Bat and Ghost Plant Hanger
If you are looking for some halloween decor that is a little more stylish and subtle than your usual decorations, then these macrame plant hangers are just the thing you need!
Choose between a spooky bat or a ghoulish ghost, or why not make both!
Follow the step-by-step instructions below to find out how to make these brilliant plant pot holders.
Project and instructions by Isabella Strambio
You will need


You Will Need
Bat
* Macrame Cord - 33m Black
* 2x 10mm Wooden Beads
* 30cm Wooden Dowel
* Scissors
* Tape Measure
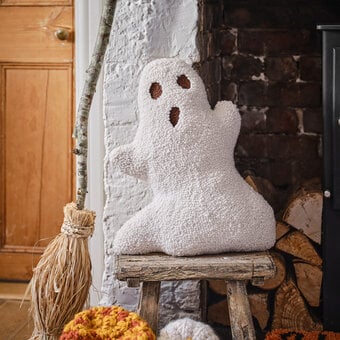
Ghost
* Macrame Cord - 75m White and 1m Black
* 30cm Wooden Dowel
* Scissors
* Tape Measure
* Masking Tape or S Hooks
First cut 7x 3m cords for the body and 10x 1.2m cords for the wings.
Take 2 x 3m cords and tie them on the dowel with the Reversed Lark’s Head Knot.

Take the next 3m string and tie it on strand 2 on the first string with the Reversed Lark’s Head Knot.
From this new string, take the first strand and tie a half hitch.
Pull. Slide to the top.


From the same string, take the second strand and tie a half hitch.

Add the next 3m string by repeating steps 2 and 3 again.

Repeat steps 2 - 4 on the opposite side.

Fold the middle two strings to form a cross.
Take the last 3m string, tie a Reversed Lark’s Head Knot over the knot and add a half hitch on each side.
Pull the middle two strings.


Take string #1 from the left, use it as a guide and tie a line of four Double Half Hitches.
Take string #1 from the left, use it as a guide and tie a line of three Double Half Hitches.
Repeat on the opposite side.


From the middle four strings, take string #1 and use it as a guide. Tie the two guides, from the Double Half Hitches on the left, with Double Half Hitches to make a diagonal line going right to left.
Next, tie with a Double Half Hitch string #1 from the left, next string #2 and finally string #3.
Repeat on the opposite side.


Add the wooden beads onto strings #6 and #9.
Tie a Square Knot with the middle 4 strings.
Tie a Square Knot on the left and right of the wooden beads.
Tie two alternating Square Knots below.
Tie a final Square Knot in the middle.


Take string #2 from the left, use it as a guide and tie a diagonal line of Double Half Hitches going from left to right in the middle.
Repeat on the other side, and close the middle with a Double Half Hitch.
Tie a new line of Double Half Hitches underneath.


Tie a 1.2m string on the dowel, on the left side.
Tie 4 strings on strand 2 following steps 2 and 3 again.
Tie a line of Double Half Hitches below, using the string strand as a guide.
Repeat this step on the opposite side.


Back on the left wing, take the guide from the line of Double Half Hitches and tie a diagonal line going the opposite way to create a zig-zag line.
Take the last string, and tie a new line of Double Half Hitches creating a triangle-shape.
Tie two more lines of Double Half Hitches creating a triangle-shape.
Repeat this on the opposite side.
Trim the guides from the lines of Double Half Hitches.


Connect the wing and the body with a Double Half Hitch Knot using string #1 from the body as a guide.
Next, take the guide and the string from the first Double half-hitch knot as one guide, and tie a new Double half-hitch knot with the next string from the wing section.
Continue gathering the guides and strings from the wing and tie new Double half-hitch knots.
Repeat this step on the opposite side.
Trim the guides.


Take one string and Tie a Gathering knot about 6-8cm below the body, around all the strings.
Split the string into 3 sets of 4.
Leave a gap of approx 10cm and tie a sinnet of 5 Square Knots with each set.
Leave a gap of approx 15cm and tie a sinnet of 5 Square Knots with two strings from one set and two strings from another set.
Repeat with all the strings.


Leave a gap of approx 15cm and tie a sinnet of 3 Square Knots with two strings from one set and two strings from another set.
Repeat with all the strings.
Leave a gap of approx 5cm and tie a Gathering Knot.
Trim the ends at the desired length.
Add a dot to the wooden beads to make eyes.


Cut a length of string to your desired length and attach it to both ends of your dowel to use as a hanger. Alternatively, hang the dowel directly on to a nail on the wall.
Place your plant pot inside your plant holder and check that it is secure. You may need to adjust the knots from the last step to acommodate your pot.
Your macrame bat plant holder is now complete!

First cut 24x 3m white cords, 2x 50cm black cords and 1x 80cm white cord.
Tie all of the 24x 3m cords onto the dowel.
Tie a row of two Square Knots with the middle 8 strings.

Tie a row of four Square Knots with the middle 16 strings
Tie a row of six Square Knots with the middle 24 strings.
Continue repeating this pattern of adding one Square Knot on either side unti you have tied a row of Square Knots using all the strings.


Using the black strings, tie two Berry Knots under the sinnet of the 5th and 8th Square Knots of the last row.
Using the white strings, tie two rows of Square Knots, skipping the rows with the black Berry Knots.


Tie 20 Square Knots under each sinnet.
Tuck the black strings at the back of the Square Knots and trim the excess.


Take the first and last two strings and tie a Square Knot, leaving a gap of approx. 20cm.
Take the next two strings on the left and right and tie a row of two Square Knots.
Tie a Square knot in the middle to create a diamond-shape.


Tie a diamond-shape with the 8 strings on the left and right.
Connect the diamonds with a Square Knot, leaving a gap of approx. 5cm


Tie a Gathering Knot, leaving a gap of approx. 5-10cm depending on the size of your plant pot.
Trim the ends at the desired length.

Cut a length of string to your desired length and attach it to both ends of your dowel to use as a hanger.
Place your plant pot inside your plant holder and check that it is secure. You may need to adjust the knots from the last step to acommodate your pot.
Your macrame ghost plant holder is now complete!

Craft with us at our workshops


Related Products