Skip to Content (Press Enter) Skip to Footer (Press Enter)

How to Sew a Modern Quilted Wall Hanging

Level
Intermediate
Time
1/2 day
Budget
10 - 30

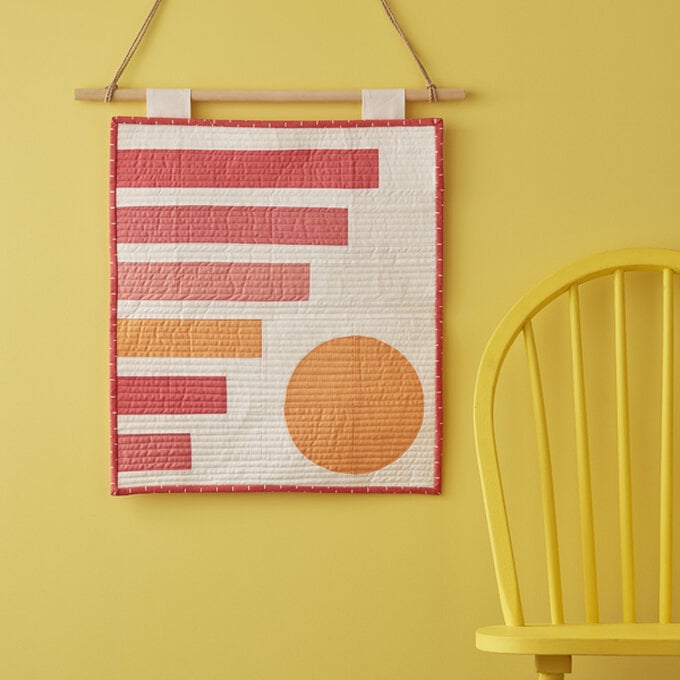
Create a modern, geometric wall hanging and practice your quilting skills whilst creating a unique and on trend decorative piece for your home. Follow the tutorial below by Lorna Slessor, who takes you through the process step-by-step.

You will need

Is $ 22.00

Quantity: 1

Subtotal

Is $ 22.00

Is $ 12.00

Quantity: 1

Subtotal

Is $ 12.00

Out of stock

Is $ 32.00

Quantity: 1

Subtotal

Is $ 32.00

Is $ 6.49

Quantity: 1

Subtotal

Is $ 6.49

Is $ 4.49

Quantity: 1

Subtotal

Is $ 4.49

Is $ 22.00

Quantity: 1

Subtotal

Is $ 22.00

Out of stock

Is $ 11.00

Low stock only 4 left

Quantity: 1

Subtotal

Is $ 11.00

You’ve viewed 2 of 7 products

You’ve viewed 4 of 7 products

Total:

How to make

Notes:

Seam allowances are quarter inch throughout. Press seams to one side, unless otherwise instructed.

Cutting Out Step-1

From the white fabric cut:

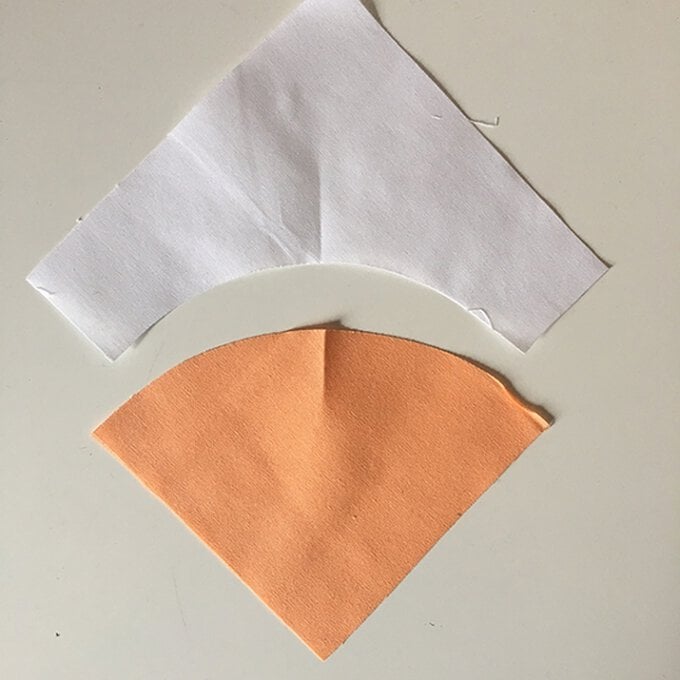
One (1) 20in x 2.5in strip. Three (3) 20in x 2in strips. Three (3) 9.5in x 2in strips. One (1) 5.5in x 2.5in piece. One (1) 7.5in x 2.5in pice. One (1) 9.5in x 2.5in piece. One (1) 4.5 x 2.5in piece. One (1) 2.5in square. Four (4) 6.5in squares. Subcut a quarter circle out of one corner of each square, using the Small Quarter Circle Template. Two (2) 3in x 4.5in pieces.
Step-2
From the darkest pink fabric cut: One (1) 15.5in x 2.5in strip. One (1) 7.5in x 2.5in strip.
Step-3
From the mid pink fabric cut: One (1) 13.5in x 2.5in strip. One (1) 5.5in x 2.5in strip.
Step-4
From the lightest pink fabric cut: One (1) 11.5in x 2.5in strip.
Piecing the Curved Units Step-1
From the orange fabric cut: One (1) 9.5in x 2.5in strip. Four (4) pieces using the Large Quarter Circle Template. Piecing the curved units
Step 2
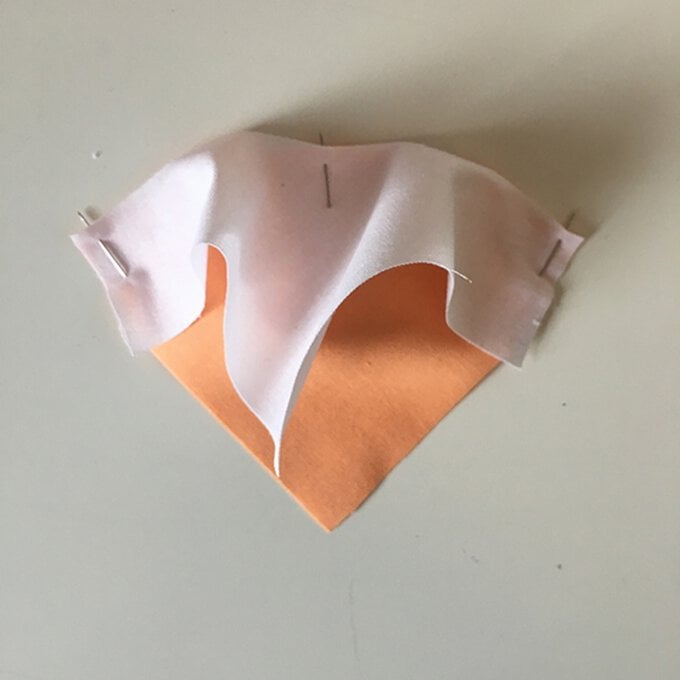
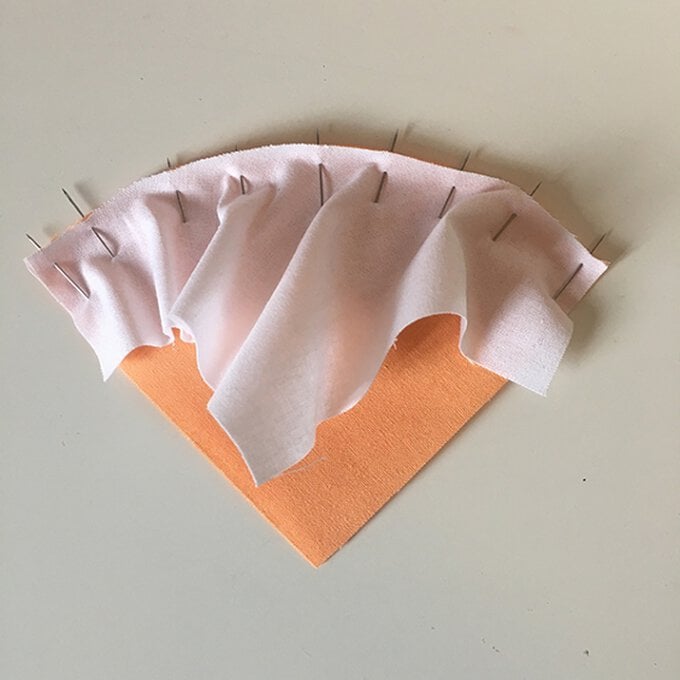
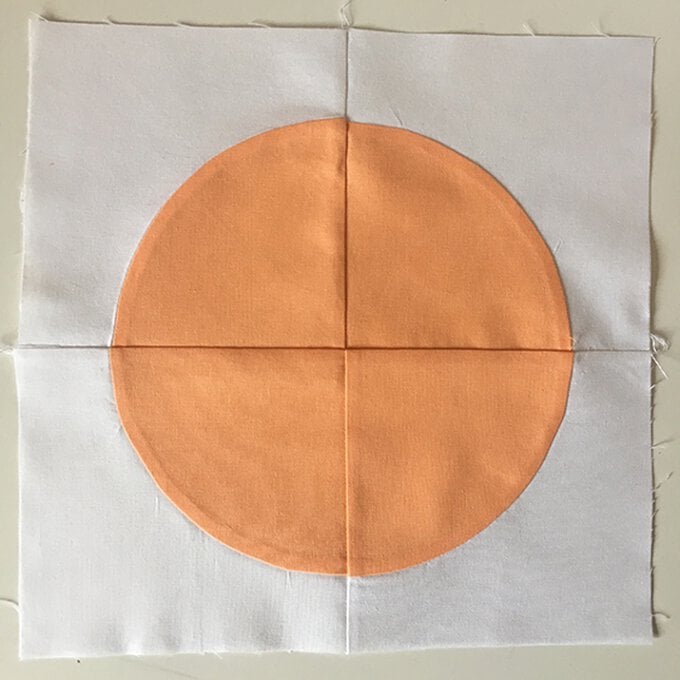
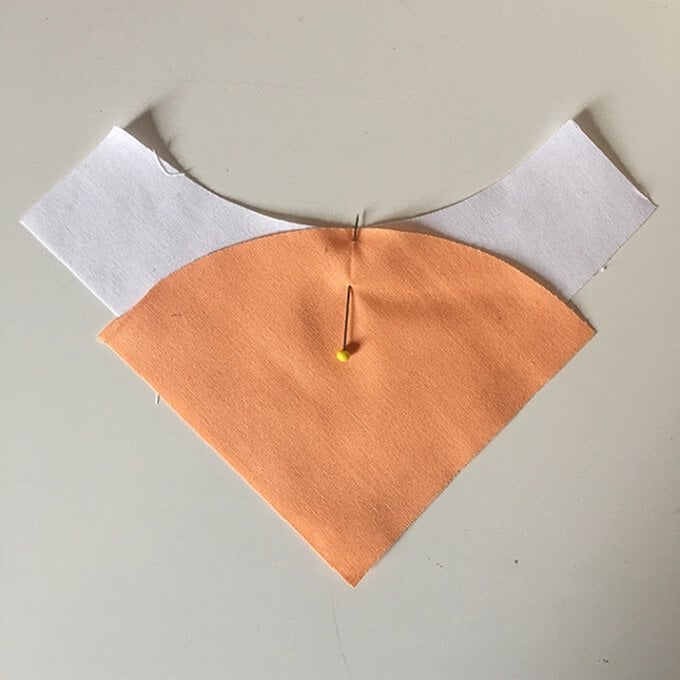
Take one white curve piece and an orange quarter circle and fold each piece in half to find the centre point. Firmly crease (Fig 1). Place the orange piece on top of the white, matching creases, and pin together in the centre (Fig 2). Pin the ends together, then carefully match up the remaining edges (Figs 3 and 4).
Step 3
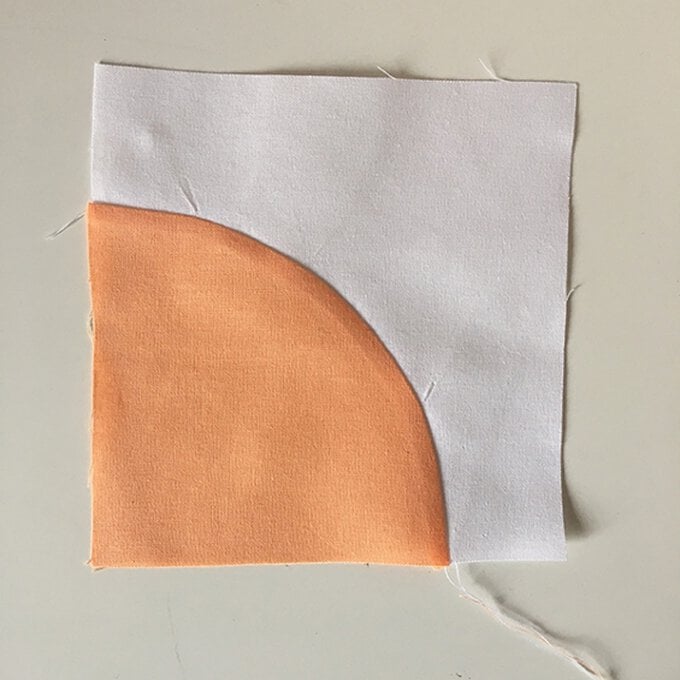
Sew along the pinned edges slowly and carefully, taking care not to warp the fabrics. Remove the pins and press the seam towards the orange fabric (Fig 5). Repeat to make a total of four orange curve units.
modern-quilted-wall-hanging-step5.jpeg?sw=680&q=85
Step 4
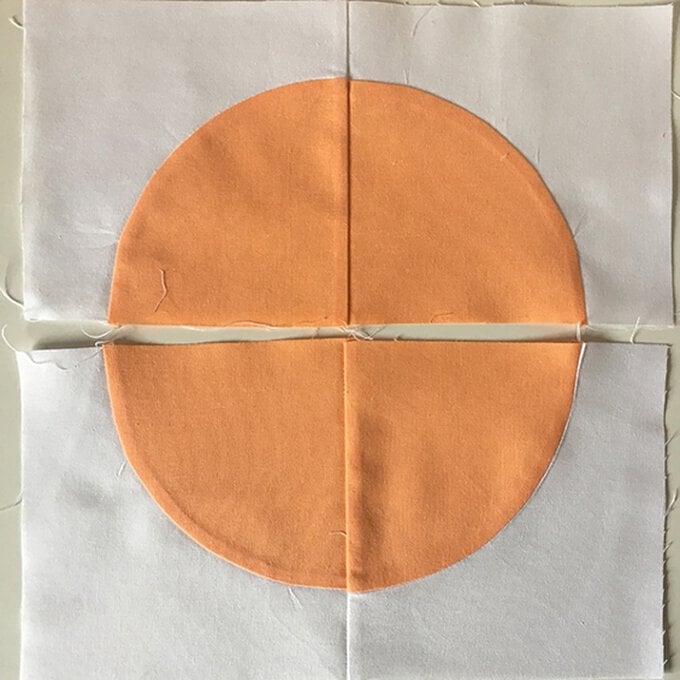
Sew the curve units into two pairs, matching the seams to make a semicircle (Fig 6). Press the seam to the left on one pair unit, and to the right on the second pair unit. Sew the pairs together, once again matching seams, and ‘nesting’ the centre seams to reduce bulk. Trim the circle block to 10.5in square (Fig 7).
Piecing the Strip Units Step-1

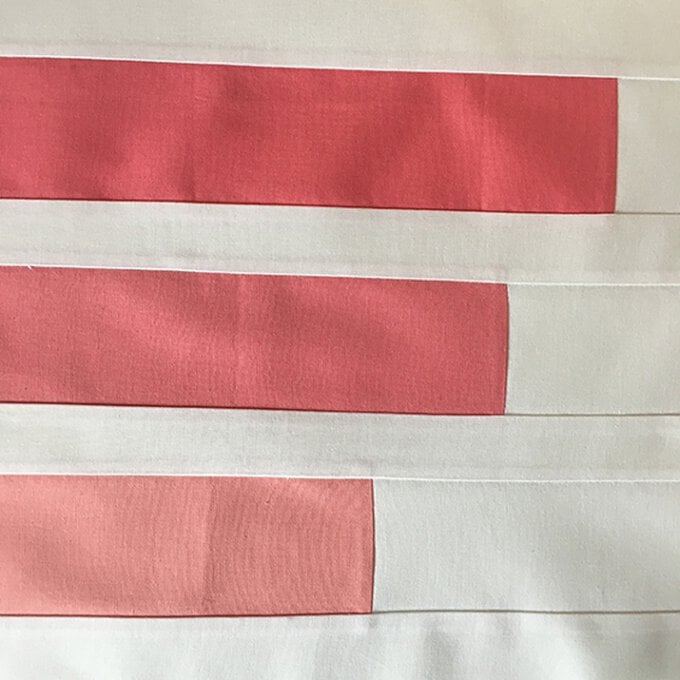
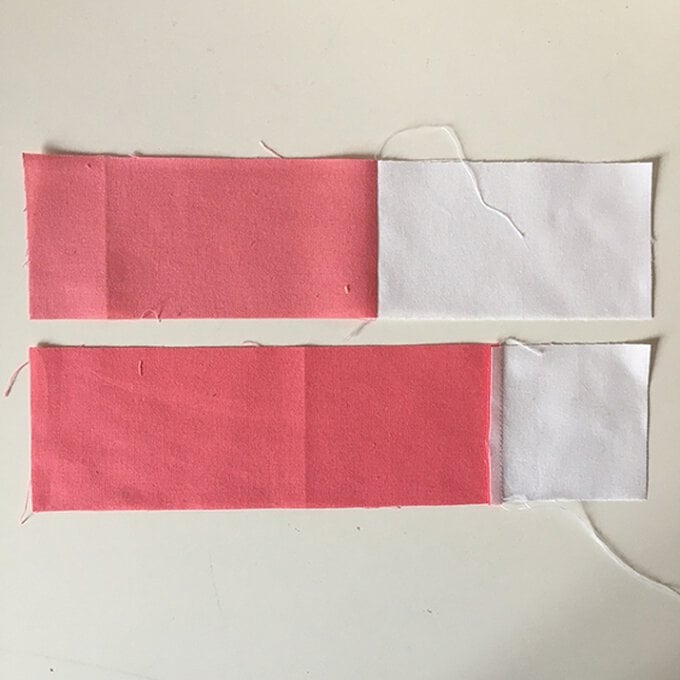
Sew the dark pink 15.5in x 2.5in strip to the white 5.5in x 2.5in strip. Sew the dark pink 7.5in x 2.5in strip to the white 2.5in square. Press both seams towards the coloured fabric (Fig 8).
modern-quilted-wall-hanging-step8.jpeg?sw=680&q=85
Step 2
Sew the mid pink 13.5in x 2.5in strip to the white 7.5in x 2.5in strip. Then sew the mid pink 5.5in x 2.5in strip to the white 4.5in x 2.5in strip. Press both seams towards the coloured fabric.
Step 3
Sew the light pink 11.5in x 2.5in strip to the white 9.5in x 2.5in strip. Press the seam towards the coloured fabric.
Assembling the Mini Quilt Top: Step-1
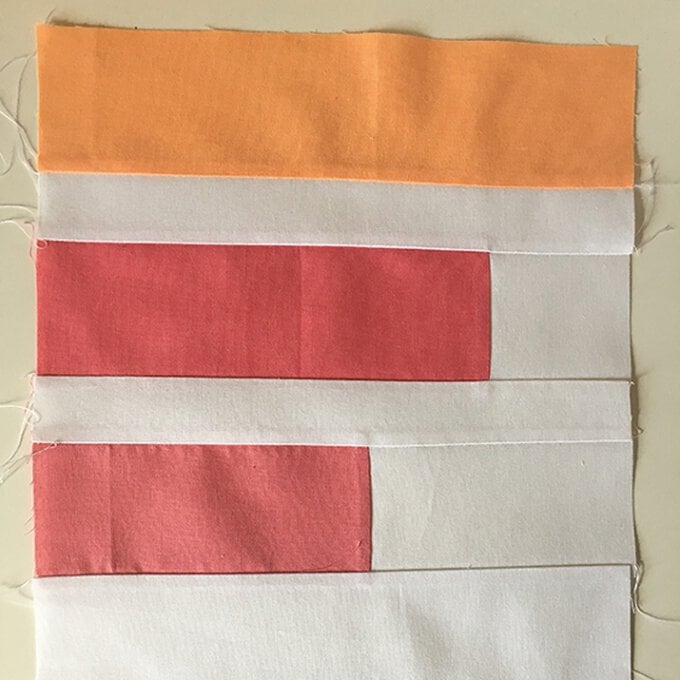
Assembling the mini quilt top: Sew the orange 9.5in strip to the top of a white 9.5in x 2in strip. Press the seam towards the orange. Join a second white 9.5in x 2in strip to the bottom of the shorter dark pink/white strip, aligning the edges with the dark pink on the left. Then sew the last white 9.5in x 2in strip to the bottom of the shorter mid pink/white strip, aligning the edges with the mid pink on the left.
modern-quilted-wall-hanging-step9.jpeg?sw=680&q=85
Step 2
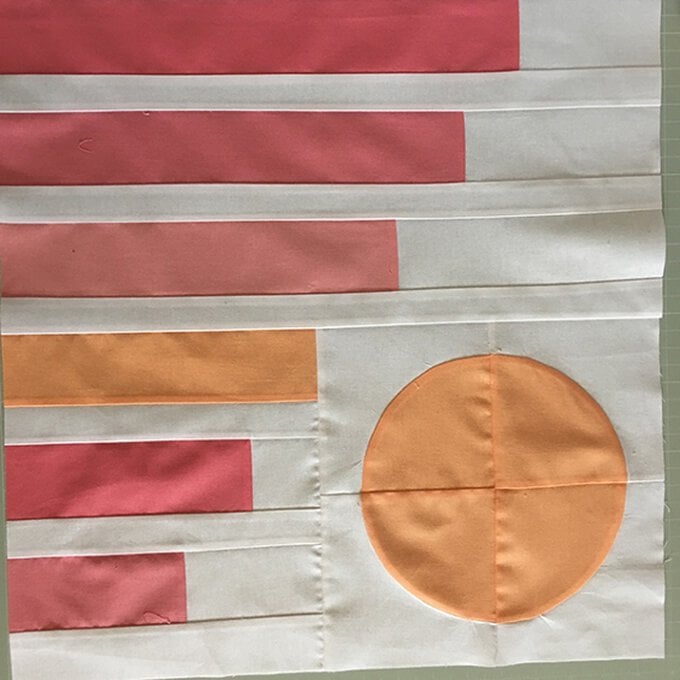
Sew the three strip units together in the order that you pieced them: with the orange at the top, the dark pink in the middle and the mid pink at the bottom. Trim any uneven edges on the right side. Press the seams (Fig 9).
Step 3
Join the circle block to the right side of the strip unit and press the seam towards the circle.
modern-quilted-wall-hanging-step10.jpeg?sw=680&q=85
Step 4
Sew the white 20in x 2.5in strip to the top of the longer dark pink/white strip. Press the seams towards the pink. Sew a white 20in x 1in strip to the bottom of each of the longer mid pink and light pink/white strips. Join the three strip sets together in the order that you pieced them, referring to the photography for placement. Trim any uneven edges and press the seams (Fig 10).
modern-quilted-wall-hanging-step11.jpeg?sw=680&q=85
Step 5
Join the two halves together, with the circular unit at the bottom. Press the seam (Fig 11).
Quilting:Step-1

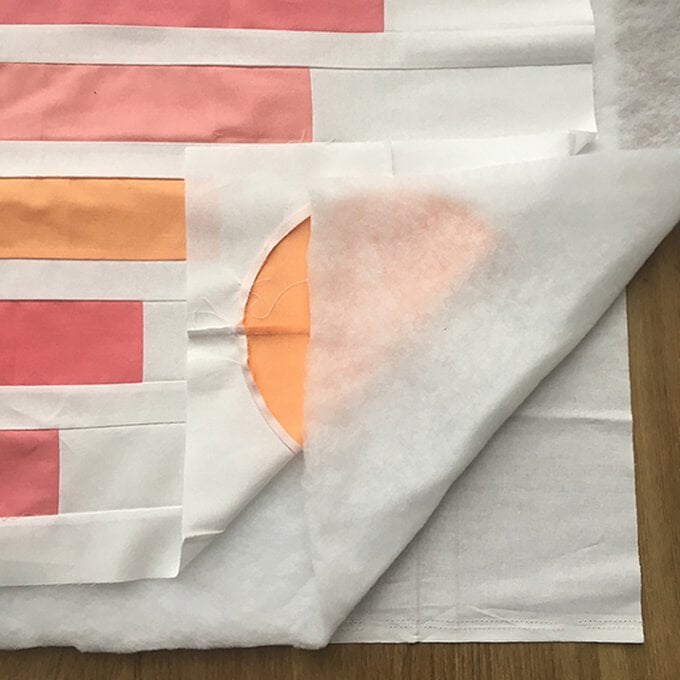
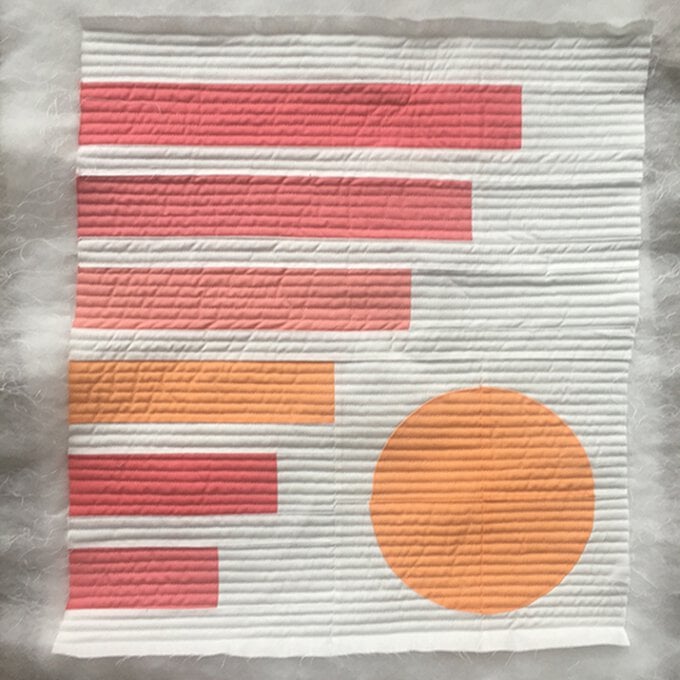
Cut a piece of white fabric a few inches larger than your quilt top. Do the same with your wadding. Lay your white backing fabric out flat, then place the wadding on top, and place your quilt top on top, right side up. This is called a quilt sandwich (Fig 12). Baste together using your preferred method – pins, safety pins, large tacking stitches or basting spray.
modern-quilted-wall-hanging-step12.jpeg?sw=680&q=85
Step 2
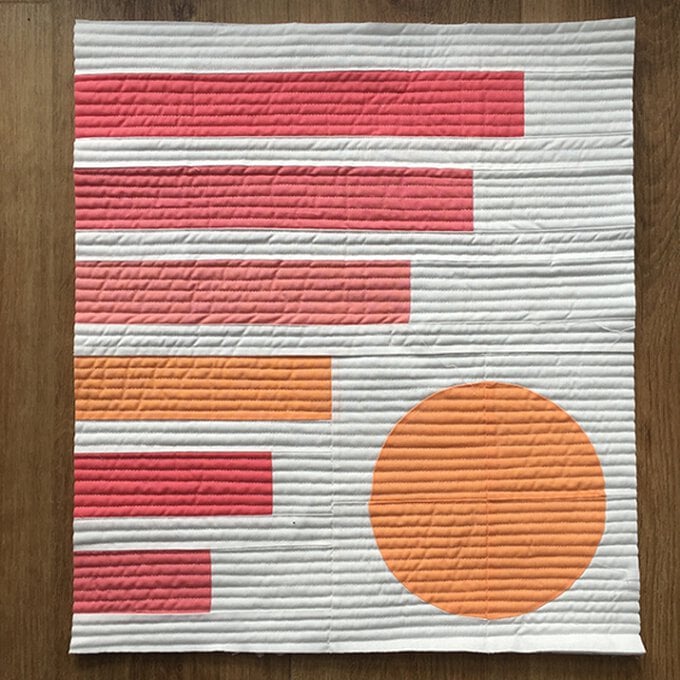
Put a walking foot on your sewing machine ahead of quilting. Starting from the middle, start quilting straight lines across your quilt sandwich, lining up the first line with a seam, and the remaining lines with the previous stitching. Continue until your entire mini quilt is quilted (Fig 13).
modern-quilted-wall-hanging-step13.jpeg?sw=680&q=85
Step 3
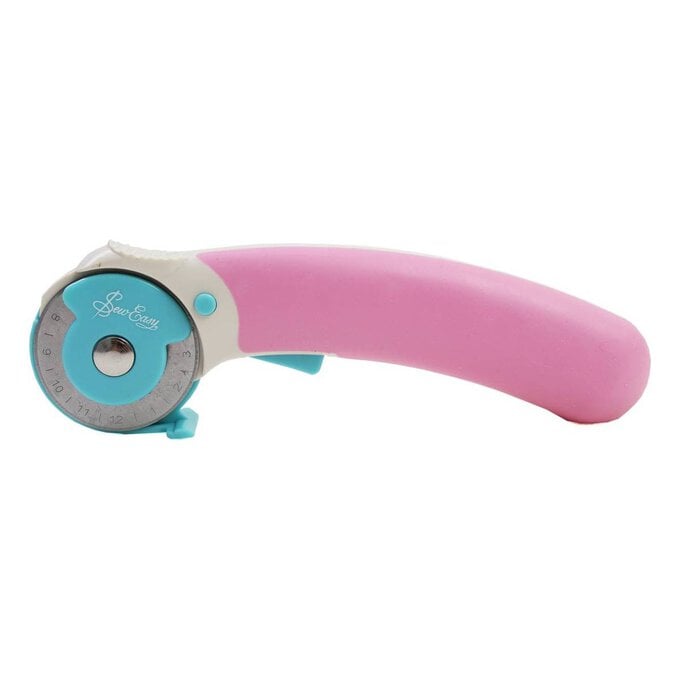
Trim the excess wadding and backing fabric and straighten the edges of your mini quilt with a ruler and rotary cutter (Fig 14).
modern-quilted-wall-hanging-step14.jpeg?sw=680&q=85
Binding: Step-1

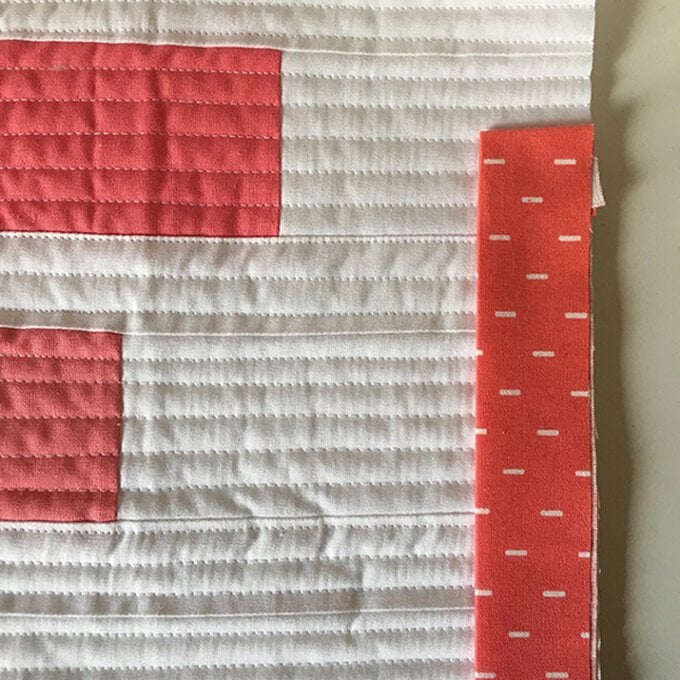
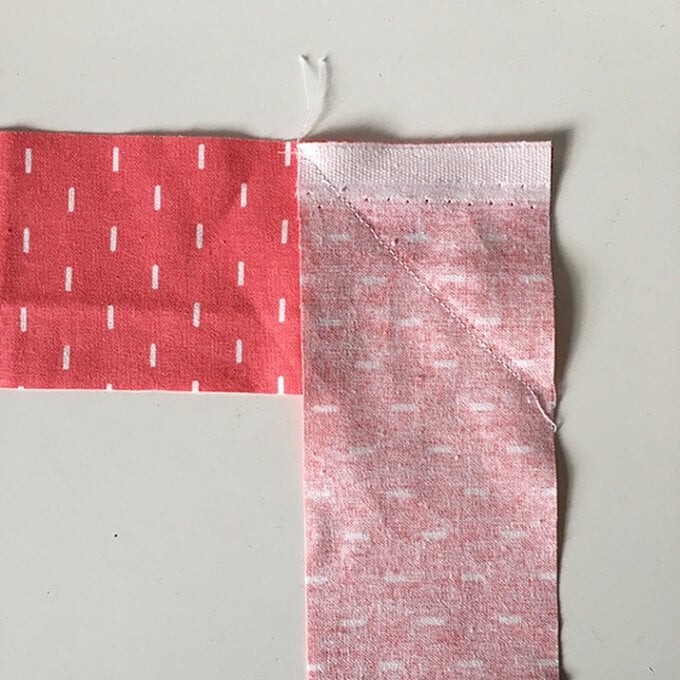
Cut four 2.5in wide strips from a coordinating fat quarter. Place one strip horizontally and place another strip vertically on top of the right edge, right sides together.
Step 2
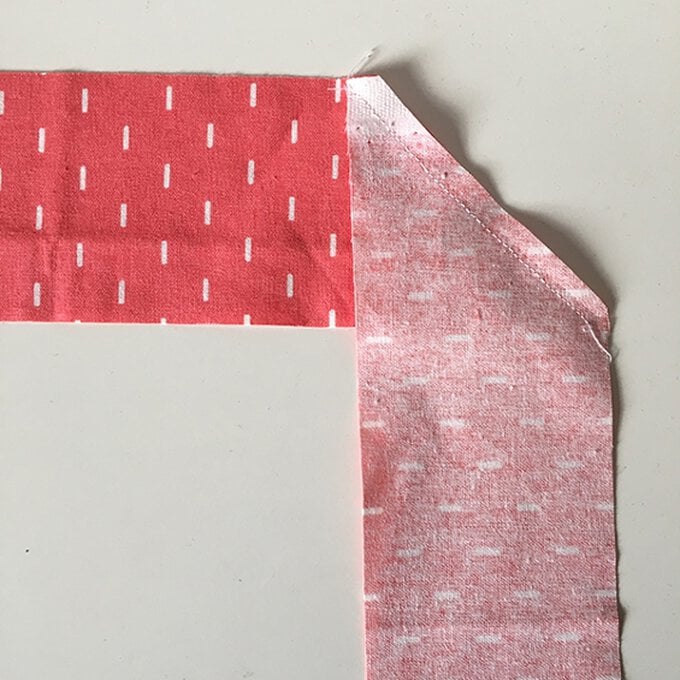
Sew a line diagonally from the top left hand corner to the bottom right hand corner, where the two strips join (Fig 15). Trim the top right hand corner off, leaving a 1/4in seam allowance (Fig 16). Press the strips open, making a diagonal seam (Fig 17). Repeat to join the remaining strips into one long strip.
Step 3
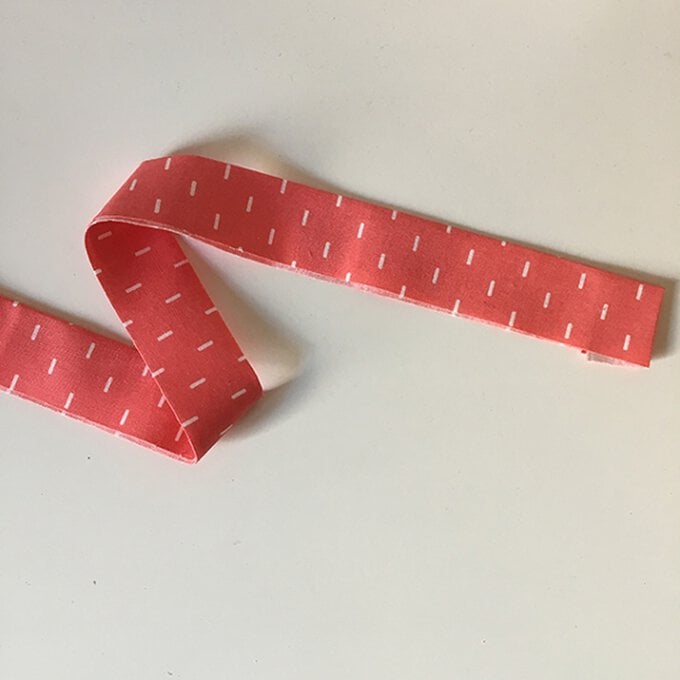
Fold the strip in half, wrong sides together, and press (Fig 18). Fold over one short edge to hide the raw edges.
modern-quilted-wall-hanging-step18.jpeg?sw=680&q=85
Step 4
Pin the folded end to the top right hand corner of your quilt top, lining up the raw edges (Fig 19).
modern-quilted-wall-hanging-step19.jpeg?sw=680&q=85
Step-5
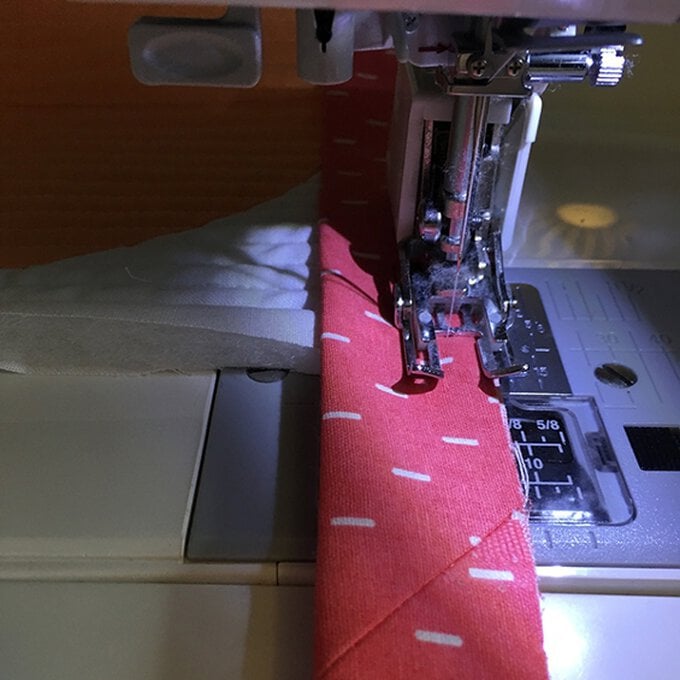
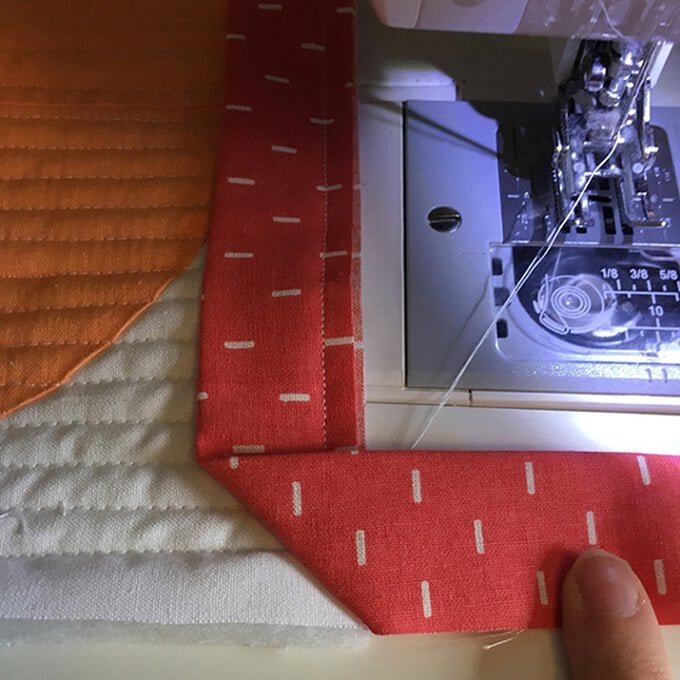
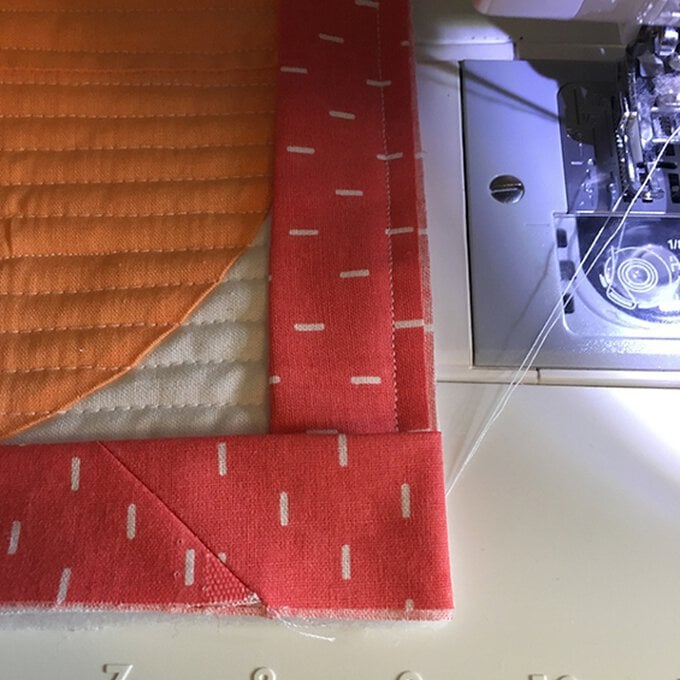
Start sewing 1/4in from the edge, an inch or so down from the folded edge of the lining. Keep sewing until you reach the corner (Fig 20). Take the quilt out from underneath the machine foot and fold the binding strip to the right to make a diagonal seam (Fig 21).
Step 6
Hold the diagonal seam with your finger, and fold the binding to the left, lining up the fold with the right edge of the quilt (Fig 22).
modern-quilted-wall-hanging-step22.jpeg?sw=680&q=85
Step-7
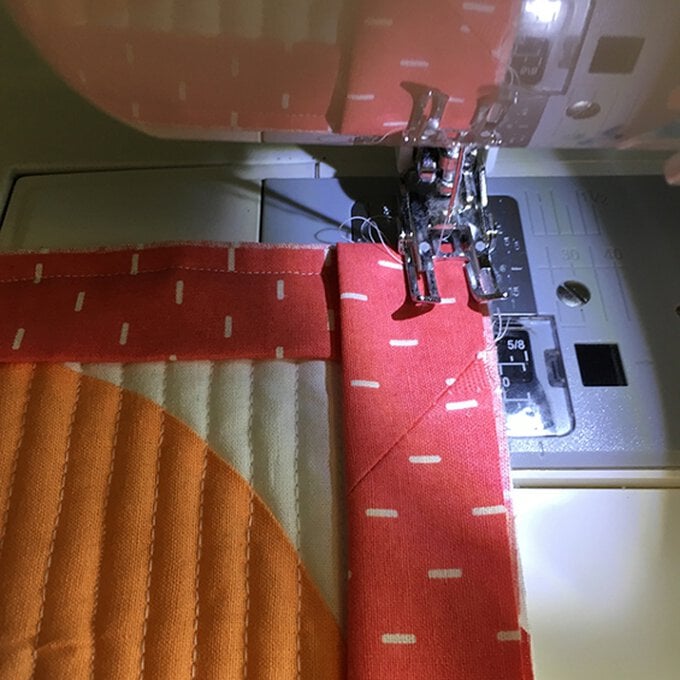
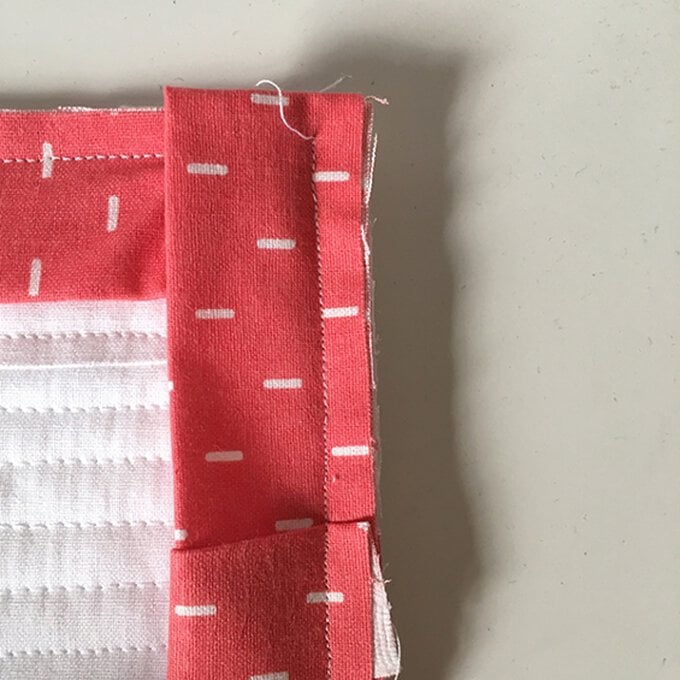
Rotate the quilt so that it's in the right direction to sew the next edge, and keep sewing (Fig 23). Repeat this until you've sewn all four edges and corners. To finish the binding, trim the strip to the right length and carefully slip it into the gap at the beginning of your binding. Stitch it closed to finish (Fig 24).
Making the Tabs and Finishing:Step-1

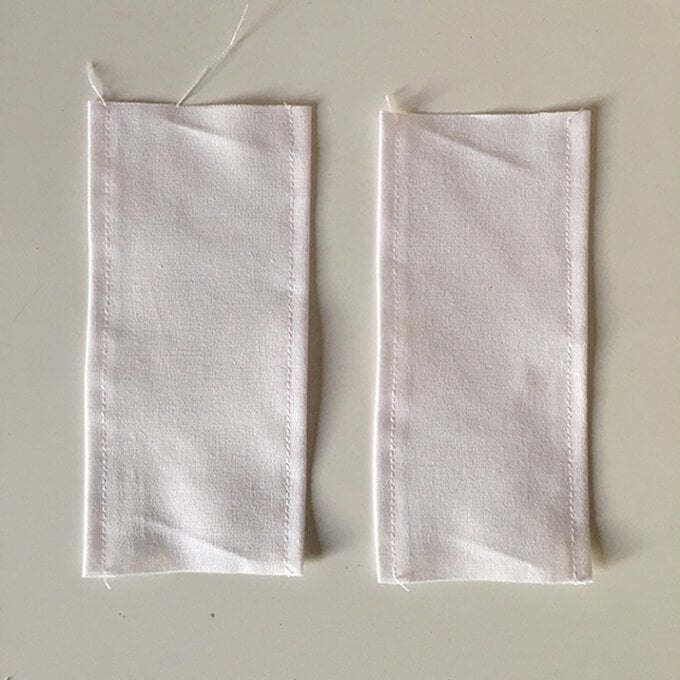
Take the two white 3in x 4.5in pieces and fold over the long edges. Press. Topstitch these down with a white thread (Fig 25).
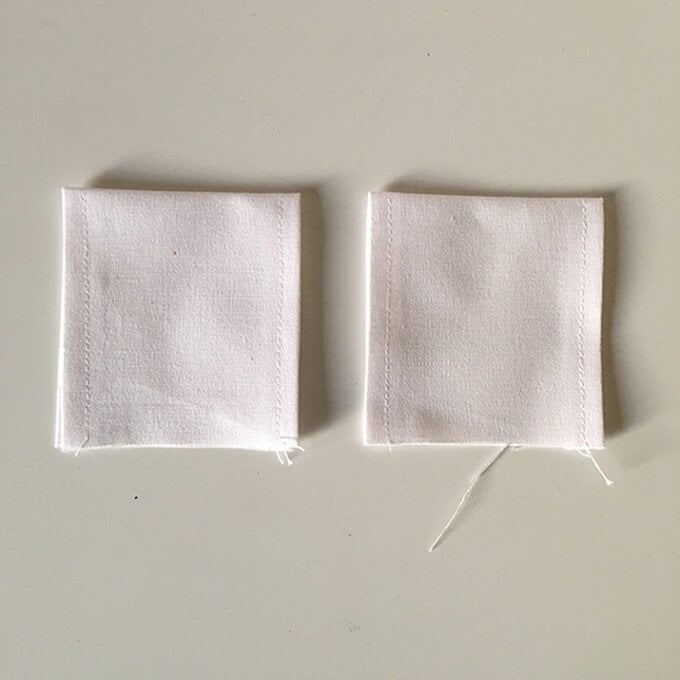
modern-quilted-wall-hanging-step25.jpeg?sw=680&q=85
Step 2
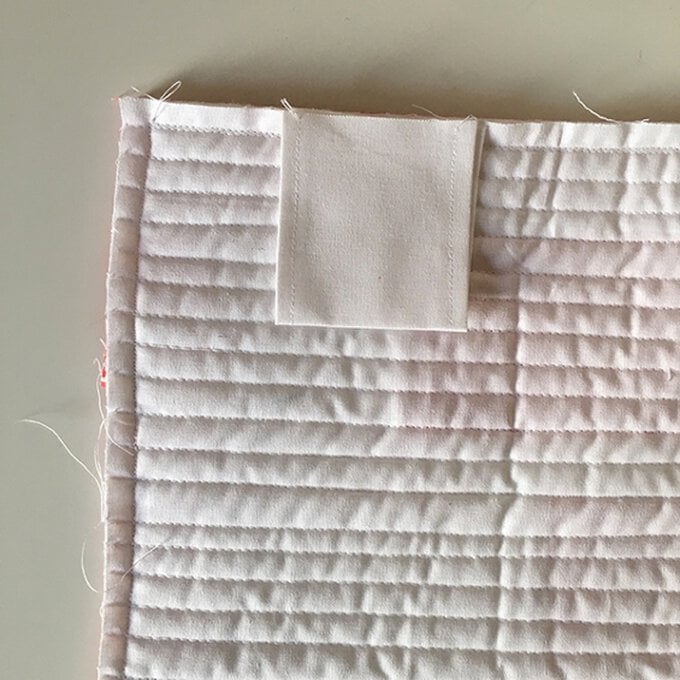
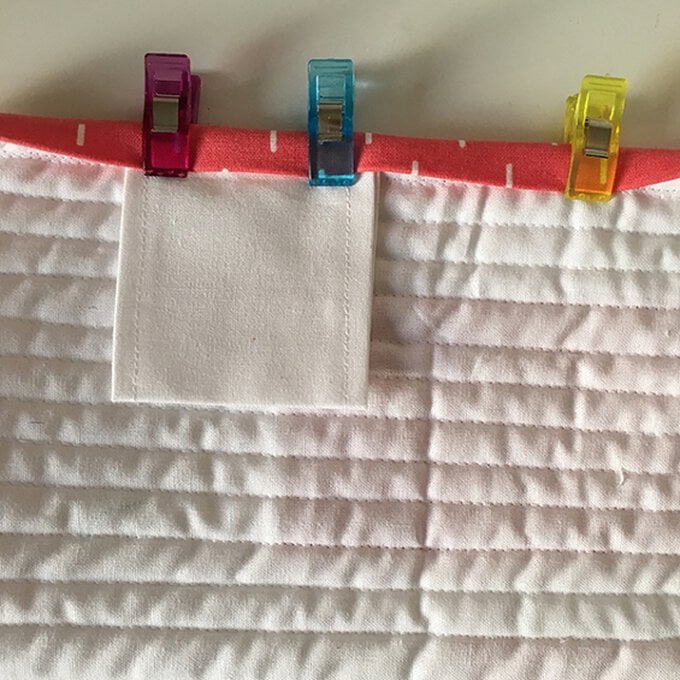
Fold in half and press (Fig 26). Align these pieces with the top edge of your mini quilt, lining up the raw edges so the folds are on the bottom (Fig 27).
Step 3
Fold over the binding around the edges, trapping the raw edges of the hanging tabs (Fig 28). Pin or clip in place before neatly slip stitching with a coordinating thread to secure.
  • bvseo_sdk, dw_cartridge, 18.2.0, p_sdk_3.2.0
  • CLOUD, getReviews, 3ms
  • reviews, product
  • bvseo-msg: Unsuccessful GET. status = 'ERROR', msg = 'Not Found.'; Unsuccessful GET. status = 'ERROR', msg = 'Not Found.';

Related Products

Top